Showing posts with label children. Show all posts

Saturday, August 29, 2015

Oliver + S Art Museum Vest

Oh my, how cute is this! This is the Art Museum Vest by Oliver + S on little Lion, who is 4.5 months old.


My family had a wedding to go to, and of course I was making a dress for myself. But what to dress the kids in? In browsing for a dress pattern for my daughter, I came across the Art Museum Vest and was instantly taken.


It was a surprisingly easy make! I had it mostly done in one late night of sewing after the kids went to bed. Probably about 4-6 hours. I had the perfect fabrics in my stash already... this gorgeous stripe by Michael Miller, along with a scrap of silver silk charmeuse for the back. The inside is a fun insect print on gray. The metal buttons were also in my stash, I can't recall what I originally purchased them for. The vest is very cleverly constructed... the seams are all enclosed with only a tiny bit of hand stitching. Brilliant!


I skipped the belt in the back, but I totally did the welt pockets, how cute! I made a lame attempt at pattern matching... totally didn't work, but I think I know how I need to do it next time. Since I had a whole sewing agenda to finish before the wedding, I didn't redo them.


I had thoughts of making it reversible, but I didn't have time to solve the problem of reversible closures. Magnets might work-- does anyone know where to get those cute sew-on magnets that I see elsewhere in people's makes? I actually love the buttons on this one, but perhaps for a future version.


And aren't those buttonholes beautiful? Another thing to love about my new Janome. I did buttonholes for the first time under time with this machine under time pressure (those precious 10 minute gaps between taking care of baby needs) and it was amazingly easy-- just put a button in the automatic buttonholer and off it went, no measuring necessary. I did have a small panic moment at the beginning when the machine started then stopped with an error, but I pulled out the manual and quickly educated myself on the buttonhole lever that I had to attach to the foot. After that they went smoothly.


The matching bowtie was a total afterthought... I whipped that up on the morning before we left. Tutorials here and here. It adds such a nice touch!

The pants are the Big Butt Pants by Made by Rae, in natural linen. Also a super quick make, since I've made several before and know the pattern fits him. If I had more time I would have made the pants that are part of the Oliver + S pattern, but that would have required fitting a whole new pants pattern and I wasn't up for that right now.

The shirt was a fabulous find at our local used children's store, Mama Goose. How lucky am I to have gone out the day before the wedding, and found the perfect white button down shirt/onesie! Mama Goose is a pretty awesome store, but I don't always have such success. I didn't even know shirt/onesie things existed. It is made by Carter's, but the local Kohls who carries Carter's didn't have anything of the sort.


It is so much fun dressing up a little boy!

Monday, August 24, 2015

Tie Dye Swing Dress: First Day Dress by MADE Hack

In the sewing flurry for the August wedding my family attended, I also purchased the First Day Dress pattern by MADE. I have yet to blog the sweet confection I made for Little Bug (getting her to model is getting tricky!). 

I did, however, manage to get some pictures of a dress I made using the pattern pieces, not exactly in the way that was intended!


This cute little number would have to be titled a collaboration, since the tie dye was done by Little Bug herself at her playschool. I neglected to send along toddler-sized white tees, so the mom in charge generously donated a white men's T... this one happened to be size Medium, V neck.


In my first attempt, I placed the shoulders of the bodice pattern of the A-line dress view of the First Day Dress against the shoulder seams of the T, hoping to make use of the already finished neckline. Of course I'm doing my sewing late at night, totally guessing on fit. I thought I was so clever, I even sewed on cute little cap sleeves and put a tag in the back. When I put it on her in the morning, the V neck went down halfway to her navel! Doh!


For take 2, I just moved the A-line dress pattern down a bit, and got over my laziness and finished the neckline myself. Since the fabric is stretchy, there was no need to add the back closure. It looked fine as an A-line dress, but it occurred to me that a little skirty or ruffle would kick it up a notch. In tunneling through my stash, I came across a red ponte knit that I picked up on super sale when Joanne's was moving locations. Using the pattern for the peplum, and adding a few inches to increase the circumference, I traced out a little skirt. The skirt is zig-zagged on, with a quickie zig-zag hem.


She just loves the twirliness! And it's hard to tell behind that impish 3 year old grin, but I think she's pretty proud to have had a hand in the making.

I love this dress pattern, BTW! I was looking for a little girl dress pattern that would be simple and classic. I have a couple big 4 patterns for little girl dresses, but they are so fussy-- zippers and elastic in funny places and all sorts of closures. And of course, crazy, unpredictable sizing-- I always have to muslin them when choosing a new size. This pattern by MADE is just what I wanted... it has the two silhouettes that I envisioned (A-line and a swing-y circle skirt) and a super simple closure-- one button held with an elastic loop. The size fits her right out of the envelope. It is hard to pass up those $1-$2 patterns, but I'm beginning to learn that a well thought out pattern is well worth spending money on, especially kids patterns-- I'll make it dozens of times!

Sunday, April 5, 2015

Natural Dye Easter Eggs

The Saturday before Easter I brought out the egg dye kit that I had bought at the supermarket weeks ago. But this year I just couldn't bring myself to break open the brilliant, jelly-bean colored dyes. Those little tablets are tradition, what I did every year with my family as a child, but when I spend so much effort trying to fill my household with natural materials, they just don't make sense.


Instead, I searched my kitchen for color-rich food items. Normally I would have run out to the store for just the right items, but I'm still in my 2 weeks postpartum where I refuse to leave the house. 

So, after a quick consult to the web, what I decided to try was the following:

Orange: Yellow onion skins 
Yellow: Tumeric
Red: Pomegranate juice and paprika (separately)
Blue: Blueberry juice
Green: Parsley and green tea (separately)

Everything except the juices I put in a saucepan and boiled for 10-15 minutes (This took a couple rounds since I only have 4 burners!)


 I then arranged them all in glass bowls, adding 1 tsp of vinegar for each cup of liquid (roughly!).


Add hard boiled eggs and crayons, and we were dying eggs before naptime. 

Note: I washed the hard boiled eggs in a little soap and water-- this was suggested by one website.

Little Bug (3 yrs old) LOVED it. It took her 10 seconds to scribble a design on an egg with crayons, and then she carefully lowered it into the colorful liquid of her choice. Then she was onto the next egg!

We left them in the dyes for anywhere from a couple minutes (blueberry juice was very fast, and tumeric was pretty quick to give a pale yellow) to over an hour (those were the ones we just left in the dyes and went off and did other things). 


The biggest FAILS were:

--The parsley. Didn't really impart nearly enough color. Might try spinach next year, or liquid chlorophyll if I can find it.
--Pomegranate juice. This was a web suggestion... did they try this before they typed it into their blog post? Even after 10 minutes, it didn't even get to a pale pink.

The successful dyes were:


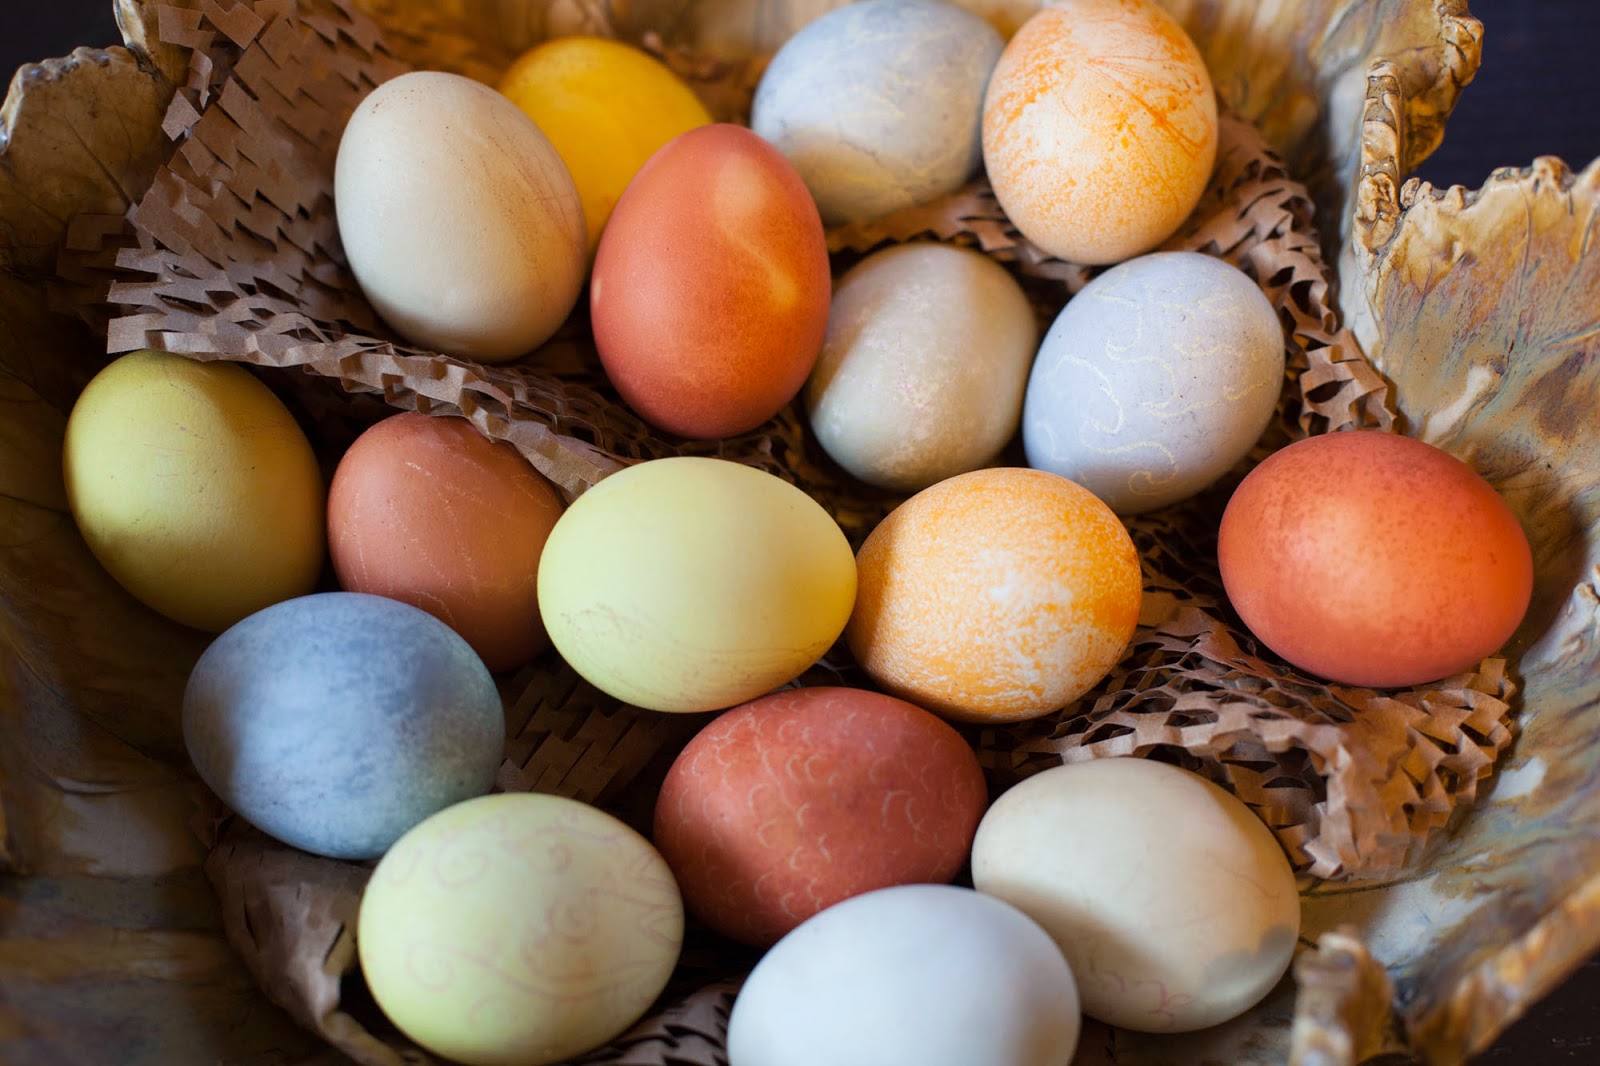
Tumeric! Of course this worked, tumeric will even dye your pots yellow (temporarily!). A couple minutes left a pale yellow, and longer gives a beautiful golden yellow.


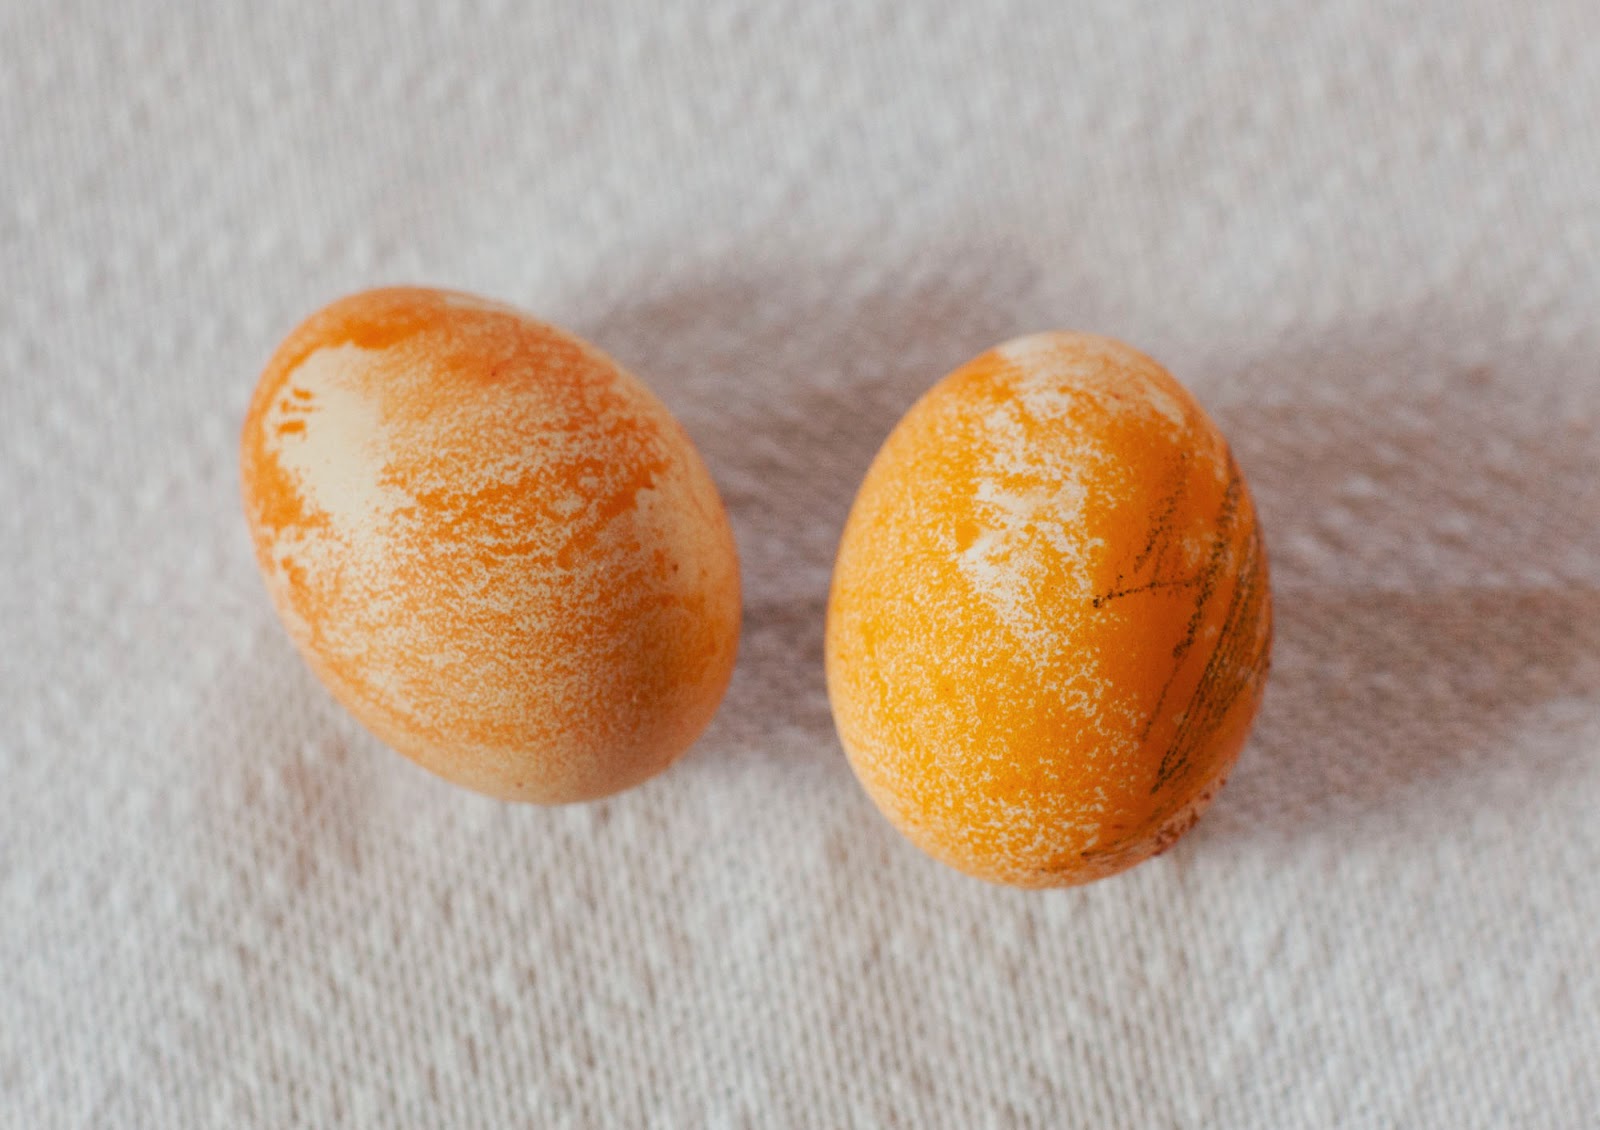
Yellow onion skins. This is just such a satisfying orangey-brown color! The palest one is probably 5 minutes or so, and the darker ones were over an hour.


Green tea. Not exactly what I was going for, but it is a nice rustic greeney-olivey color.


Hungarian paprika. Another surprise. It acted almost like there was oil in the spice... maybe there was? Sort of a marble effect, rather lovely.


Blueberry juice. Not what I expected either, but sort of nice and rustic. They are a bit more blue than they appear in this picture.


All together, the look lovely! I'm totally sold on natural dyes... so beautiful.

Not to mention the fact that I'll feel a lot better about eating the hard boiled eggs (or letting Bug eat them).


Things to try next year:

Dyes:

Blue: Red or Purple Cabbage. A little after-the-fact web searching turned up this some truly lovely blue eggs that were done with cabbage.

Red: Beets. Obviously. But we didn't have any beets in the house!

Green: Spinach or liquid chlorophyll. No visual evidence that this works, but worth a try. Red cabbage on brown eggs might give a green too.

Purple: Red zinger tea or red wine.

Techniques:

Wrapping leaves around eggs with 5 inch squares of nylon stockings. Lovely!

Rubber bands. Simple, kid friendly.


Sunday, March 8, 2015

Handmade Baby Boy Layette

Here is my collection for the new baby boy! Can't believe I got through my list before he was born...

Two pairs of Big Butt Baby Pants (Made by Rae Pattern). This was the only pattern I ended up buying, just because it is so cute! I made it in Bear Hike Flannel by Birch Organics in Shroom and Little Lambs Flannel by Michael Miller's, from Fabric Worm.


The back panel is plain gray flannel from my stash.


Two zip baby sleepers (blogged here). The pattern is traced from a sleeper I was given, and the fabrics are from Fabric Worm: Blue School and Bugs by Birch Organics. 


Bamboo Fleece Sleeper (blogged here).


First outfit for a newborn! The top knot hat was made from the free pattern on Make it Love it, out of bamboo interlock from Natures Fabrics. The shoes are made from my favorite bamboo fleece and the free pattern at make-your-own-baby stuff. The top is from a pattern I made for my daughter when she was a newborn, also made from bamboo interlock.


Four pants from Made By Rae's free baby pants pattern. The print fabrics are organic cotton from Nature's Fabrics and the solids are cotton knits from Etsy.


Four envelope neck Ts from the free pattern at Smalldreamfactory.


Bamboo Fleece baby blanket edged with merino wool (blogged here).


Baby Surprise Jacket in knit Alpaca wool (blogged here).


Besides the handmade items, there are the few hand-me-downs from my daughter that aren't too girlie, a few irresistable used items from the great second-hand childrens stores we have in town, and 2 packs of carters onesies, one in newborn and one in 0-3 months.

I'm officially ready! His due date is 2 days away. He can come anytime he wants!

Friday, March 6, 2015

My First Knitting Project Ever: Elizabeth Zimmerman's Baby Surprise Jacket

This is my first ever completed knitting project!


I'm a good crocheter, but I seem to have inherited a block against knitting from my mom. My mom is a master crocheter-- she made the most amazing, complex crocheted blankets, we each had one on our beds when we were growing up, and she always makes a gorgeous crocheted baby blanket for her grandchildren and often the babies of our cousins. As a kid I started out with granny squares and later made fancy doilies for fun. 

My mom also taught me to knit when I was a teen. I never saw her knit anything, and I never finished my first project... a purple scarf. A totally endless project, made with local craft store acrylic yarn, that I've carried around with me for years. It is soooooo ugly!

Somehow when I was browsing for baby things, Elizabeth Zimmerman's Baby Surprise Jacket jumped out at me as such a cute little sweater for a newborn. I walked into our local yarn shop and asked the owner if I was crazy to want to knit that as a first ever knitting project. To her credit, she said no, it was a fine project for a beginner! She had a copy of Elizabeth Zimmerman's book with the pattern in it, and set me up with bamboo circular needles and Berroco Alpaca yarn. She even encouraged me to try striping, which turned out to be not too difficult on this pattern.


I relied heavily on the help of Youtube videos to get my knitting skills up to date, and also to help me through the project. The series of videos by City Knitting on making the Baby Surprise Jacket were fantastic, I doubt I would have completed the project so well without their help!


The only small disappointment is that the sweater is actually sort of large for a newborn! It probably won't fit him until next fall. My gauge is sort of off-- it was about 5 stitches per inch, when it should have been 6.

Therefore... I've started another one, in a sport weight yarn with a smaller gauge. People did mention that this pattern was addictive!

Waldorf Blanket Doll

While I had all of my doll-making supplies out, I decided to make the new baby a birthday gift of a Waldorf blanket doll/star doll. 


His head is made in the traditional waldorf-doll style with wool fleece stuffing and a minimal embroidered face. He has a bit of embroidered mohair yarn hair and a sewn on cap. 


His body is made of a striped organic cotton knit on one side, and organic bamboo fleece on the other side. 


I couldn't find a free pattern, so I just made it up as best I could!


Thursday, March 5, 2015

Tiny Waldorf Baby Doll

On my list of things to make before the new baby comes was something special for my 3 year old, to be given to her shortly after the baby was born. She is already obsessed with dolls and is constantly labeling them babies and mamas, so I thought a tiny waldorf baby doll, a doll for a doll, would be perfect for her.


Strangely, there seem to be very few of these around. The most popular ones are heads with little pillow bodies, and I really wanted to make something that was more doll-like.


I ended up adapting the pattern for the button baby doll that I had made in the 16-inch size previously. It took a number of tries to get the proportions right... just scaling down the pattern resulted in what looked like a disturbingly malnourished premie!


I ended up with a doll that is about 6 inches. The head size is pretty realistic in proportion to the body... about 1/3 of the height, which I think I've decided that I like. The other alternative would to be to make the head more like 1/2 of the height of the doll, which would have resulted in a more cartoony, perhaps "cuter" doll... but I didn't go this route, at least this time!

For the hair, I usually crochet a cap, but that looked out of proportion on this doll, so I ended up embroidering the head with mohair wool yarn.


Making the clothes for the doll was really difficult... the proportions were difficult, and I just couldn't convince my machine to sew such tiny seams. I had to hand sew, and I never hand sew! But it came out pretty cute. I used a tiny bit of leftover Birch Organic knit fabric along with some matching cotton knit for the top, and bamboo interlock with velcro closures for the diaper.


I deliberately left the gender a bit ambiguous. I wanted to let my daughter choose... she could see the doll as a representation of her new brother, or she could choose to read herself as a baby into the doll. I sort of can't help seeing it as a girl though, but I think that is just my bias.


I also created a sling for the doll, to be worn by her full-size Waldorf doll that she already calls "the Mommy doll." It is just a tube of woven fabric. There is 1/4 inch elastic sewn in a circle to create a depression for the baby doll, and 1 inch elastic sewn into the back of the sling to fit over the larger doll's shoulders.