Exercising during a pandemic continues to be a challenge for me.
My gym is now open, but has such limited hours, you have to sign up in advance, and you must wear a mask and social distance. I just can't see doing an intense HIIT workout on a spin bike wearing a mask... I'm breathless just thinking about it. Further, the thought of being indoors in AC with potential symptomless virus carriers exchanging molecules of air... icky.
I am eternally jealous of everyone who has the funds and space for a home gym! I have managed to secure a few random dumbells by watching Dick's Sporting Goods websites and driving hours out of my way, but it is a far cry from satisfying my workout needs.
So... back to running. Theoretically, one can run in any weather, at any time. I happen to live right across the street from a lovely asphalt paved 2.5 mile loop (with additional connected trails for longer runs and variation. It even has some winter maintenance, which should make it viable even if it snows feet at a time.
However, one needs the proper gear... which has enabled a flurry of sewing!
The quarter-zip top is by far my preference for running, or any sweaty sport. That little bit of speedy ventilation over the chest makes such a big difference. Years ago I bought a pattern for such a top, one of the few on the market, but the muslin I made showed fit problems and the instructions for the front zip ended in a hot mess. I still have this pattern and perhaps should go back to it at some point... but no time for that right now.
Instead I opted for the Greenstyle Pacific Pullover... which has a really well done sew along by Sharon at sweetmamalife.com, including video instructions. LOVE this video for installing the zip on the collar variation, it has taken this skill from insurmountable to totally doable. I also love pattern companies that post pictures of LOTS of tester garments... this really helps me to see how well the the pattern works for different bodies and different skill levels. I had a really good feeling about the front zip option since so many testers, some of them obviously newer to sewing, had excellent results.
I was so confident that I jumped right in with a Polartech power wool fabric that got at a great deal on Etsy from Two on Two off that I've been hoarding for years. I graded by my measurements (wider at the waist and hips) and it was perfect. The front zip went in perfectly, don't think I even pulled out a seam ripper.
Changes: I added light knit interfacing to the collar... both sides! It seemed too floppy without it. However the instructions for adding twill tape or grosgrain ribbon to the collar give a beautiful finish, I really love this.
I was greedy and made both the kangaroo and panel pockets, and I think I got away with it. I love the technique for the kangaroo pocket... but I might skip it for future running tops since I don't need the extra padding in front.
The thumbhole cuffs worked soooooo beautifully in this fabric.
Later, after running in it, I belatedly added a back zip pocket... which is my preference for carrying anything (phone, flashlight, etc) since it helps to balance the weight. The pocket is similar to making a welt pocket (usually I use silk organza for the opening so that I can see my markings underneath) then you sew in an exposed zip. I just sewed a rectangle of fabric over the zip area to enclose the pocket.
Love this top! It is super light weight, but actually surprisingly warm for its weight.
The next one I made was a hoodie running top. I've always wanted a hoodie running top, but I've never purchased one since it seems sort of impractical and they tend to be expensive.
I decided to use the hood from the Jalie Marie Claude on the Greenstyle Pacific Pullover. The Marie-Claude hood looked like a more fitted hood. I used the center front marking as a guide to skip the overlap, and it seemed to fit pretty well.
After running with it, it wouldn't stay in place so I added a drawcord, which fixes the problem. I also did the 3/4 zip, thumbhole cuffs, and a back zip pocket (of my own devising).
This knit is a dry-flex fabric from thefabricfairy.com and I LOOOOOVE it, it is just like one of my old RTW running tops from Moving Comfort.
 |
Add caption
|
I made the pony-tail hole in the hood, just to try it out. It is growing on me! If you are making the Jalie hood... it is a two layer center panel, and the instructions have you use the two panels to make the ponytail holder seamless. Instead I used the two center panels to enclose the seams on the hood, then made the ponytail holder using the largest buttonhole my machine was capable of.
When I saw this wool stretch fleece I hit BUY in a hurry. I just love natural fibers, and technical natural fibers really interest me. This wool is incredibly stretchy and cozy, I just love it. I have to say that when I prewashed it, the surface got sort of pill-y... not exactly pills, but it looks like bits of the fleece have adhered to the outside. This doesn't affect the performance, but it does marr the surface a bit.
This hoody is WARM, so warm that I have yet to complete a run in it. However it is great for convincing myself to go out on a cold dark run (I run during the week at 5:30am, which is pitch dark and generally rather cold). And if I use it as a warmup hoody, it is pretty easy to just tie around my waist when I get too warm.
In terms of fit, I cut and sewed my measurements, and it worked out mostly fine! If I was making this and wanted a truly form fitting fit, I would probably size down.
I added the front 3/4 zip from the Greenstyle Pacific Pullover, and used their instructions for inserting the zipper into the hood. I also added handwarmer pockets, sewn like the pockets on the
Mini Nova from True Bias... since I've recently sewn that pattern. It's a sideseam pattern pocket that is one-layer, rather than two, to reduce bulk.
Here's my usual back zip pocket, made the same way as the previous pullover. The inside is continuous fleece, since the rectangle of the pocket is installed with the fleece on the inside.
The thumbhole instructions on the Jalie use a single-layer method, which was perfect for the fleece. i might have deliberately installed these to cover more of my hand above the thumb, since the sleeve are rather long and help enable my need to keep my hands warm without actually carrying gloves.
I once again used a drawsting to cinch the cord. I put in a double grommet, so that I could make a "hands free" hood cinch that I've noticed on RTW hoods. The other end of the elastic cord is sewed into the seams, so that when you pull the cord through the toggle there isn't any loose end hanging around.
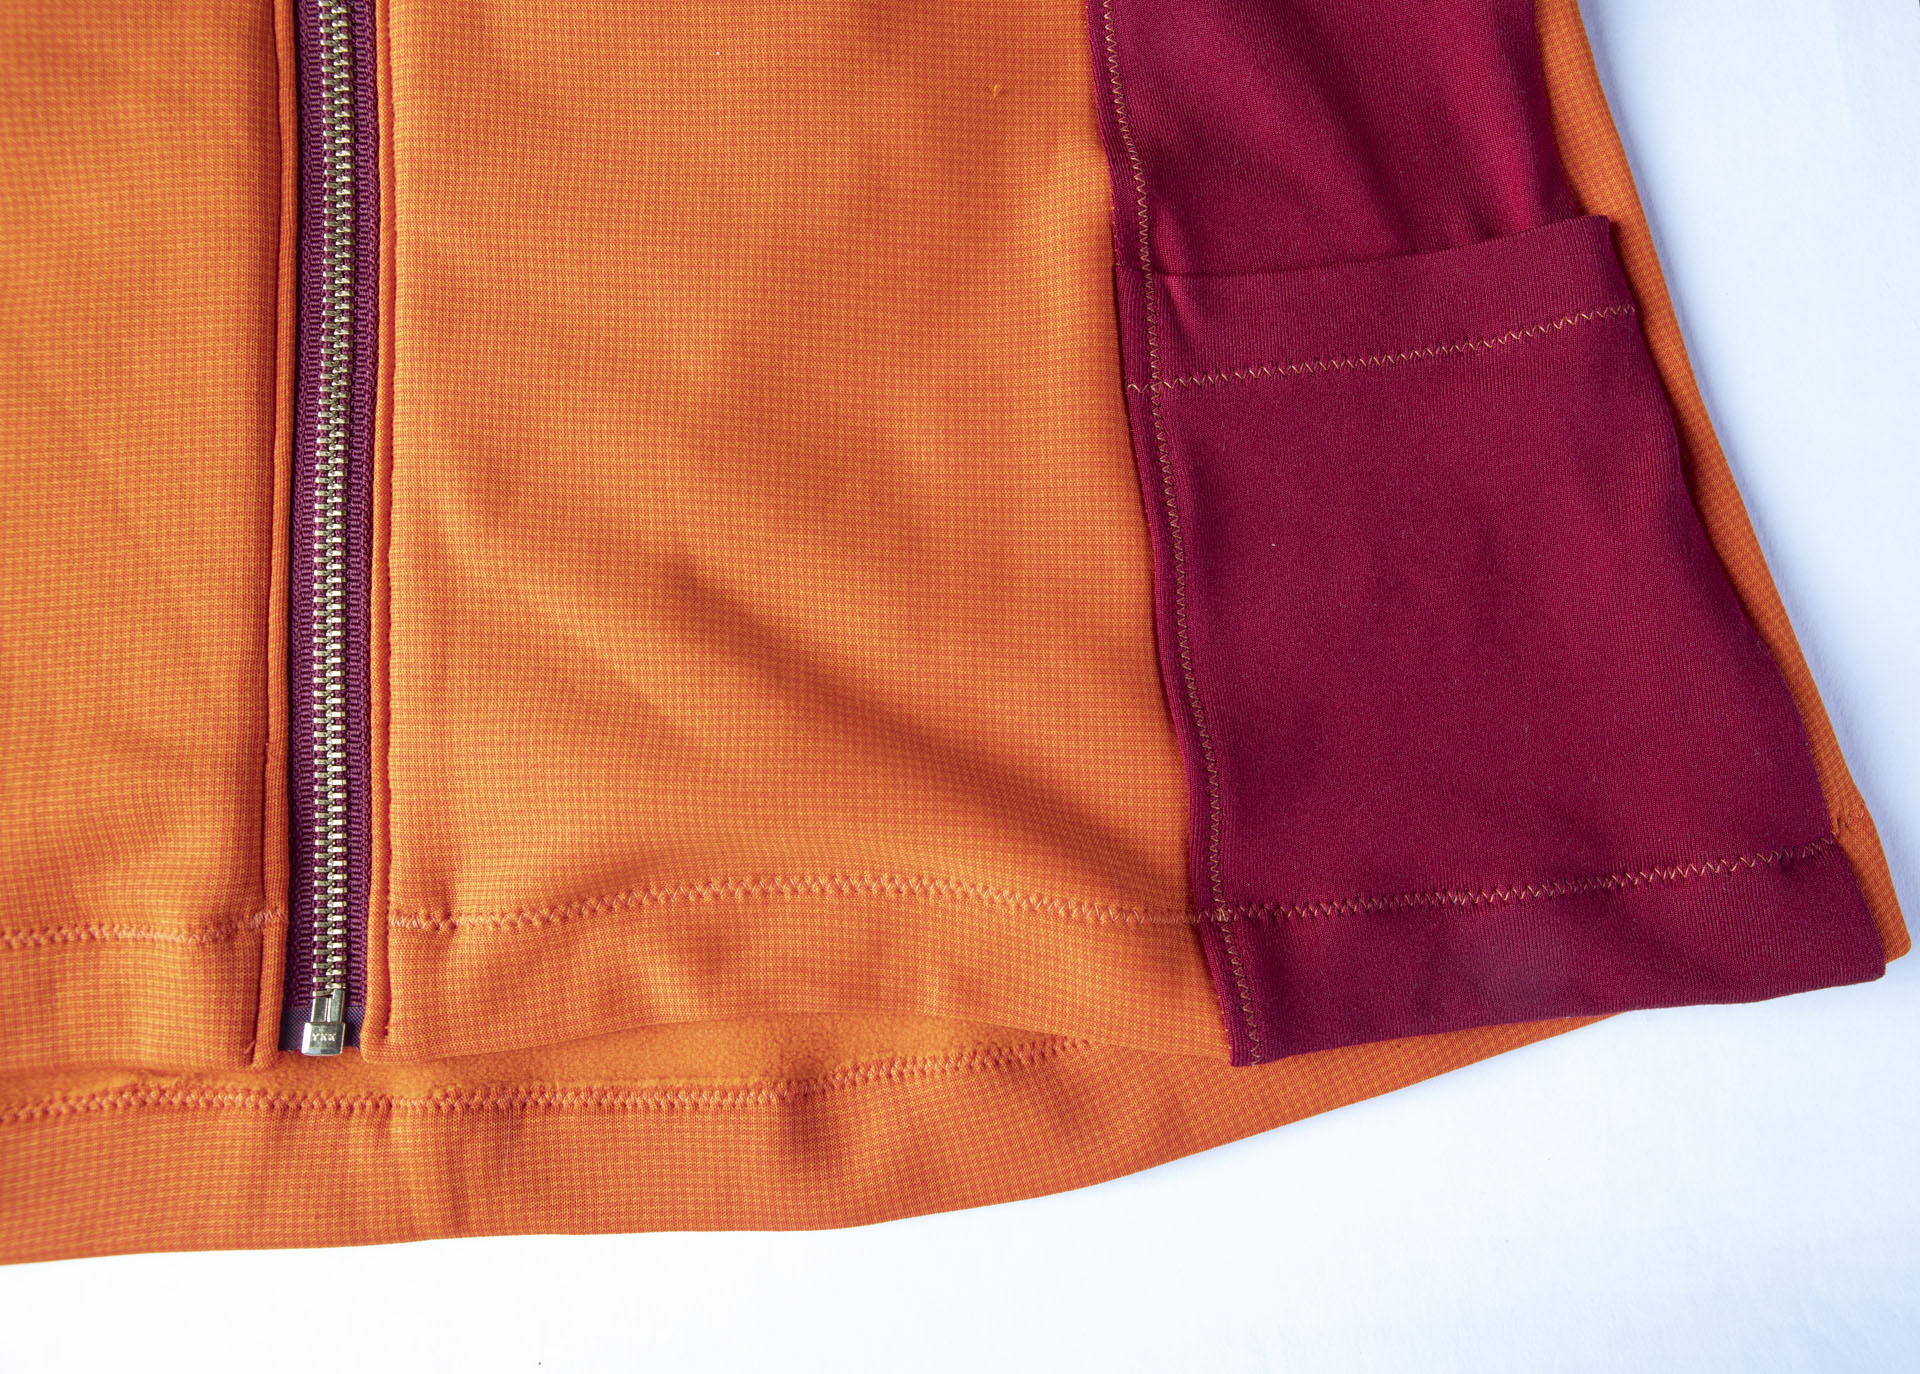
Top #4 is a windproof vest! I've always wanted a windproof vest.
This fabric was from The Rainshed and was surprisingly stretchy... on the order of 25%.
I made the Greenstyle Pacific Pullover, sleeveless, with a full zip (not an option on the pattern, but not difficult to figure out.)
I made some rookie mistakes... separating zip is necessary for this varaint! Then I attempted to tear out the zip, which just tore my fabric. After cutting a new right front panel, I was good to go.
I made a back zip (used fusible interfacing to make the welt hole and a mesh pocket bag this time).
The only matching zip I had was metal, so I also made a chin guard.
So just a few other elements were needed for my winter running wardrobe. I needed warm tights, so I made the Avery leggings in Wool Powerstretch Fleece. I made them a size larger and a bit longer, then ended up taking in the seams on the waistband back to my original waist size. One layer of the waist is powerstretch, the other is regular heavyweight legging supplex, and the elastic is 3/8 inch elastic pulled to provide a bit of support.
I've worn these on two cold runs so far, and they are awesome! No sagging yet.
Another addition to my wardrobe... another Greenstyle Powerbra. These are awesome, and what else is one to wear under warm running tops. In a pinch, they look great with high waisted tights.
And finally... a running headband.
Free pattern. Mine is wool fleece on one side, and Dry-Flex on the other.