Showing posts with label children's sewing projects. Show all posts

Tuesday, November 6, 2018

The Princess and the Pilot-- Girl Inspired Princess Dress Pattern, Self-drafted wings pattern

So we finally had a sunny afternoon to get some good pics of this year's Halloween costumes!


It is probably no surprise that my little princess wanted to be a princess. Actually, she wanted to be a queen... probably inspired by the Olivia book about how everyone wants to be a princess, and Olivia wants to be herself and not like all the rest of the princesses, so in the end she decides she'll just be a queen.


Apparently, queens need to be dressed in pink, glittery gowns that go down to your toes. Those were my instructions. 

I was feeling a bit pressed and wanted a pattern that would just tell me what to do without any fuss. The Big 4 pattern companies are full of princess-y dresses, but my experience with their sizing for children's patterns has been dismal and the thought of toile-ing and altering them made my head hurt. 


I decided to take a risk on an independent designer, and I bought the Girl Inspired Princess Dress pattern. I couldn't find a single review, so I was just praying that the pattern was a good one. The photos were lovely, and the style of the dress is the perfect fairy-tale princess dress with just enough decoration to be sweet and classy.  The lifted overskirt that shows the tulle underneath is just adorable!


I had a moment of panic when I downloaded the pattern and the grading looked a bit-- let's just say-- unconventional. However... when I sewed up the lining in my daughter's size by measurements (8), the fit was perfect. I did change the shape of the bodice so that the waist didn't curve inward... my daughter has a nice little round body that does better with a more barrel shaped bodice. And I did increase the side seam allowances (the pattern has 3/8 inch seam allowances, which seemed skimpy to me). 

The directions were also excellent, and they lead you through the process of making a fully lined dress with all seams enclosed and no hand sewing. Yay! 

For the skirt, the pattern just gives the dimensions of the rectangles, in many cases using the entire width of the fabric and gathering to fit. Unfortunately my ruffle attachment would not work with the tulle! But it turned out to be not so bad just gathering the traditional way with two rows of basting. 


The back is closed with buttons, which is a lovely detail. 


I purchased the crown and the earrings on Amazon. I almost bought another of those plastic birthday crowns, but at the last minute I thought perhaps I would see if I could find something a bit nicer. The crown is actually quite sturdy, it feels like it is made of metal and the fake gems are very glittery. 


The queen was head over heels over the earrings. They are a bit flimsy, and the white rubber pads are always falling out, but with a bit of care they seem to work very well for her, and she is able to wear them for hours without pain (or so she claims). 


The queen declared that she needed special shoes and a wand. The shoes were purchased at Target, and we made the wand together from fabric scraps and ribbon and a piece of a dowel.


Leo is very into planes right now, so I had the idea of making a plane or some wings. Cardboard would of course be classic, but seemed like it would be cumbersome, so I thought that perhaps I'd make some in fabric. 


I put the idea into google and lo and behold, these wings by Hanna Anderson popped up. They were almost exactly what I had in mind, and I almost bought them on the spot, until I took a closer look and realized they were actually sort of plastic-y and not nearly as cool as the idea in my head. For instance, what little wimpy jets those wings have!


So I sat down and came up with my own pattern. I used a super-shiny knit fabric from Joannes, and a bit of stretchy orange knit for detailing and the straps. Inside of the wings I used 1/2 inch foam. The jets are two sizes of seltzer bottles (since we don't drink soda!) stuffed with colored cellophane and held on with stretchy straps.


The wings strap on with backpack style straps with quick release buckles, and there are elastic straps for his hands or wrists to go in. 


It is a great costume for a 3-year old with lots of energy-- he was just flying from house to house when we were trick-or-treating. 


The hat and goggles were from Amazon, cheap but effective.


Another successful Halloween! The kids love their costumes, so I expect they'll be favorites for dress-up for the rest of the year. 

Thursday, September 21, 2017

Velveteen Rabbit Pattern is available on Etsy!

When my daughter was born, a family friend gave us a copy of the Velveteen Rabbit. Of course I had read it as a child, but I as a new mother the idea of something that is so loved that it becomes "real" struck me as all the more poignant. 


So when I started making home-made toys for my kids, the Velveteen Rabbit was high on my list! 

My first pattern, the Bunny Lovey, is very sweet for a baby, but the Velveteen Rabbit is a toy that a child can play with throughout childhood. It is soft and cuddly, but also is wonderful for imaginative play or for taking a place at the tea-table. 

Love Sewing Magazine noticed my blog posts about my first versions, and they asked if I had finished the pattern. Last spring, in cooperation with Love Sewing Magazine, the pattern was released in the spring of 2017. 

Now, I am happy to be able to offer it to you as a downloadable PDF pattern on the Unlikely Handmade Store on the blog and on Etsy. The download includes the PDF pattern, which you can print on your home printer, and photo-illustrated, step-by-step instructions in a downloadable PDF. 

This fall I'll be doing a little sew-along on the blog! So get your pattern and your fabric ready, and we can make up a Velveteen Rabbit in time for the holidays! 


Tuesday, November 1, 2016

Dragon Lovey, a New Pattern by Unlikely Handmade

I am so pleased to introduce you to the newest sewing pattern from Unlikely Handmade... the Dragon Lovey!
The Dragon Lovey is a pattern to make a blanket doll-- a soft toy that is mostly not stuffed, sort of like a shaped security blanket. The head is stuffed to give it a little shape, though! These toys are great gifts for newborns or infants, but they are also much loved by older children too!

Dragon lovey made with a recycled, felted sweater, ribbed velour, and wool blend felt for the back ridge. 


The construction of the toy is very simple if you have basic sewing skills and a sewing machine. You could certainly do it by hand too, but it would take a bit more time. The pattern includes step-by-step instructions illustrated with photographs.

The pattern also includes two fun variations. The first is a dinosaur... a Stegosaurus!

Dragon Lovey-- The Stegosaurus variation. This one is made from a recycled, felted sweater. The back ridge is wool-blend felt, and the belly is ridged velour. I added spots made from the same felt as the back ridge, sewn on before I sewed the body together. 

The second is a bit fantastical... a Winged Dragon!

Dragon Lovey-- the Winged Dragon variation. It is made of striped velour, with a white velour belly. The back ridge is wool-blend felt, and the wings are shiny gold fabric from my stash, left over from a halloween costume!
I wanted to launch this pattern in time for holiday gift making. Since it is hard to make just one, the purchase of the pattern also includes the rights to sell your handmade creations!

To celebrate the launch of the pattern, the Dragon Lovey will be on sale until November 5th for 15% off (regular price $7). No coupon code necessary, just visit my Etsy shop.

I love seeing your creations! If you make a Dragon Lovey (or Stego, or Winged Dragon), post them with the tag #dragonlovey and tag me @unlikelynest!


Thursday, June 9, 2016

Sunshade Hoodies for the Beach and Play!

We are ready for the beach! And none too soon because vacation with the family is coming right up in another week.


These are what I call Sunshade Hoodies... modeled, shamelessly, after the Patagonia product of this name. Back when Lilly was a baby I snagged a Patagonia one on sale, and it was the best darn thing for keeping the sun off of a little kid. I still run after them with sunblock, but I feel less bad about the inevitable spots that I'll miss, and late reapplications. So much of summer play involves the kids sitting or squatting over big piles of sand, and the hoodie is just perfect for that since it covers their back and head. I also find that a hood is easier to keep track of than sun hats, and it is so light that I can flip it up over their heads and they often don't notice, while a hat can be a fight.


Other than the Patagonia product, the only other thing around seems to be the ubiquitous rash guard. Those are okay, but the kids ones are often not labeled with their UV protectiveness rating so I just don't know how protective they are, and the cut leaves the back of the neck and sometimes the arms exposed.

Anyhow, I decided to make my own this year. The fabric is from Peekaboo Pattern Shop which has the cutest line of coordinating swim fabrics, all labeled UV 50. They also have pirates, ice cream cones, and mermaids... but I just couldn't resist these sharks!


The pattern is from Hey June Handmade, and is the Hatteras Hoodie pattern for kids. I LOOOOVE this pattern, it is everything I could hope for in a pattern. The size range is HUGE, from 2 to 14 years! Kids grow so fast that I'm grateful for the range, and it means I could use the same pattern for both kids.


This pattern is also fantastic in other ways. I love the 3/8 inch seam allowance, it is perfect for serging seams-- not too much waste, but a nice little 1/8 of an inch to chop off and give a clean finish. The construction is clean and clever, and gives a professional look. And the sizing has been spot on so far, for both kids-- I risked it with no toiles, just going by the measurements, and the fit is perfect.


I mostly followed the pattern exactly, but I added just a bit of interest by finishing the curved edge of the pocket with a contrast strip.

The trickiest part was getting the hood to match perfectly with the edge of the front slit. It really helps to sew a line of basting holding the hood and front edge in place before you sew the neck seam.


And of course, stripes meant I had to take extra care in matching the side seams! Tons of pins seemed to do the job nicely. I only chopped one with my serger, doh! I can't help thinking, every chopped pin is taking me closer to the inevitable replacement of that blade.


Friday, March 18, 2016

The Bunny Lovey: A Free Sewing Pattern with Illustrated Instructions


The Bunny Lovey is a sweet little blanket doll. It would be a lovely gift for a newborn! And it is quick to make if you have a sewing machine and some basic sewing skills. 

The pattern is FREE... just sign up for our mailing list on the sidebar. After you confirm your subscription, you will be sent a "Welcome" email that has a link to the pattern. 

With the free pattern, you can make as many bunnies as you like to give as gifts or for charity. If you would like to make bunnies to sell, please purchase the paid version of the pattern from my Etsy Store... it is just $5, and includes the right to sell your handmade creations. 

UPDATE August 2016... the PAID version on Etsy now includes downloadable, illustrated instructions. But once again, you can totally make this for free by subscribing to the newsletter and using the instructions here on the website.

If you sign up for the newsletter and you don't see the "Welcome" email, be sure to check your spam folder or the "Promotions" tab if you use Gmail.


Materials:

--1/4 yard or a fat quarter of your main fabric. I used an organic cotton fleece, but this could could be any fabric that is soft and snuggly. It would be lovely in a french terry or a velour!

--A very small amount of contrast fabric. I used colorful quilting cottons.

--The Bunny Lovey pattern. It is free-- just sign up for our newsletter on the sidebar. After you confirm your subscription to the email list, you will be sent another email with a link to the pattern. It is just two pages, and no taping necessary. 

--Embroidery floss for the eye.

 --Stuffing for the head and tail. I use wool batting or roving, but you could also use cotton batting or poly fill.


Instructions:

Sew all seams with a 1/4 inch seam allowance. 

Print out the PDF pattern on letter sized paper. Make sure the printer resize the page, I always set scaling to 100% on my printer. 

Cut out the paper pattern pieces,and lay them out on your fabric. Make sure the arrows on the pattern pieces align with the grain of your fabric. If you are using napped fabric like velour, the arrow should point in the direction that the fibers naturally lay down. Cut your pieces from your fabrics, as indicated by the directions on the pattern pieces. Transfer markings for the placement of the ears, eye, and tail. 


Sew together the two tail pieces, right sides together. Leave an opening at the base of the tail for turning and stuffing. Sew together the ears with each ear having one piece of main fabric and one piece of contrast fabric, right sides together. 


Clip the point of the ear straight across, close to but not touching the stitching.


Turn the ears and the tail right sides out. If you have hemostats, use them to grab the tip from the inside and pull it through. Otherwise, use your fingers and a stick (like a chopstick). Press them flat. 


Put the head pieces right sides together. Sew around the head leaving the neck open. Clip the curves, being careful not to cut your stitching.


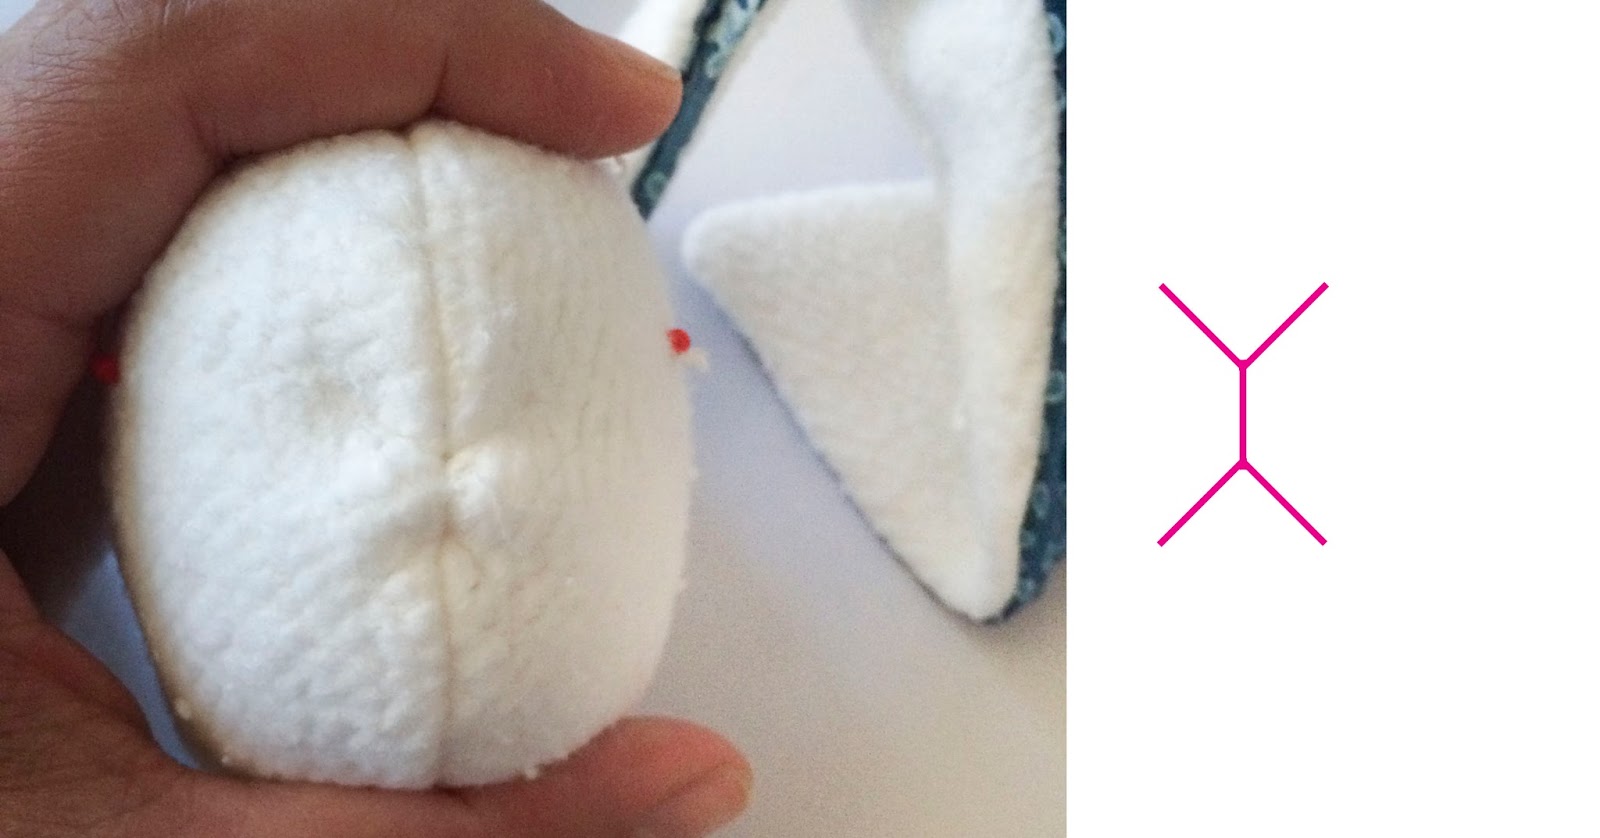
Cut a slit in the head for the ears, where indicated by the pattern. Cut through both layers of the head.


Fold the ears in half, with the contrast fabric on the inside.


Stick the ears up through the neck into the head and through the holes you made. The fold should be to the back of the head.


Arrange the head so that the seam allowance is in the center, and the ears sit flat. The folds of the ears should point towards each other. Sew across the top of the head from ear to ear, catching the raw edges of the slits you made. 


Pull the ears to turn the head right side out. Smooth the seams flat with your fingers. Stuff softly with wool (or your choice of stuffing).


Sew the bunny nose and mouth. I used a double strand of white sewing thread to give just the shape of bunny cheeks and nose. You could also use pink embroidery thread to give a stronger impression of the face. Hide your knots inside the head.

Decide where you want the eyes. Use the markings on the pattern as a guide, but make sure it looks right for your bunny, with the personality you want to give it. I use a pin with a colored head to make sure I like the placement.


Sew the eyes with embroidery thread. I used blue on this bunny, but I also use brown or pink (albino bunny!). You could also just leave the eyes off to make a super minimal bunny. 

Hide the knots inside the head. Here I have knotted my strands, then threaded both ends through the needle and pulled them back through the head. I'll clip the strands close to the head and the ends will disappear into the stuffing. 


Attach the tail to the body. Cut a slit where indicated on the pattern, about two inches from the bottom of the bunny. Stuff the tail.


Slip the tail through the slit, with the tail of the tail on the inside. Sew across the base of the tail from the inside, catching the raw edges of the slit. Taper to nothing on either side of the tail. 


Sew the body together. Leave about two inches open at the center of the neck for turning and inserting the head. Clip curves.


Insert the head into the body. Push the stuffing up into the head so that the neck is as flat as possible. Make sure that the raw edges of the body pieces are turned to the inside. 

Starting about 1/2 inches before the opening in the neck, sew cross the base of the neck, catching the turned under edges of the body and the neck. Sew past the opening by 1/2 inch. I use a zipper foot on my machine to get as close to the head as possible. 

And you are done! You now have a beautiful toy that you can feel totally good about giving to some little person you love. 

Oh, and please send me pics if you make one, I would really enjoy seeing your creations! You can send me an image, or post on Instagram #bunnylovey


Wednesday, February 3, 2016

Waldorf Inspired Mushroom People

I fell in love with making these when I was thinking about Waldorf playscapes and little dolls that my daughter could play with on her playscape. I made her a little mushroom person, and he was an instant hit-- everyone wanted one.


They are fun to make, and I'm happy to put to use my collection of felted wool sweaters. I'm also having a great time making different varieties of mushrooms.

You can see more pictures of them in my Etsy shop!