Wednesday, November 29, 2017

Velveteen Rabbit Sew Along Day 4: Sewing the Body and Attaching the Ears

Welcome back to the Velveteen Rabbit Sewalong. Today we will be assembling the body of the rabbit. This is an exciting day, since your rabbit will start looking like a "real" rabbit!

Sewing the Body

For all seams, use a 1/4 inch seam allowance unless otherwise indicated. 

Start by getting your belly piece and sewing the dart on the belly of the rabbit. Fold the belly piece in half, right sides together, and mark the start and the finish of the dart onto your fabric piece. Sew from the wide part of the dart to the point. I usually sew just to the end of the dart, then tie the two sewing strands by hand to secure it.

If you have underlined your bunny, sew a line of basting down the center of the dart first. Then fold your belly piece and sew the dart as described above. This helps to make sure the two pieces of fabric stay together when you sew the dart. 


For the next steps, make sure that you have marked points A and B on both the Belly and the two Body pieces. 

Sew the Belly and one Body pieces, right sides together, from point A (the top of the shoulder) to the base of the rabbit's foot. Use a 1/4 inch seam allowance. 


Then sew the second Body piece to the other side of the belly, also sewing from Point A to the base of the foot.


Next, you will sew the short distance from point A to point B. Clip the tight angles on one of the Body pieces just to the 1/4 inch seam allowance, which should allow you to lay it flat against the Belly. Then sew from A to B. Repeat for the other side.


Then sew the body pieces together from point B around the head and down the back.


Clip tight corners and curves just to the stitching. Turn right side out.


Attaching the Ears


You are now ready to attach the ears to the body. Watch the steps in the video, or follow the pictures below. 


Cut holes for the ears in the body using the markings on the pattern pieces. 


Turn the body right side out. Fold the ears, then insert into the holes from the outside of the bunny. 


Turn the bunny back inside out, and sew across the top of the head, catching the bottoms of the ears and the edges of the ear holes. Baste first to check placement, then sew with a stronger stitch.


Turn right side out and admire your work! Your bunny should be starting to look like a bunny. 


Add the Tail


To make the tail, sew together the two tail pieces right sides together. Clip the curve of the tail.

Turn right side out. Stuff with a bit of stuffing. Baste the tail into place on the rear of the bunny, centering the tail over the center back seam.


Sew the base

Clip the tight corners, just short of the 1/4 inch seam allowance.


Line up the base with the body/belly of the bunny. Make sure your pieces are right sides together. The notch on the back of the base lines up with the center back of the bunny.

Sew around the base, leaving a 5 inch gap for stuffing.


Okay, that's all for today. Tomorrow we will finish up our bunnies with stuffing and details like the eyes and nose.

Tuesday, November 28, 2017

Velveteen Rabbit Sew Along Day 3: Assembling the Ears

The Velveteen Rabbit Sew Along is back! Today we're going to assemble the ears of the rabbit.


Before you start assembling the ears, attach the interfacing to Ear Front Inner fabric piece. If you are using hair canvas, baste the canvas to the wrong side of the fabric pieces, using a wide machine basting stitch and staying within the 1/4 inch seam allowance. If you are using a heavy fusible interfacing, follow the instructions for your interfacing to adhere it to the wrong sides of the Ear Front Inner pieces.


Then, sew the the Ear Front Inner piece to the ear front outer piece. This can be a tiny bit tricky, so you can watch me do it in a video, or just follow the pictures below.


First, sew one side, from the point of the ear to the base, right sides together. The stitching line is marked on the pattern piece at the top of the ear, it might help you to transfer this marking to your fabric pieces with a fabric marker. You can see my markings on the picture below. 


After stitching the first side, clip the tight angle of the outer ear piece just to the stitching. This will make it easier to line up the second side. 


Then, pin and sew the other side from point of the ear down to the base. 


After stitching, press your stitching flat. If you are working with a napped fabric, use a scrap of napped fabric as a press cloth, or press it from the back, to avoid crushing the fibers.

Then, sew the Ear Back to the assembled Ear Fronts, right sides together. 


Clip the point and trim the seam allowances to 1/8 inch. 


Turn the ear right side out. Use something pointy like a chopstick (or a point turner, if you have one!) to gently press the tip out. 

Repeat all steps for the second ear, then you are are ready to assemble the body!


Friday, November 24, 2017

Velveteen Rabbit Sew Along Day 2: Assembling the PDF Pattern and Cutting

Hello there! Today we will be assembling our Velveteen Rabbit PDF files and cutting our fabric.

If you've missed any previous posts, here is what has come before in the Velveteen Sewalong:

Welcome and Schedule
Day 1: Fabric and Supplies

The pattern is designed to be printed on a home printer on 8.5"x11" paper. Make sure that you print the pattern at 100% (I have to turn off "scaling" on my printer). After you print, check the test square on the first page of the pattern with a ruler-- make sure it measures exactly 1 inch or 4 cm.


Some of the pattern pieces are larger than will fit on 8.5"x11" paper, so the first 4 pages need to be taped together. Match the triangles and tape together pages, matching the triangles. For a secure and accurate join between two pages trim off the margin of one page and tape it to the side that still has the margin.


Pages 5, 6, and 7 don't need to be taped because the contain smaller pattern pieces.

Before you cut, prewash your fabrics. This helps remove any residual chemicals or contaminants from your fabrics, which is important if you are planning on making a toy that a child will play with. It also prevents shrinkage when the toy is washed... although a finished stuffed toy should only be hand washed and air-dried.

After you've taped together the pattern, cut out the paper pattern pieces. Arrange your pattern pieces on your main fabric, contrast fabric, and muslin using the cutting layouts in the instructions. When I'm working with lofty fabrics like fleece or some velvets, I prefer to trace around the pattern pieces with a fabric marker and cut them out with fabric scissors. For thinner fabrics like quilting cottons and muslin, I use a rotary blade and a cutting mat.

You can also cut out the heavy weight interfacing for your ears at this time using the Ear Front Inner pattern piece and the cotton muslin for the weight bags.


If you are using a velveteen or velour with nap, make sure to pay attention to the nap. The main thing is to always cut nap in the same direction, so that when you stroke your bunny, the fur will all lie in the same direction. You want to place the arrow on the pattern piece in the direction that the little hairs on the fabric want to lie down. Here's a short video I made to illustrate this:


If your fabric has stretch, you will want to underline or interface it. In the video above about nap I am making a bunny out of cotton velour, which is a knit fabric with stretch. To help the bunny keep it's shape, I chose to underline it with cotton muslin.

You might also want to underline or interface your fabric to provide additional strength. If you are making a bunny that you plan to give to a child who will potentially play with it for many years, the underlining or interfacing will make the toy better able to stand up to the tough life of a well-loved toy.

You can underline with any medium-light weight fabric-- I usually use cotton muslin. If you are interfacing, use a quality medium weight interfacing with minimal stretch. Don't trim the seam allowances on your interfacing: sewing the interfacing into the seam will add strength.

To underline or interface your fabric, cut the Body and Belly pattern pieces out of your underlining fabric or interfacing. If you are underlining, simply machine baste your underlining piece to the back of your fabric piece with a wide stitch. Keep your basting stitch just inside the 1/4 inch seam allowances. If you are interfacing, follow the instructions on your interfacing to adhere the interfacing to the back of your fabric piece.

Tomorrow we start assembling the bunny!


Thursday, November 23, 2017

Give Thanks Sale!

If you are in the US, Happy Thanksgiving! 

The Velveteen Rabbit sewalong will continue tomorrow, but today join us for a Give Thanks Sale!
 Unlikely Handmade Etsy Store

10% off PDF patterns in the Etsy Store with code: VELVETEEN through Monday, November 27th.

Have a great holiday everyone!

Wednesday, November 22, 2017

Velveteen Rabbit Sew Along Day 1: Fabric and Supplies

Welcome to Day 1 of the Velveteen Rabbit Sew Along. Today we'll be talking about one of my favorite things: fabric! We'll also talk about the other supplies you'll need to make your rabbit.


The Velveteen Rabbit Pattern is made for a medium-weight woven fabric. This is mostly for durability and to help hold the stuffing firmly in place. However, you can still make your bunny out of a stretchy or lighter weight fabric-- you just need to underline it or add a layer of interfacing to your fabric, and we'll talk about that on Day 2.

You'll need 1/2 yard of fabric for the body, then another fat quarter or 1/2 yard of fabric for the belly and inner ears. These could be the same fabric or contrasting fabrics. 

Velveteen is technically an imitation velvet that is a short pile woven fabric. I have yet to find a reliable source of true velveteen fabric-- many of the "velveteen" fabrics being sold seem to be knits of varying composition and quality. 

Far more common are cotton velour fabrics, and this is what I've made many of my samples from. Cotton velour is comfortable against the skin, relatively durable, and comes in a wide variety of colors. It is a knit fabric so you'll need to underline or interface to stabilize the fabric.

plum velour - forest velour - purple velour - pink velour

I'm very partial to natural and organic fabrics for children's toys. Here are some lovely options in sherpa, fleece, and organic velour. 


cotton sherpa - natural french terry - cotton fleece - organic cotton velour

It is very fun to make bunnies in patterned fabrics! The top right is a cotton flannel, and I think it would make a wonderfully cuddly bunny. A medium weight flannel or twill fabric would also be perfect since there would be no stretch and it would be nice and durable. If you choose a lighter quilting weight cotton, you would want to underline or interface for strength.

plaid -  floral - dots - stripes


Furry or fluffy fabric would also be a wonderful choice. You would want to choose something with a short pile so that it wouldn't overwhelm the bunny or be too difficult to work with. 

beige sherpa - faux sheepskin - spots - silver fur


You'll also need some other supplies...

Interfacing

Hair Canvas | Fashion Sewing Supply's Pro-Sheer Elegance Medium Interfacing


The ears of the Velveteen Rabbit are stiffened with interfacing. While some vintage models are wired, I choose to design the pattern with safety in mind. If you are making a bunny for display, feel free to experiment with wire!

You'll want a relatively stiff interfacing to help keep the ears up. I use sew in hair canvas, which can be found here or here or might be available at your local fabric store. You could also use Peltex Ultra Firm or a similar heavy interfacing, either sew in or fusible. You only need 1/4 of a yard. 

If your fabric is light weight or stretchy, you will want 1 yard of either a light weight fabric to use as an underlining or a light-mid weight fusible interfacing. 

Cotton muslin works nicely as underlining-- it is cheap, natural, and durable. You could also use any light woven fabric-- repurposed shirting fabric would also be a great option. 

If you want to use a fusible interfacing to support your fabric, choose a mid-light weight fusible. My favorite all-round interfacing is this one from Fashion Sewing Supply, but you could also use something such as this Pellon interfacing that should be available at your local fabric store. 

Eyes


You'll need 12mm safety eyes, I usually use brown ones. If you haven't used these before, they are very easy to install and are very secure. They also look convincingly like the eyes on antique stuffed animals. I usually buy mine locally, but you can also get them on Amazon.

Stuffing

You'll need some stuffing for your bunny. The most readily available and easy to use stuffing is Polyfil, which should be available at your local craft or fabric store.

I strongly prefer to stuff my toys with wool. It does cost more than polyfill. But wool is a natural, re- newable resource. It is hypoallergenic and is often a bedding choice for allergy sufferers since it resists bacteria and dust mites and has antimicrobial and antibacterial properties. It creates a toy that warms to a child’s body and has a satisfying firmness.

If you need more convincing, read this article about wool stuffing by one of my favorite doll makers. 

Where to get wool? The best source on the east coast of the US is West Earl Woolen Mills. No website, you have to call them. Other places: Reggies Dolls and Weir Crafts. You will need 1 lb. 

Other natural fill choices include cotton, bamboo, and kapok. I haven’t tested these options, but if you have these fills available, feel free to experiment. 

Weighting

The rabbit is weighted to provide a natural feel and to help it stand upright. 

To sew the weight bags, you'll need 1/4 yard of a woven fabric, cotton muslin or similar.

For the weight, I use ground walnut shells. You can buy them at your local pet store (they are used as bedding for reptiles) or here. You can even get them scented. You will only need about 1 cup of ground walnut shells. 

If nut allergies or washability are a concern, you can use poly pellets, find them here or here. You only need about 1 cup of pellets. 


Preparing your fabrics

Make sure to prewash all of your fabrics, including the fabrics you will use as underlining and weight bags. I generally wash all of my fabrics on cold and tumble dry on hot. For delicate fabrics or wool, I usually hand wash or machine wash on gentle and air dry. 

You might want to pre-wash your interfacing, if it is not already pre-shrunk. For most interfacings, you can soak them in warm water and air dry. 

That's it for today! Tomorrow we'll assemble the PDF and start cutting. 


Tuesday, November 21, 2017

Velveteen Rabbit Sew Along: Welcome and Schedule

Welcome to the Velveteen Rabbit Sew Along!


If you have never made a stuffed animal before, the Velveteen Rabbit is a great place to start because it has a simple shape without too many curves or tight places. This sew along will help guide you through the process.

The holidays are coming right up and I know many of you makers are getting busy. I wanted to get this sewalong up to help those of you that might be considering making a special toy for someone special on your list!
Velveteen Rabbit in Maroon and Pink Cotton Velour

About the Pattern

The Velveteen Rabbit pattern is a PDF sewing pattern to make a nearly life-size standing rabbit toy. The bunny stands about 14 inches tall when his ears are down, and is weighted to feel like a real rabbit. The pattern is designed for woven fabrics such as quilting cottons and velveteen, but it also includes instructions for how use a stretchy fabric like cotton velour or minky.

The pattern includes downloadable step-by-step instructions with photo illustrations. The sewalong and the accompanying videos provide additional examples and information.

The pattern was first released in Love Sewing Magazine in Spring 2017. The version that is for sale on this website or Etsy includes more detailed instructions.

If you haven't gotten your pattern yet, you can get it at my Etsy store here. Use code VELVETEEN to get 10% off through November 27.

Sew Along Schedule

Welcome and Schedule
Day 1: Fabric and Supplies
Day 2: Assembling the PDF and Cutting (Video: Understanding Napped Fabrics)
Day 3: Sewing the Ears (Video: Assembling the Ears)
Day 4: Sewing the Body (Video: Attaching the Ears)
Day 5: Stuffing, Weighting, and Finishing (Videos: Introduction to Safety Eyes and Stuffing)

Materials

If you are working on assembling your materials for making your rabbit, here is what you will need:

Velveteen Rabbit Pattern
1/2 Yard Main Fabric
Fat Quarter (18”x22”) or 1/2 Yard Contrast Fabric
Matching sewing thread
1/4 yard cotton muslin or similar plain woven fabric (for weighted bags)
Sew-in Horsehair Canvas or medium/heavy fusible interfacing for ears
Two 12mm safety eyes
Embroidery floss
Stuffing (Wool or Polyfill)
Ground Walnut shells or poly pellets for weighting

Optional (suggested for stretchy fabrics or thin fabrics):
Additional cotton muslin for interlining or medium interfacing

History and Inspiration

I've always been a fan of classic toys, and the Velveteen Rabbit is one of my favorites! Most of us know about the Velveteen Rabbit from Margery Williams' 1922 book, The Velveteen Rabbit.

It was Williams' first book, and it told the story of a young boy who receives a stuffed rabbit toy for Christmas. Once the novelty of the talking and mechanical toys wears off, the rabbit becomes a favorite toy. Their relationship grows for many years, but one year the boy gets sick, and all of the toys that consoled him when he was sick are discarded. Left overnight in the garden, the rabbit cries a single real tear, then a fairy grants his wish to be a "real" rabbit. The following summer, the boy sees rabbits playing in the yard and remarks on how much one of the resembles his former toy.

Cover of the first edition of The Velveteen Rabbit by Margery Williams, Illustrations by William Nicholson.

While the book made the idea of a Velveteen Rabbit famous, such a toy might have been commonplace in 1922. There are several stuffed rabbit toys in museum collections that date back to before Williams published her book. One of my favorites is in the collection of the Victoria and Albert Museum in London. The Velveteen Rabbit Pattern was strongly influenced by this sweet standing rabbit.

"Toy rabbit called 'Tiny', in an upright stance, printed cream velvet with brown spots," ca 1902, Victoria and Albert Museum, London.
There are also several excellent examples of "velveteen rabbits" by the famous toymaker, Steiff. The orange bunny was sold at a Christies Auction for over $2,000!

Steiff Rabbits: Left: Steiff sample, ca. 1929 | Right: Steiff jointed rabbit, ca. 1910 (ebay)
Other examples of upright stuffed rabbit toys can be found on Ebay and collector websites. 

Left: Vintage Farnell Winfred Rabbit, ca 1925 |  Right: Antique Edwardian Mohair Bunny (ebay)

The velveteen rabbit has been around for a long time, so you can be sure that it won't go out of style in a hurry.

Here are a few more that I created from the pattern. The one on the left is made from a silk/rayon velvet with a white ribbed cotton velour ears and belly. The one in the middle is made from a cotton print by Cloud 9 fabrics.


I'll be back tomorrow with the first sew along post where we'll talk about fabrics, hope to see you there!


Thursday, November 9, 2017

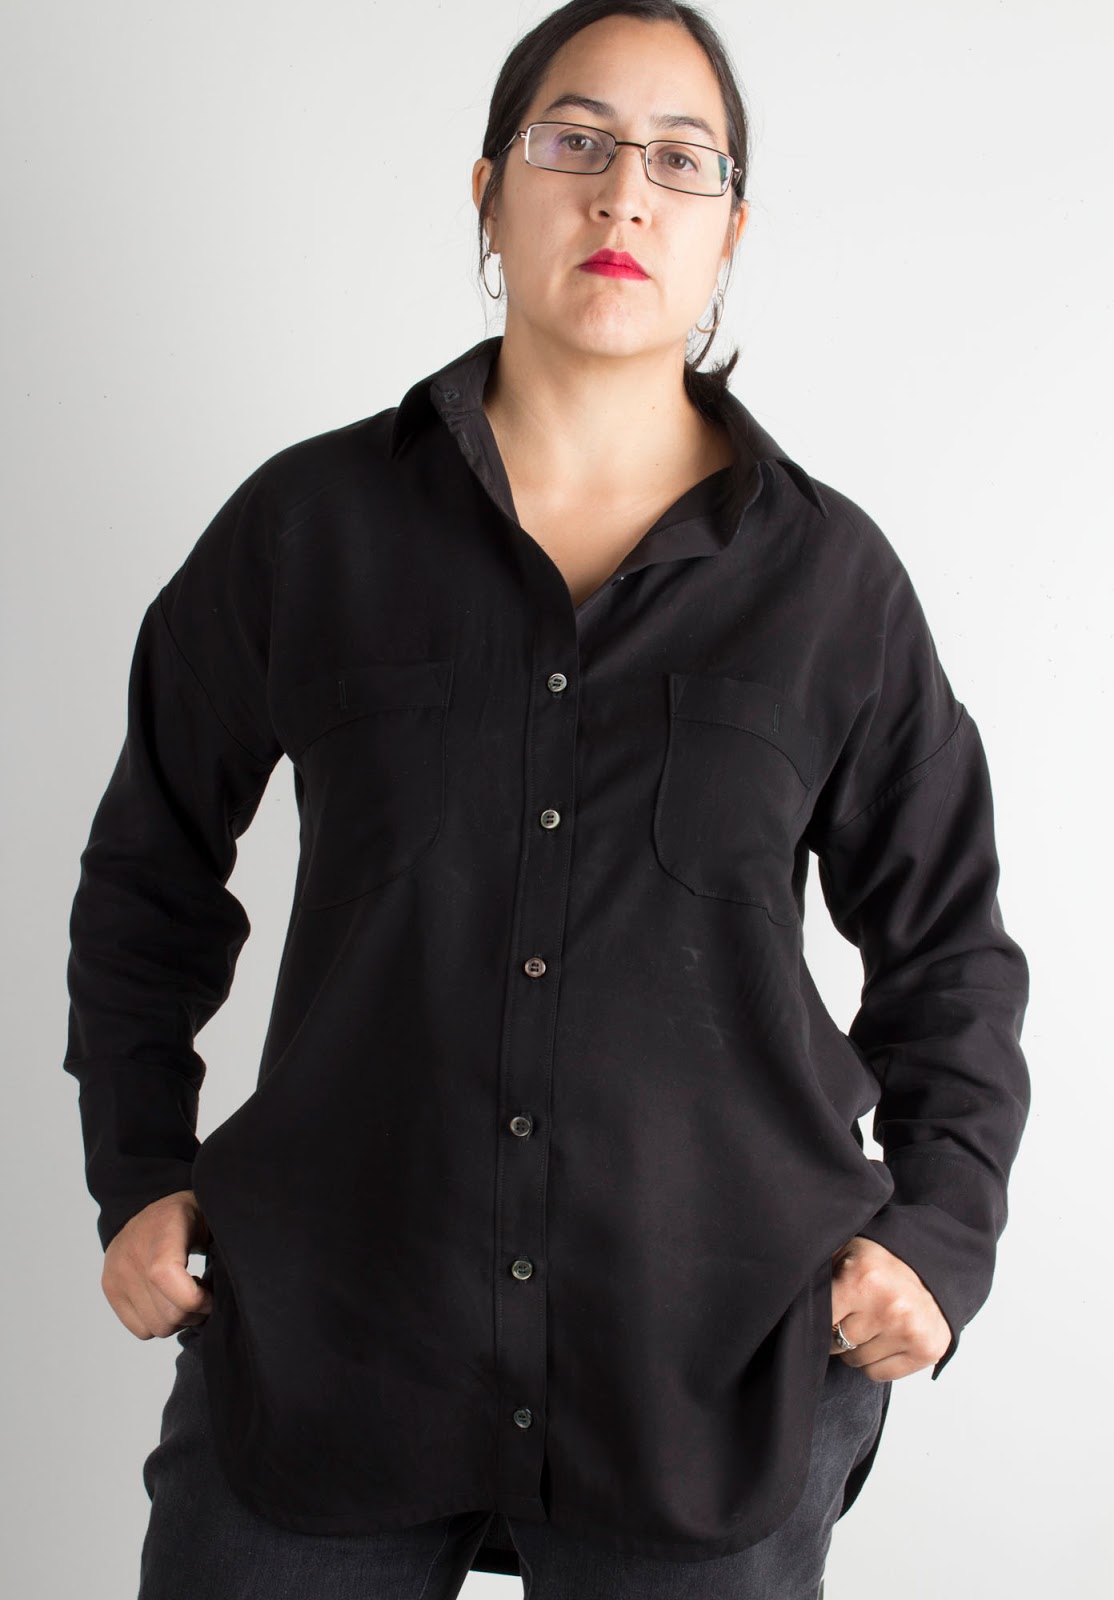
Cow Skull Kalle- Closet Case Files Kalle with Long Sleeve Expansion

Black shirts are the basis of my fall wardrobe, so when Heather announced sleeves for the Kalle Shirt, I couldn't sew one up fast enough. 


This one is made in black tencel from Threadbare Fabrics. I'm okay telling you that it is AWESOME fabric because I've already purchased some more for my stash. It is thick, smooth and silky and presses like a dream, sort of like a high quality matte silk charmeuse without the price tag. The tencel I've bought has varied widely in its qualities-- this one is by far the nicest I've seen.


I've already sewed the Kalle several times, you can read more about it here and here. To make this Kalle, I used my shortened tunic pattern in size 12.

I didn't muslin the sleeves, but I did baste on the sleeve and cuff to check fit. It fit perfectly. The sleeves might be just a tad on the long side, but I decided I liked them that way. So I removed my basting and sewed the sleeves in properly. The armhole and sideseam are finished with a faux flat fell, as suggested by the pattern.


In typical Closet Case style, the sleeves are an understated but cool design-- they have a super wide cuff with traditional tower plackets. I decided to put a double button on the cuff so that I could turn it halfway up.


I used some more of my favorite smokey mother-of-pearl buttons. With the double cuff and extra-long length of the Kalle, I used one whole shirt set and the leftovers from another set.


I sewed the inside yoke with a piece of silk from a roll end from Emmaonesock. I totally didn't realize this fabric described as a "rorscharch pattern" had bull's skulls on it, but when I noticed this I knew it would be the perfect secret detail for this shirt.

The jeans in these pictures are, of course, my black Closet Case Ginger Jeans.

I guess I should also say that purchasing the expansion pack makes this the most expensive pattern I've ever bought- $14 for the original pattern, and $7 for the expansion, no discounts. But this is now the 4th Kalle I've made, and I'll probably make more, so that is in its favor. Since the Kalle was the first shirt pattern I ever sewed, the sew-along was like a sewing course filled with super-useful tips for fuss-free shirt making, so that also is in its favor. Finally, this pattern fit my body without a single change (I didn't even make a muslin for the first Kalle)... and that's pretty invaluable. Of course, this last item won't be true for everyone, but this pattern does seem to work for a wide variety of body types.


I know it is such a stereotype for artists to dress in black... but I just can't help myself. Lately my self-chosen uniform has been black collared shirts with black jeans. Occasionally I wear a white shirt. Somehow I don't find it boring at all, and getting dressed has never been easier. This Kalle is a fun addition to my very small (but growing) shirt wardrobe-- just a little bit different, but still very classic and understated. 


Monday, October 23, 2017

Sewing Beautiful Basics: Liesl Classic Shirt in Black and White Linen

Button down shirts are comfortable and versatile-- who would have guessed? Certainly not me, based on my prior experience of ill-fitting, gaping, button-popping shirts.


To be fair, I've never really invested in a quality shirt, tailored for a woman. All of my shirts have been cheap, trendy models found on clearance racks. Bought on impulse, and just as quickly banished from my closet after the inevitable wardrobe malfunction.

Sewing up the Closet Case Files Kalle Shirt this summer (x3!) was a wardrobe-level revision event. I knew I needed a long-sleeve model to get me through the fall into winter, so I started looking for a classic shirt pattern. 

I thought I had what I needed in the Grainline Archer, which I had bought earlier this year in anticipation of wanting to make a shirt. As I was printing and taping, I also started browsing the HUNDREDS of reviews, and looked at the pattern in greater detail. To my surprise, there seemed to be quite a bit of dissatisfaction with the pattern, especially when sewn in larger sizes. Multiple people described the cuffs as being excessively large in the larger sizes. I also was a bit confused as to whether the shoulders were supposed to fit or be dropped-- the pattern description doesn't specify, they look fitted on the pattern model but many reviewers described them as dropped. Then, I realized that the pattern didn't include a tower placket for the cuffs, and that little bit would cost me an extra $10, on top of the $16 original pattern. The fact is, I can probably make ANY basic shirt pattern fit, and I could draft the features I want... but really the experience I'm looking for with a paid pattern is to have it fit and have the features I want with minimal fuss. At that point, I neatly folded away the half-taped pattern and stared searching for a new pattern.

I finally settled on the Liesl Classic Shirt, which is advertised as a completely classic shirt with all of the expected shirt-y details-- tower plackets, separate top and bottom collar pieces, etc. My only previous experience with this brand is the related Oliver+S kids patterns, where I have sewed the Art Museum Vest with great success. The fact that some Liesl patterns are produced in concert with Butterick makes me nervous that they'll exhibit the hated excessive ease problem, but there was no indication in the few reviews out there that this was a problem. 

Since it wasn't any more expensive to get the paper pattern, I went this route. I was sort of regretting it as I entered a second week of obsessively checking the mailbox, but finally it arrived. 

I made a few changes. I removed the front bust dart through the highly technical method of ignoring it, then removing excessive length from the front panels. I also graded out a size from under the armholes to the hips. I did a quick muslin, which confirmed that I needed a generous (1 inch) full bicep adjustment. I would have been surprised if this were not necessary-- tight biceps is a major reason why RTW shirts and jackets don't fit me properly. Other than the biceps, the fit was spot on-- the shoulders are just right, the width and length of the arms are perfect. The length of the shirt is also perfect on me (although I neglected to take any untucked photos).  I love the way the pleats are handled in the back... the two spaced out pleats are much more flattering than the classic center pleat, while still providing a blous-y effect.

Generally, the drafting of this pattern is fantastic. It includes separate pieces for the collar facing and the cuff facing, which is very handy. The markings on the tower placket pattern piece are very helpful for figuring out how to attach it. The pieces all fit together beautifully, and the markings are professionally done and easy to interpret. The pattern also includes cup sizes which I'm sure would be very useful for many sewists. 

After checking my adjustments with a second muslin, I sewed it up in black linen.


The construction was fairly straightforward. The instructions which came with the pattern were reasonable with good illustrations, but I opted to follow methods that I learned sewing the Closet Case Files Kalle shirt, such as using thread tails to pull out the collar points and Heather's alternate method of collar attachment.


I used a variant of the burrito method for the yoke construction, and cut a bit of scrap patterned linen for the inside yoke. 


The tower plackets came together surprisingly easily, although I had to resort to the sew-along photos to make sure I was getting everything right. The directions in the pattern for the cuffs had me scratching my head-- I have no idea what the directions were trying to describe, so I just did it the way that made sense to me based on other cuffs I've sewn.


The buttons are real mother of pearl shell buttons from The Thackery. I would usually buy buttons like that in bulk, but I loved having all of the different sizes in their shirt button sets. They are truly lovely and feel wonderful 


I am absolutely in love with this shirt. I wore it an embarrassing number of times this week- a black shirt is just always appropriate in my workspace. I know it is linen and the "rules" are to pack your linen away for the winter, but I don't intend to stop wearing it anytime soon! I just love how linen looks after it hangs to dry, and how it softens with wear.


And then I made a white one. Same linen, from Fabrics-store.com, in pure white. It was a pre-cut piece, so the cost was extra-reasonable!

For the white one I upped the ante a little and french seamed the armholes and side seams. The buttons are extra thick mother of pearl, from The Thackery. 


The one thing about the black shirt that I'm not fully happy with is the way the front and back tails join. The method in the pattern just has you join them after hemming and sew a little reinforcing triangle. While I did my best tucking in all the little ends, some are already starting to escape and fray. So for the white linen shirt, I decided to cut a softer curve and finish with self bias binding-- very similar to the way Kalle is finished. I'm much happier with this finish-- together with the french seams, it makes the inside super clean, no chance of fraying.
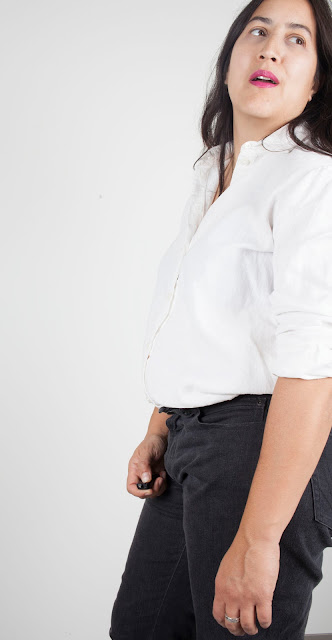

So far so good with the whites I've been adding to my closet. I do really love wearing white. I'm not sure that they will last though... just this weekend I had a bit of a scare. I noticed colored spots on the freshly washed whites I was hanging to dry, and realized that I must have gotten maker on my hands after picking up the kids' drawing supplies. Fortunately it was washable marker and just washed right out. However, I am thinking that I might sew my next white shirt in cotton thread, in anticipation of the need to dye it sometime in the future!


I'm also wearing my previously blogged Ginger Jeans in these photos. I did make one huge change since I blogged them. They did in fact stretch out unacceptably with wear, and I was just going to take in the side seams, but then I had the brilliant idea to take the excess out of the center back-- effectively doing a swayback adjustment. I took a full two inches out of the center back waistband and huge wedge out of the yoke. This improved the fit dramatically... the jeans are now comfortably relaxed without feeling like they are going to slide off. I always do swayback adjustments on fitted shirts and dresses and even coats... I don't know why it never occurred to me that my jeans would need one too!


I'm loving these shirts. You can't get much more basic than white and black shirts, but they are all I want to wear right now. If I'm in the mood for embellishment I fulfill it with bright lipsticks and jewelry. The necklace is a thrift store find and the lipstick is Mac Breathing Fire, which was a freebie and I love it!

Thursday, September 21, 2017

Velveteen Rabbit Pattern is available on Etsy!

When my daughter was born, a family friend gave us a copy of the Velveteen Rabbit. Of course I had read it as a child, but I as a new mother the idea of something that is so loved that it becomes "real" struck me as all the more poignant. 


So when I started making home-made toys for my kids, the Velveteen Rabbit was high on my list! 

My first pattern, the Bunny Lovey, is very sweet for a baby, but the Velveteen Rabbit is a toy that a child can play with throughout childhood. It is soft and cuddly, but also is wonderful for imaginative play or for taking a place at the tea-table. 

Love Sewing Magazine noticed my blog posts about my first versions, and they asked if I had finished the pattern. Last spring, in cooperation with Love Sewing Magazine, the pattern was released in the spring of 2017. 

Now, I am happy to be able to offer it to you as a downloadable PDF pattern on the Unlikely Handmade Store on the blog and on Etsy. The download includes the PDF pattern, which you can print on your home printer, and photo-illustrated, step-by-step instructions in a downloadable PDF. 

This fall I'll be doing a little sew-along on the blog! So get your pattern and your fabric ready, and we can make up a Velveteen Rabbit in time for the holidays!