Sunday, March 13, 2022

McCalls m7969 in linen

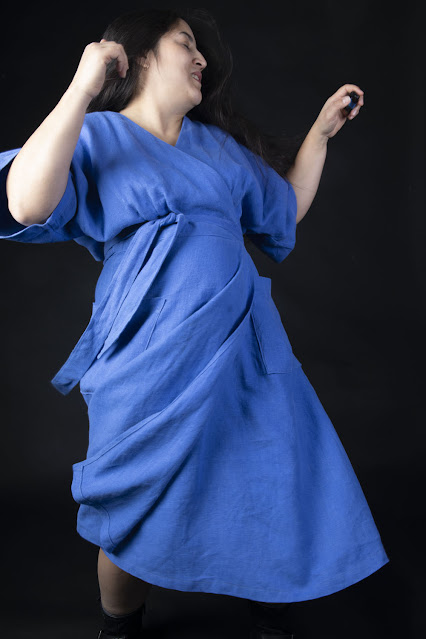
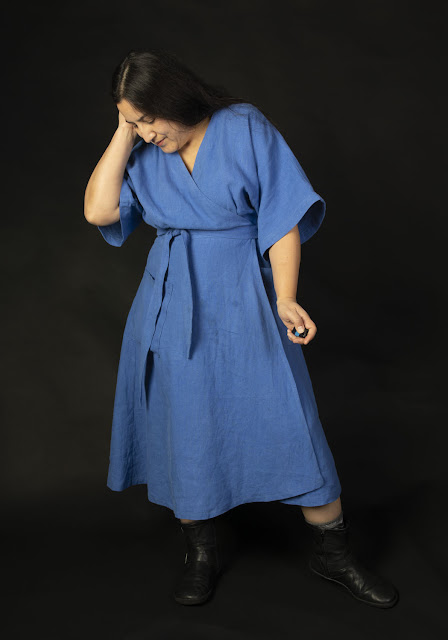
Okay, spring can come now, I'm ready!  


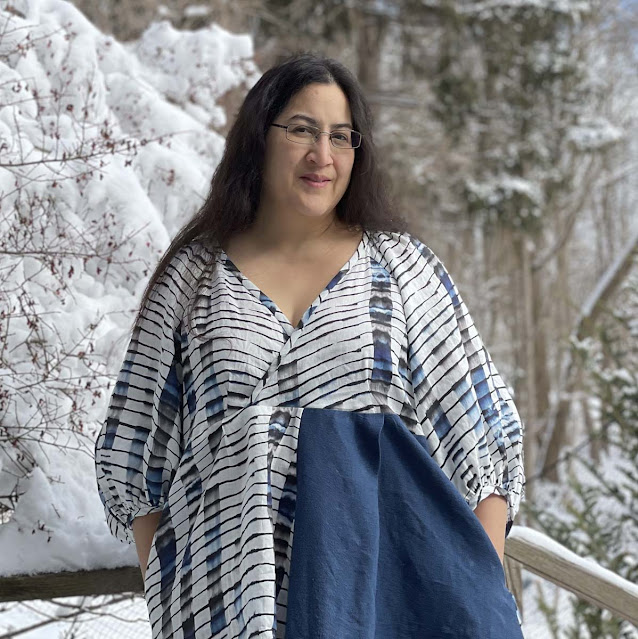
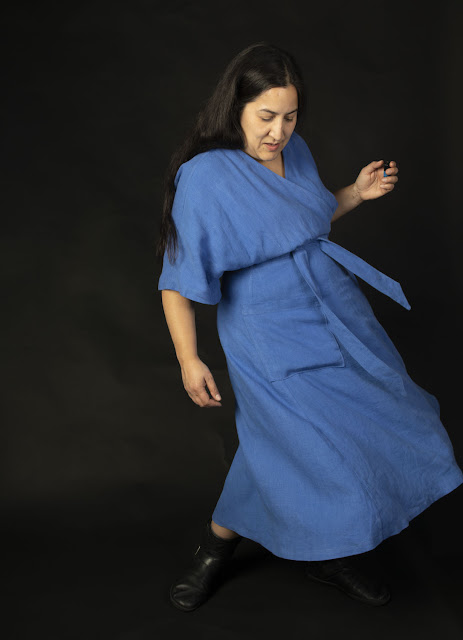
This is m7969, which is must be something of a blockbuster hit for McCalls, it is all over Instagram. With sweet sleeve shape and easy, flattering silhouette that seems to look good on everyone, I was smitten and had to give it a try. 

I purchased a paper pattern months ago, but the yellow tissue and newsprint directions were bringing up memories of frustration and disappointment from my youthful attempts at sewing. I also just really dislike working with that fragile, crinkly tissue paper. When Minerva made the PDF available with their newsletter, I finally felt empowered to move ahead.

Of course I made View A (like everyone else!) but I subbed in the skirt from the Closet Core Elodie wrap dress because I don't like gathered skirts. I can't really even say why, but every time I make a dress with a gathered skirt, I wear it once and it sits in my closet until I change it out.

After looking at other blogger's versions, I decided go for sewing to my measurements, which seemed likely to turn out pleasantly oversized. That put me at an M bust and L waist, which are in two different PDFs (or two different pattern envelopes!). I'm ALWAYS right in the middle of size splits, I hate it when companies don't overlap their sizes. So... I printed off the M and just guessed at where the waist would be on the L. 

The one mod that many bloggers have done that I think is very smart is making the front wrap a little more modest. I know if I do this, I'll get lots more wear out of the dress, rather than saving it for some rare (since covid, non-existent!) sexy date night occasion. I extended the front triangle 3.5 inches and drew a straight line to the shoulder, then extended the front bindings (by a totally arbitrary amount, and I just cut off the excess). I also shortened the sleeves by an inch at the shorten/lengthen line. 

The linen print was a birthday purchase from Emmaonesock several years ago. I didn't have quite enough to cut out the quite full skirt of the Elodie, so I pulled out a remnant of navy linen to complete the skirt. 

Of course I added POCKETS-- having pockets in all of my clothing is one of the great advantages of sewing my own clothes. Designers, take heed-- us busy women need options for pockets. Since this pattern didn't include any pockets, I borrowed the divinely deep pockets from the Closet Core Amy jumpsuit and added them at the side seams. 

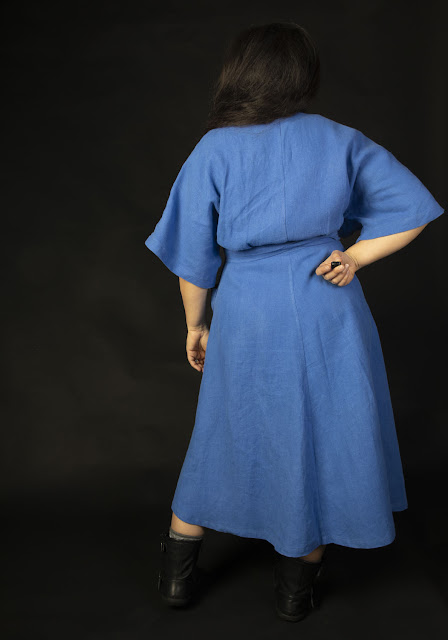
I started out blindly following the instructions-- but after considering it, I ripped those first seams and went with my own order of construction. With this fine linen I made french seams throughout, starting with the raglan seams and doing the underarm and side seams in one fell swoop. The instructions called for an inordinate amount of basting-- who does that, and why cut the neck binding on the bias, only to interface it on the grain? I didn't bother with the interfacing, I just treated it like any other bias bound neckline. I also didn't hand- slip stitch the bindings as suggested-- I might have if this was a solid or a slick fabric, but with a pattern and toothy linen, stitching in the ditch to secure the binding worked just fine. From taping the PDF to hemming, I had it done in a day. 

It seems that the binding was meant to be shorter than the neckline to have the effect of snugging in the wrap. Since I modified the front for more coverage, I sort of missed this effect, but ended up compensating when baste-fitting the front by pulling down on the bindings until the front laid flat with no gaping. I also sewed the waistline about an inch higher in the front, and added small pleats under the bust on the bodice and on the skirt. 

In terms the quality of the pattern-- I really think McCalls missed an opportunity to impress the sewing community. The PDF was sort of baffling-- wrong pagination, and how exactly were you supposed to put it together? No instructions on this that I could find, I didn't see any scale markings to check my printer scaling-- I eventually decided by trial and error that I was supposed to line up the little diamonds that I could hardly see through opaque printer paper, and I just had to trust that my printer was not scaling inappropriately. The PDF instructions did seem somewhat improved from what I remember of old McCalls patterns, but still not the kind of considered, tested construction that many Indie designers have perfected. 

Fortunately, it is a forgiving pattern in terms of fit and I have lots of experience sewing now so I can compensate for poor instructions, and the dress turned out beautifully. The sleeves are everything I was hoping for-- voluminous and elegant in this lightweight linen. It is just so cute and comfy, and I'm ready for spring as soon as Mother Nature is!

Saturday, March 12, 2022

Altering boots for wide calfs-- the Belenka Sierra

I love knee high boots, but as an avid cyclist, skiier, and joggger, I have always had trouble fitting my calves into them. Boots marketed as "wide calf" are often of lesser quality, have unsightly giant elastic gussets, or are just too huge for me. This problem has only intensified now that I've transitioned to minimal/barefoot footwear-- there just aren't a lot of choices in knee high boots. 

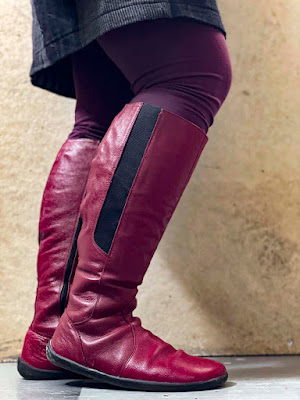
This fall I purchased the Belenka Sierra, and after getting them professionally stretched, I could zip them, with difficulty. But then, ski season started, and when I tried them on in mid-January, there was absolutely no way I was going to zip them. 

I considered zip in gussets, and they seem like a good idea for some people. However, I can't see how they won't be sort of fussy and leave unsightly gaps, and having volume added only on the inside seems like it would be pretty lopsided. And they are quite expensive. 

So I decided that I would be bold and alter my boots to fit. I bought a piece of red leather on Etsy, then used dark red dye to get the color even closer to my boots. 


Then, using the measurements of my calf, I designed a pattern for an insert that followed the shape of my calf. I decided to put the insert in the back of the boot where I needed the most volume and where it would be the least disruptive to the shape of the boot. 


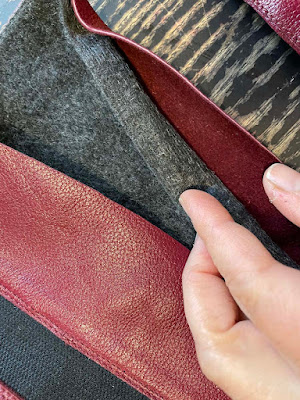
The boot is lined with wool, so I cut the gusset out of leather and wool, and glued the two together. Then I cut out a strip from the back of the boot and inserted the new gusset in between the leather and the lining. I played around with using various kinds of clips and adhesives (but I lack a true leather adhesive). In the end I just held it in place, and sewed it first across the bottom of the gusset, then up each side. 


My first try was not perfect-- the gusset was actually too large. I unpicked it adjusted the size, and resewed it. When I was happy with it, I sewed a second line of stitching to secure it (also, the boot is double-stitched in most seams, so it is in keeping with the aesthetic). 

I used a leather needle in my regular sewing machine, and matching gutterman thread. Fortunately the leather fed easily without sticking. 


Having boots that actually fit my calves is amazing! I've never owned boots that I can actually zip up without effort, over socks or leggings. I will totally do this again if I purchase another pair of knee high boots. 


Sunday, November 7, 2021

Be Lenka Sierra Review: Barefoot Minimalist Riding Boots

Update: I ended up altering these boots to fit my calves better. See the blog post here.

----------------------------

Lately I have been very into barefoot or minimal style shoes. Everyone's feet are different, but for me, switching to barefoot style shoes has made a huge difference in my long-term foot pain and problems. 

If you are not familiar with them, "barefoot" shoes have absolutely no heel or heel lift and are sometimes called "zero drop." They also have a foot-shaped toe box so that you can spread out your toes fully and a thin sole with minimal padding that allows your foot to have more of a sensation of "feeling" the ground. 

The first barefoot shoes I tried were athletic shoes to help with my foot pain when walking and running for fitness, but I soon found that switching all of my shoes to barefoot style shoes helped my feet feel better on a daily basis. 

My job as a professor involves standing and walking for much of the day, and wearing barefoot shoes has really helped me to stay on my feet for longer with less foot pain. It seems counter-intuitive since arch support and padding seem like a good idea when your feet hurt and your arches ache, but I've tried so many of the "orthopedic" brands but none of them really helped in the long term. 

I was really nervous about the footwear I was bringing to Europe with me since the amount of walking I do when teaching in Rome far exceeds my lifestyle in the US, but I was very happy to find that my barefoot shoes have kept my feet happy and pain-free.

The other advantage of being in Europe is that there are barefoot brands that are more accessible here. Most brands will ship to the US, but often do not accept returns or the cost of shipping for returns is prohibitive. 

My latest purchase has been the Be Lenka Sierra, a leather riding boot by a manufacturer in Slovakia. I just couldn't wait to share them with you!


Some Be Lenka shoes are available from Anya's Shop for free shipping and returns in the US. I had purchased the Be Lenka City in suede from Anya's Shop before coming to Europe, and these are one of my most comfortable shoes. For days when I know I'll be walking for a long time on varied terrain, these are my shoe of choice, so I knew that there was a good chance that I would like other Be Lenka shoes. Anya's Shop carries the Be Lenka Sierra, but they don't currently have the Ruby and I was smitten by this eye-catching color. 

My feet are 25.5 cm long and I ordered my usual size in BeLenka, a 41. My calves are wider than the measurements on the size chart-- they measure about 42cm, and the 41s have a calf circumference of 38.2. However, I have successfully stretched boots to fit my calves in the past, so I decided to give them a try.  Since I'm in Europe, returns would not be terribly difficult if necessary. 

When my Be Lenka Sierras arrived and I first put them on the heels felt very stiff and uncomfortable, and I could not zip them up. However the foot box was a perfect fit for my toes in both width and length. 

After a bit of wearing them around the house the heel started to feel more comfortable, and some stretching of the elastic caused a bit of relaxation, so with some work I was able to carefully zip them up. Wearing them around the house I have continued to break them in, and today I wore them to lunch at a friend's house. They are still quite tight in the calf, but very comfortable in the foot, like wearing a cozy slipper. 

They still might require a trip to the cobbler for some calf stretching, but the fact that I can wear them gives me hope that only a little bit more space is needed to make a perfect fit on the calf. In some ways this is probably ideal since the boot with time will have a perfect fit with no sagging. 

I am very happy that this boot fits, since I very much missed having a riding boot last winter as I was transitioning to barefoot shoes. 


Saturday, November 6, 2021

Zaqq Equity Brogue- Barefoot Chelsea Boot Review

When I was looking for a great barefoot Chelsea boot, I came across the brand Zaqq. Their Equity Broque Cognac was exactly what I was looking for-- a beautifully made chelsea boot lined with leather in a zero drop, thin sole, natural foot shape shoe.


I tried to order this shoe from the US but I was unsuccessful, as they required me to send my SS number and I am not comfortable giving this to vendor. When I knew I would be coming to Europe, I was excited that I would be able to try this boot. 

My foot is 25.5 cm, so after watching their videos and looking at the size chart, I chose the 44. This boot was massively too large on me, so I sent it back and ordered the 42. 

The 42 fits in the length, but the boot is very wide in the ankle and heel. Both of my heels slip when I walk. I tried adding a wool insole from other shoe, but this does not fix the problem. You can see how baggy these are on my foot in the photos.

I have a fairly wide, high volume foot, but these are still too wide for me and they are on their way back. Zaqq has been good about honoring their return policy, but they do not pay return shipping outside of Germany.

Interestingly, my husband also ordered a pair of Equity chelsea boots. The size he chose based on measurements was too small for him, so he ordered a size larger, and this fits his foot very well. He has a very high volume foot in both the ankle and heel. 

Happy shoe shopping!


Tuesday, October 26, 2021

Gluten Free in Rome: Mama Eat Lab Review

Hi all! If you follow me on Instagram, you know that I've been in Rome two months now, and I have another month to go. Sooo, not much sewing... but if you are interested in the wardrobe I brought with me, I've been posting on Instagram and I'll probably do a round up here soon. 

However, I have been doing a lot of great eating... gluten free eating!

Do you remember back when the lockdowns started, how we all stocked up on comfort food like bread (or tried to bake it, emptying out stores of baking products!) Well... I did that. For a couple weeks I ate more bread products than I have for many years, and felt terrible. I've always tried to deny that gluten was my problem, but this experience seemed to make engaging it unavoidable. 

So I tried avoiding gluten... and it was amazing. Within weeks, I felt like my digestive system had reverted the kind of normal function that I remember from my early 20s. For me, it was more effective than all sorts of other diets and supplementary regimes I've tried over the years. I've been practicing a gluten free diet ever since. 

I don't have an official diagnosis, and I'm not really interested in one. My symptoms are not serious enough to really warrant long and arduous discussions, testing and isolation diets. I'm also very open to the idea that I'm not really allergic to gluten and it could be some element of the mass production and continuing refinement of wheat in our culture. I found it very interesting that on one of our trips, I ate a whole meal of ancient wheat grown, harvested, and prepared on a farm in Umbria with no noticeable intestinal effects. Alternatively, during a recent cooking demo, I consumed a commercial wheat pasta masterfully prepared into some of the most delicious Carbonara ever tasted and paid a price afterwards. 

In any case, my body is happier when I forego gluten, so I have been seeking out places to enjoy Italian cuisine gluten-free and I've had some wonderful culinary experiences that I'd love to share!

Today after an incredible 3-hour tour of the Vatican Museums, we stopped to refuel at Mama Eat Lab, Borgo Pio, 28.

This is a small place, a few outside tables and about eight 4-person tables. This was my second visit, and we had no problem finding a lunch table with no reservations, although occupancy rose and fell over the time we were there. Clearly, people had heard about it and were seeking it out! There are English menus and servers are comfortable speaking English, but they are also happy to speak Italian. Prices are pretty reasonable, about what you'd find at a comparable non-gluten free restaurant.

This is a sister restaurant of Mama Eats Trastevere, which is an old standby of the gluten-free crowd. The Borgo location has a smaller menu and focuses on "street food" which can be take out or served at the table. You can also get pizza or pasta and various other primi piatti, all gluten free. They have gluten free beer and reasonable wines available, as well as the usual soft drinks and sparkling or still water. 

The appetizers are amazing, you could definitely make a whole meal of them. This time we got two of the 25cm Arancini, Pistachio and Rago. 


Usually arancini in Rome are round, fist-sized affairs. The long format is sort of unusual, but it does seem to maximize the delicious crispy gluten-free crust. Inside there is perfect risotto around a cheesy filling. Just right for two to share! Our family of four rapidly consumed the two long arancini down to the last crumb. 

Also on the appetizer menu are Crocchè (very similar to the long arancini, but with a potato base and delicious fillings like mushroom) and fried pizza, both of which we tried last time and were wonderful. 

For main dishes, we sampled a few different items. 


Polpette al Formagio, meatballs  with cheese and french fries.


Frittura di mare: fried calamari, anchovies, and shrimp.

And the old standby, the Margherita Pizza.

I especially enjoyed the pizza, the crust was light and fluffy in an almost Naples kind of way that I have yet to enjoy in a gluten-free pizza. 


For dessert we had Scunizielli Nutella which are fried pizza strips drizzled with chocolate hazelnut. Delicious! You can get them in a paper cone to go or on a plate. A single serving was more than enough for our family to eat their fill of sweet fluffy fried dough. Last time we had fresh donuts with hazelnut sauce... these were out of this world, but they weren't on the menu today. I'm going to have to keep a watch on the menu, they are worth going back for!
Thursday, March 4, 2021

Belatedly loving the Burnside Bibs in Telio Silky Noil

Y'all know by now that I overalls are my fave. If there was any holding back, the quarantine did that in... why dress to please anyone but myself? 

I've made a countless number of Closet Case Jenny Overalls (at least eight!) and a very well loved pair of Helen's Closet Yanta Overalls. With spring on my mind, if not yet in the weather (it snowed again this morning!) I was thinking about making a lighter weight, more jumpsuit-y pair of overalls. Enter the Burnside Bibs by Sew House Seven!


While I have long loved all of the gorgeous Burnside Bibs sewn by the many talented makers I follow, I've been skeptical of how much I would like the clever tie system that distinguishes the Burnside Bibs. Even in the more streamlined versions, it tends to produce gathers across the bum, which I don't care for on my own body. I also have a quiet dislike of dangly ties, which tend to end up in the most inconvenient places when utilizing the facilities in a rush. After careful consideration, I decided that both of these minor flaws could be avoided with a few minor changes. 


This was my first ever Sew House 7 pattern, and any flaunt with a new pattern company is a bit risky. However, I was pleasantly surprised to discover that the large format files were made for printing on a 36 inches wide printer rather than the usual 50 inches or so. The printers I have access to are 44 inches wide, so this worked out well.


The instructions, for the most part, were very clear and a joy to follow. The only bit of confusion I encountered was in the changing seam allowances, and there was one point where I seriously could not figure out from the instructions what the seam allowance was. However I persevered in wildly guessing and it seemed to all work out fine in the end. 

I didn't toile, I just sewed up my size via the measurements and made adjustments on the fly. I made the closer fitting view, with pleats in the back. I ended up raising the crotch half an inch and trimming an inch off the top of the bib, but other than that I made no changes. The invisible zipper went in without a hitch. The method of sewing the waistband and facing was very clever and left a very clean finish on the inside. 


I left the front of the straps as intended to keep the clean lines of the front bib, but instead of long ties through belt loops in the back, I sewed buttonholes into the straps and buttons to the inside back of the waistband. This makes the straps somewhat adjustable without the use of ties or other hardware. I don't need to unbutton a strap to get the overalls in and out, so this works out very well. 


To manage the extra ease that the pattern manages with the ties, I made side straps that cinch with d-rings. This generally works well, but it made slightly more awkward than it should be in that I was lazy and used the left over straps for the cinching, and I didn't have any D-rings smaller than 1 inch. Therefore the D-rings tend to twist annoying when you cinch them. I may at some point re-sew them with either smaller D-rings or wider straps, which would solve the problem. 

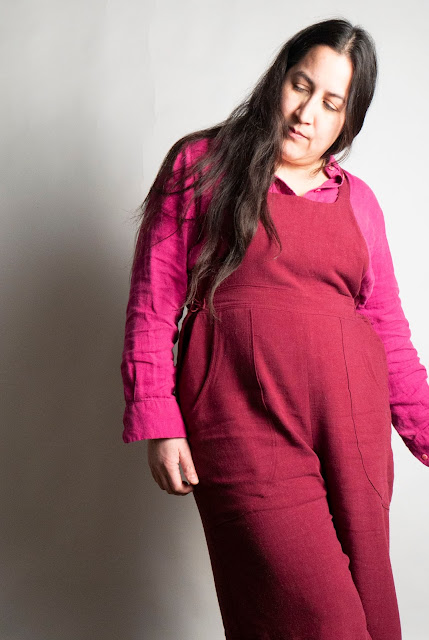
My fabric is a very drapey linen-viscose noil by Telio. Since I was going for a lighter, more flowy jumpsuit look, I think this achieved that look and feel, although I think I'd also really enjoy the burnside bibs in a slightly beefier fabric, perhaps a light denim or heavy linen.  

I'm wearing them here with a fushia linen Liesl Classic Shirt, but I'm going to be enjoying trying them out with all sorts of tops in my wardrobe, which is part of the fun of overalls! I definitely think there will be more Burnside Bibs in my sewing future, it was a quick and satisfying sew. 

Sunday, November 29, 2020

Closet Core Patterns Elodie Dress

 I made an Elodie Dress by Closet Core Patterns!


I made it in bright blue 7 oz linen from The Fabrics-store.com. I just love how the heavier linen falls in this dress, it is swooshy and fun to wear. 

Constructions and fit-wise, there isn't much to say, it all went smoothly, as usual with Closet Core patterns and my body. I made the 0-20 draft and graded to my measurements (14 bust and 18 waist, maybe, did not grade the hips due to the flowy skirt), and it fits beautifully! I have not had much luck with wrap dresses and tops even though I have made many of them, but this one fits me perfectly, and the front wrap portion stays closed on me. 

So here are a few more fun pictures. Make and enjoy!


Tuesday, November 24, 2020

Winter Running Clothes: Greenstyle Pacific Pullover, Jalie Marie-Claude, and Helen's Closet Avery Leggings

Exercising during a pandemic continues to be a challenge for me. 

My gym is now open, but has such limited hours, you have to sign up in advance, and you must wear a mask and social distance. I just can't see doing an intense HIIT workout on a spin bike wearing a mask... I'm breathless just thinking about it. Further, the thought of being indoors in AC with potential symptomless virus carriers exchanging molecules of air... icky. 

I am eternally jealous of everyone who has the funds and space for a home gym! I have managed to secure a few random dumbells by watching Dick's Sporting Goods websites and driving hours out of my way, but it is a far cry from satisfying my workout needs. 

So... back to running. Theoretically, one can run in any weather, at any time. I happen to live right across the street from a lovely asphalt paved 2.5 mile loop (with additional connected trails for longer runs and variation. It even has some winter maintenance, which should make it viable even if it snows feet at a time. 

However, one needs the proper gear... which has enabled a flurry of sewing!

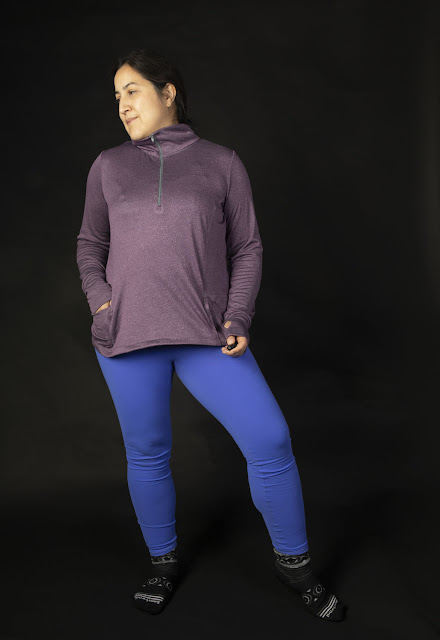
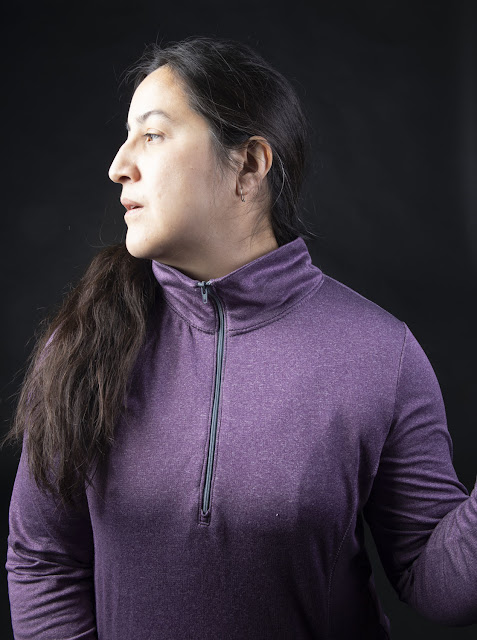
The quarter-zip top is by far my preference for running, or any sweaty sport. That little bit of speedy ventilation over the chest makes such a big difference. Years ago I bought a pattern for such a top, one of the few on the market, but the muslin I made showed fit problems and the instructions for the front zip ended in a hot mess. I still have this pattern and perhaps should go back to it at some point... but no time for that right now. 

Instead I opted for the Greenstyle Pacific Pullover... which has a really well done sew along by Sharon at sweetmamalife.com, including video instructions. LOVE this video for installing the zip on the collar variation, it has taken this skill from insurmountable to totally doable. I also love pattern companies that post pictures of LOTS of tester garments... this really helps me to see how well the the pattern works for different bodies and different skill levels. I had a really good feeling about the front zip option since so many testers, some of them obviously newer to sewing, had excellent results. 

I was so confident that I jumped right in with a Polartech power wool fabric that got at a great deal on Etsy from Two on Two off that I've been hoarding for years. I graded by my measurements (wider at the waist and hips) and it was perfect. The front zip went in perfectly, don't think I even pulled out a seam ripper. 


Changes: I added light knit interfacing to the collar... both sides! It seemed too floppy without it. However the instructions for adding twill tape or grosgrain ribbon to the collar give a beautiful finish, I really love this. 


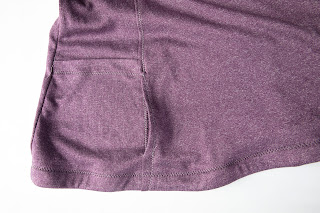
I was greedy and made both the kangaroo and panel pockets, and I think I got away with it. I love the technique for the kangaroo pocket... but I might skip it for future running tops since I don't need the extra padding in front. 


The thumbhole cuffs worked soooooo beautifully in this fabric.


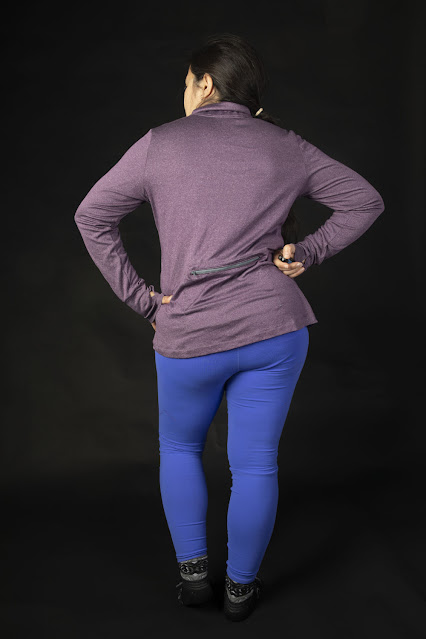
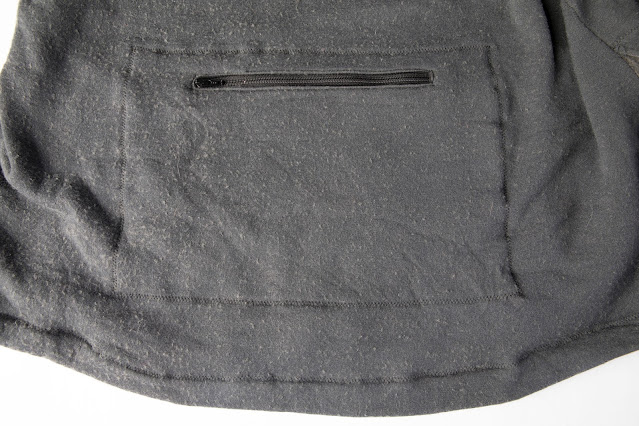
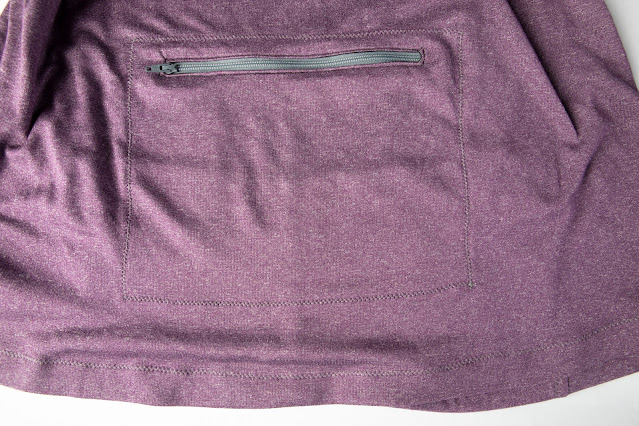
Later, after running in it, I belatedly added a back zip pocket... which is my preference for carrying anything (phone, flashlight, etc) since it helps to balance the weight. The pocket is similar to making a welt pocket (usually I use silk organza for the opening so that I can see my markings underneath) then you sew in an exposed zip. I just sewed a rectangle of fabric over the zip area to enclose the pocket. 


Love this top! It is super light weight, but actually surprisingly warm for its weight. 

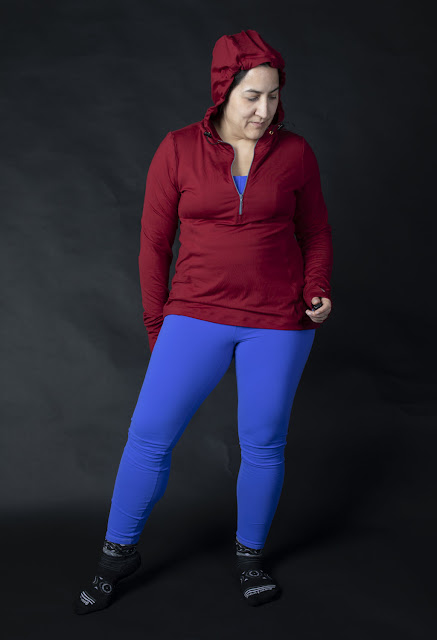
The next one I made was a hoodie running top. I've always wanted a hoodie running top, but I've never purchased one since it seems sort of impractical and they tend to be expensive. 

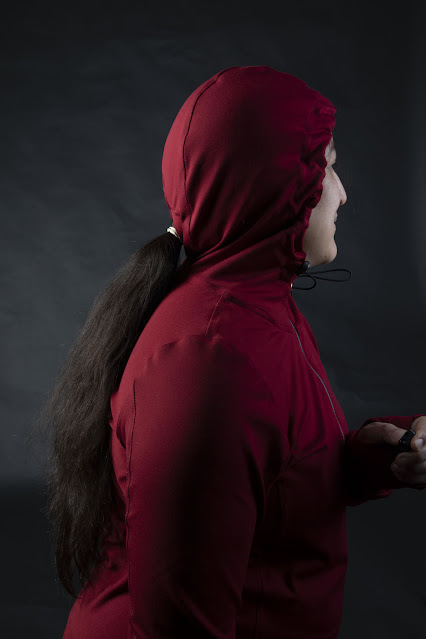
I decided to use the hood from the Jalie Marie Claude on the Greenstyle Pacific Pullover. The Marie-Claude hood looked like a more fitted hood. I used the center front marking as a guide to skip the overlap, and it seemed to fit pretty well. 


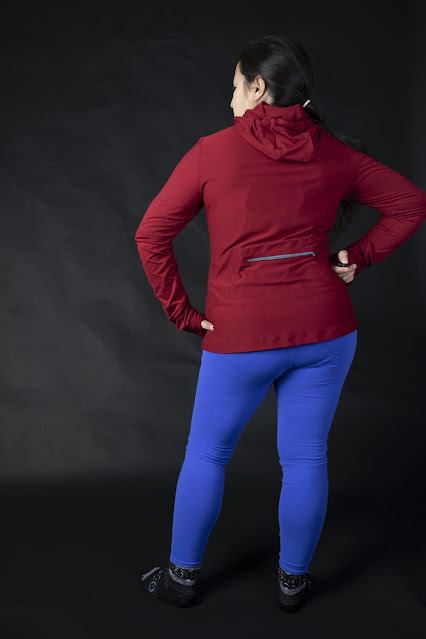
After running with it, it wouldn't stay in place so I added a drawcord, which fixes the problem. I also did the 3/4 zip, thumbhole cuffs, and a back zip pocket (of my own devising). 


This knit is a dry-flex fabric from thefabricfairy.com and I LOOOOOVE it, it is just like one of my old RTW running tops from Moving Comfort. 


Add caption

I made the pony-tail hole in the hood, just to try it out. It is growing on me! If you are making the Jalie hood... it is a two layer center panel, and the instructions have you use the two panels to make the ponytail holder seamless. Instead I used the two center panels to enclose the seams on the hood, then made the ponytail holder using the largest buttonhole my machine was capable of. 


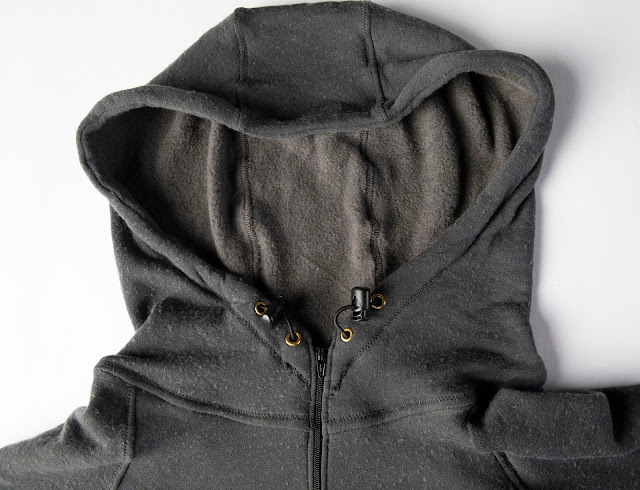
When I saw this wool stretch fleece I hit BUY in a hurry. I just love natural fibers, and technical natural fibers really interest me. This wool is incredibly stretchy and cozy, I just love it. I have to say that when I prewashed it, the surface got sort of pill-y... not exactly pills, but it looks like bits of the fleece have adhered to the outside. This doesn't affect the performance, but it does marr the surface a bit. 


This hoody is WARM, so warm that I have yet to complete a run in it. However it is great for convincing myself to go out on a cold dark run (I run during the week at 5:30am, which is pitch dark and generally rather cold). And if I use it as a warmup hoody, it is pretty easy to just tie around my waist when I get too warm. 


In terms of fit, I cut and sewed my measurements, and it worked out mostly fine! If I was making this and wanted a truly form fitting fit, I would probably size down. 


I added the front 3/4 zip from the Greenstyle Pacific Pullover, and used their instructions for inserting the zipper into the hood. I also added handwarmer pockets, sewn like the pockets on the Mini Nova from True Bias... since I've recently sewn that pattern. It's a sideseam pattern pocket that is one-layer, rather than two, to reduce bulk. 


Here's my usual back zip pocket, made the same way as the previous pullover. The inside is continuous fleece, since the rectangle of the pocket is installed with the fleece on the inside. 


The thumbhole instructions on the Jalie use a single-layer method, which was perfect for the fleece. i might have deliberately installed these to cover more of my hand above the thumb, since the sleeve are rather long and help enable my need to keep my hands warm without actually carrying gloves. 


I once again used a drawsting to cinch the cord. I put in a double grommet, so that I could make a "hands free" hood cinch that I've noticed on RTW hoods. The other end of the elastic cord is sewed into the seams, so that when you pull the cord through the toggle there isn't any loose end hanging around. 


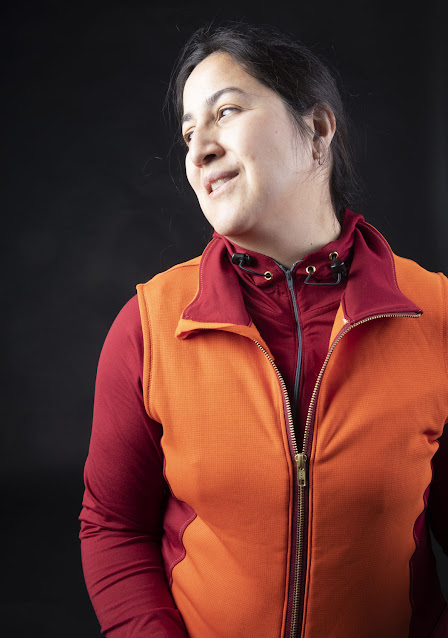
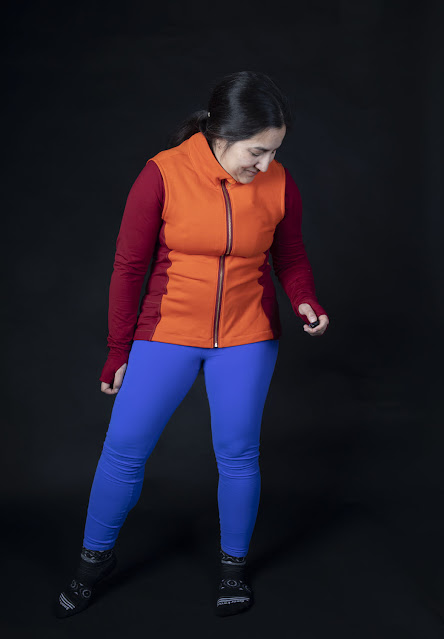
Top #4 is a windproof vest! I've always wanted a windproof vest. 


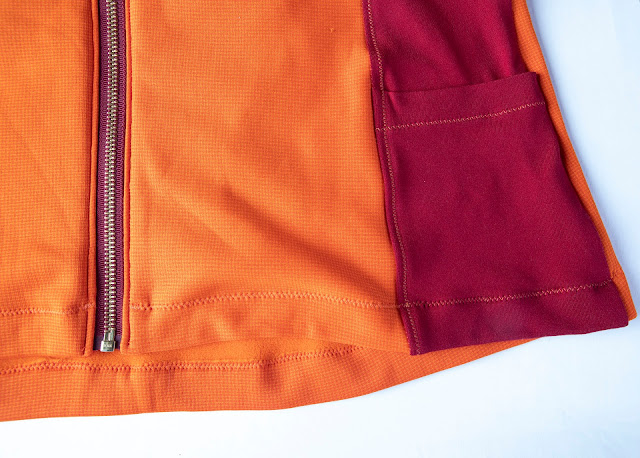
This fabric was from The Rainshed and was surprisingly stretchy... on the order of 25%.


I made the Greenstyle Pacific Pullover, sleeveless, with a full zip (not an option on the pattern, but not difficult to figure out.)


I made some rookie mistakes... separating zip is necessary for this varaint! Then I attempted to tear out the zip, which just tore my fabric. After cutting a new right front panel, I was good to go. 


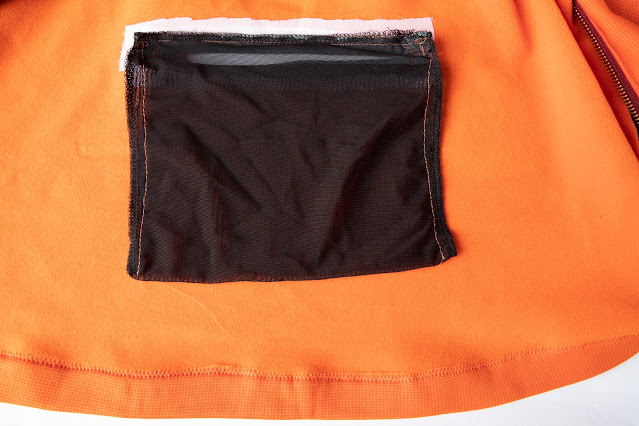
I made a back zip (used fusible interfacing to make the welt hole and  a mesh pocket bag this time).  


The only matching zip I had was metal, so I also made a chin guard. 


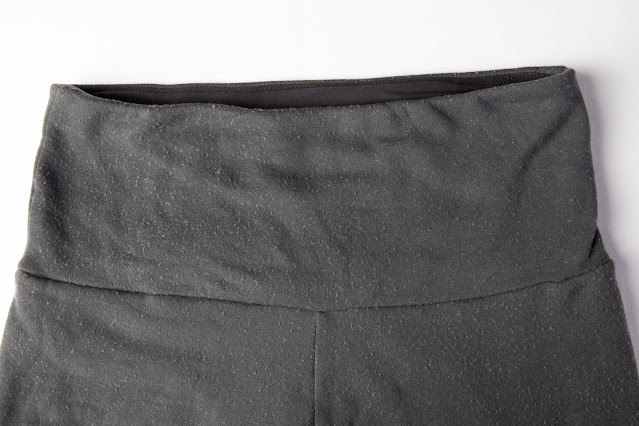
So just a few other elements were needed for my winter running wardrobe. I needed warm tights, so I made the Avery leggings in Wool Powerstretch Fleece. I made them a size larger and a bit longer, then ended up taking in the seams on the waistband back to my original waist size. One layer of the waist is powerstretch, the other is regular heavyweight legging supplex, and the elastic is 3/8 inch elastic pulled to provide a bit of support. 


I've worn these on two cold runs so far, and they are awesome! No sagging yet. 


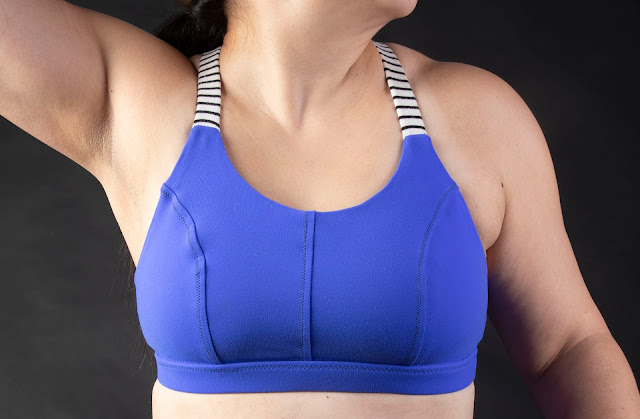
Another addition to my wardrobe... another Greenstyle Powerbra. These are awesome, and what else is one to wear under warm running tops. In a pinch, they look great with high waisted tights. 


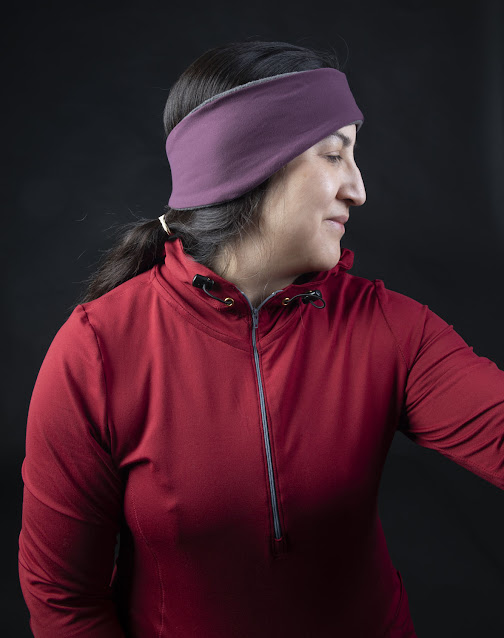
And finally... a running headband. Free pattern. Mine is wool fleece on one side, and Dry-Flex on the other.