Wednesday, April 13, 2016

Ginger Jeans: Back Pocket Design Inspiration

If you follow me on instagram, you know I've finally cracked into that Cone Mills denim and embarked on the famous Ginger Jeans journey. Whoo-hoo! 

Making a particular wardrobe item causes you to look pretty deeply at the design choices and details. There are lots of those on jeans that we just take for granted-- one of the big ones is the back pocket. The pattern suggests very early in the process that you might want to add a design to the back pocket, but beyond interfacing, the choices are left up to you. That's always a both exciting and overwhelming for me!

Faced with a blank pocket, I decided to do a quick internet survey and share the results with you. A special thanks to the Jeans Pocket Project Wiki for pulling together so many great images, lots of these come from their collection.
First up, the most elaborate! 
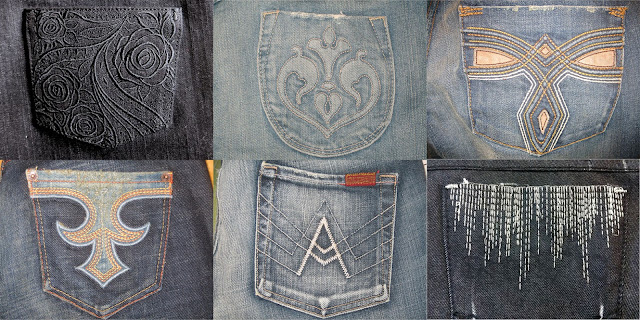
Top Row, left to right: unidentified; Siwy;
Bottom Row: People 4 Peace; Chip N Pepper; unidentified

There are some VERY elaborate back pockets out there... think rhinestones, studs, chains, and zippers! The ones I have here are relatively tame, but they all seemed to be well balanced and very wearable. I love the black on black roses, but that won't be happening without an embroidery machine. The multiple colors of topstitching thread is a nice idea, and I also like the use of denim-on-denim applique. The bits of leather on the Siwy pocket are beautiful, I have to remember that for the future. I'm in love with the last design, it is both contemporary and organic. It would be time consuming to replicate, but very doable.

Paper Denim and Cloth; Urban Ring; Designs by Bellabug, made for her daughter
unidentified; Paige Premium Tidal Pocket, Page Premium Tidal Pocket

The basic curve, and variations. These designs are all classic, feminine and timeless. The simplicity of the top left is lovely... a simple well-placed line is a great detail. At the more elaborate end of things, the appliquéd wave design is really lovely.

1921; Earnest Sewn; Acne; Bluejeanious
Stronghold; Yanuk; Loomstate; Calvin Klein

There are quite a few designs that incorporate a decorative outline of the pocket. Very simple, doable, and effective. I love the handstitch detail of the 1921, the curves of the Earnest Sewn Pocket, and the multiple colors used by several of the designs. My favorite is the subtle asymmetry of the Calvin Klein pocket.

Armani Exchange; Diesel; Mavi; Abercrombie
Jake Agave; Moussy; Ralph Lauren; Levi Strauss
And, of course, there are innumerable variants of the horizontal squiggle. Perhaps the most famous is the last-- the iconic Levis pocket design, over which they have sued their competitors. It seems like the big names in RTW jeans are crowded into this category... imitation is the best flattery, non?

After looking at all of these designs, I decided to stick with something simple for my first pair of jeans. The second grouping of images above, showing simple curve designs, is my inspiration. I also think this would be quite reasonable on my standard, no-frills sewing machine: no 360 degree turns or fancy stitches please! I traced my pocket pattern piece several times onto a sheet of tracing paper, and drew in the seam allowances. To further add some design boundaries, I cut out a pleasing curve on a piece of cardboard and used that as a template, drawing three or four lines.


In the top row, I tried having those lines intersect in different ways. On the bottom row, I took one design and experimented with subtle variations of where the lines intersect the edges of the pocket. These sketches could be more drawn with more care, but I was doing this late at night, and I didn't want to use up too much of my precious sewing time!

The possibilities are endless! But I am gravitating towards the lower left. What do you think?

Tuesday, April 5, 2016

Rainbow floral voile top: Ruby Top by Tessuti Patterns

My sewing has moved onto spring, even if the weather has taken a step back into winter (we were shoveling snow yesterday in the Finger Lakes!).


I've been hoarding this lovely cotton voile from Emmaonesock for YEARS. I still remember, I saw it on her website and I HAD TO HAVE IT. I didn't even really know what voile was at the time. I thought I'd make a nice floaty skirt... but the fact is, I have lots of lovely floaty skirts that I don't wear very often. Floaty tops, however, get worn all the time in my wardrobe, since I think showing a lot of leg and not much midriff is a good look for my post-baby body.


The pattern is the Ruby Top by Tessuti Fabrics. I'm drawn to tops with cut in shoulders. I think it comes from the days when I was a climber and had muscular arms to show off. I still love how free this sporty style feels since it gives a wide range of shoulder motion.


The cut of this top is fantastic... just so easy to wear, and it hangs beautifully with a nice drapey fabric. This is the second time I've made this pattern... the first one was pretty good, but I noticed the armholes hung very low. I didn't heed the warnings from other bloggers because I NEVER have this problem, if anything I tend to lower armholes a bit. But lo and behold, the armholes on that first top (which I will get to blogging sometime!) are VERY low, to the point that I have to wear it with-- um-- "decorative" bras.

Armhole detail.

This time, I raised the armholes 1.5 inches. Yikes! I literally added 1.5 inches to the bottom of the armhole, and graded to nothing midway to the shoulder. It looked crazy, but it totally worked-- the armholes on this version are perfect. Not binding, and no peeking at my bra.

White cotton batiste lining.

The other major change is that I fully lined the top with a white cotton batiste voile. It was super easy to do... I suspect it was faster than all those bindings and facings anyway. I just cut two of the front and the back, trimmed 1/16 of an inch off the armholes and the neckline of the lining, then sewed the two together with one of the "bagged lining" methods. Follow this link for a great tutorial, but basically, I sewed the top together at the shoulders, and did the same for the lining. Then I sewed the neckline and armholes of the top and lining, right sides together. Then I pulled it right side out and sewed the side seams. It worked like a charm!

V notch front detail. Nice design detail, don't you think?

The other change I made to the pattern was totally a mistake, but let's just call it a design detail. The "v" notch front was not part of the original pattern! The V was supposed to be the back closure... but in my muddled early morning gotta-get-this-done state of mind, I accidentally made the V in the front and didn't even notice until it was hemmed! Fortunately, I love it.

Tucked!
Speaking of late night sessions, this is a quick make. I took my time, did lots of ironing, took breaks to soothe restless babies, refill my wine glass, etc, and I had it done, fully lined, in less than 3 hours.

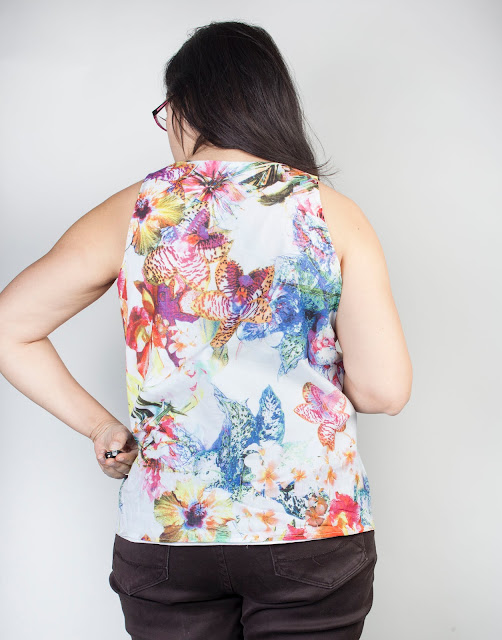
Back view. Top looks great. Jeans... not so rockin...!
Looking at this back view, it is a good thing that I have my Ginger Jeans pattern out and my Cone Mills Denim rumbling through the wash-dry cycles. These are, eh-hem, my best jeans! $100 RTW. Well, okay, they are about 3 years old, so I guess they probably have seen better days. We'll see if those long awaited new jeans finally materialize...