My sewing has moved onto spring, even if the weather has taken a step back into winter (we were shoveling snow yesterday in the Finger Lakes!).
The pattern is the Ruby Top by Tessuti Fabrics. I'm drawn to tops with cut in shoulders. I think it comes from the days when I was a climber and had muscular arms to show off. I still love how free this sporty style feels since it gives a wide range of shoulder motion.
The cut of this top is fantastic... just so easy to wear, and it hangs beautifully with a nice drapey fabric. This is the second time I've made this pattern... the first one was pretty good, but I noticed the armholes hung very low. I didn't heed the warnings from other bloggers because I NEVER have this problem, if anything I tend to lower armholes a bit. But lo and behold, the armholes on that first top (which I will get to blogging sometime!) are VERY low, to the point that I have to wear it with-- um-- "decorative" bras.
 |
| Armhole detail. |
This time, I raised the armholes 1.5 inches. Yikes! I literally added 1.5 inches to the bottom of the armhole, and graded to nothing midway to the shoulder. It looked crazy, but it totally worked-- the armholes on this version are perfect. Not binding, and no peeking at my bra.
 |
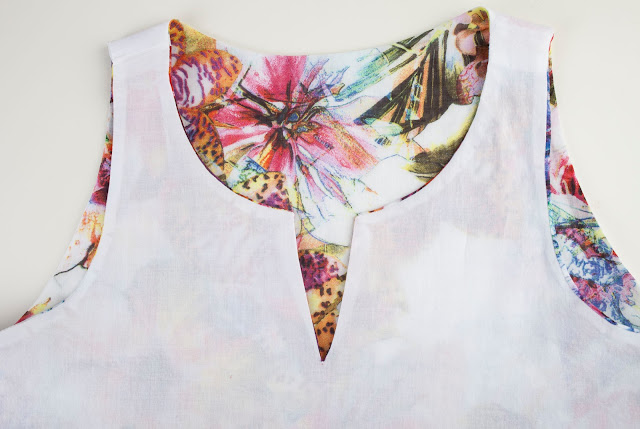
| White cotton batiste lining. |
The other major change is that I fully lined the top with a white cotton
 |
| V notch front detail. Nice design detail, don't you think? |
The other change I made to the pattern was totally a mistake, but let's just call it a design detail. The "v" notch front was not part of the original pattern! The V was supposed to be the back closure... but in my muddled early morning gotta-get-this-done state of mind, I accidentally made the V in the front and didn't even notice until it was hemmed! Fortunately, I love it.
 |
| Tucked! |
 |
| Back view. Top looks great. Jeans... not so rockin...! |
Looking at this back view, it is a good thing that I have my Ginger Jeans pattern out and my Cone Mills Denim rumbling through the wash-dry cycles. These are, eh-hem, my best jeans! $100 RTW. Well, okay, they are about 3 years old, so I guess they probably have seen better days. We'll see if those long awaited new jeans finally materialize...


Looks great on you! LOVE the fabric and thanks for the tip about lining with cotton batiste - I'll have to try that.
ReplyDelete:-) Chris
You know, I went back and looked at my recent orders, and the lining fabric is 100% cotton voile from Fabric.com. I often buy Kaufmann Savannah Batiste, and it is a very similar fabric... I have trouble telling them apart. They are both very lightweight, soft fabrics.
ReplyDeleteHello! I just got the Ruby Top pattern, and i wanted to line it instead of doing the armhole/neckline binding, but the tutorial you link to only appears to work if your bodice back is split in two. It does not appear that you did that, so I am wondering how you did it! Love your finished top!!
ReplyDelete