My sewing has moved onto spring, even if the weather has taken a step back into winter (we were shoveling snow yesterday in the Finger Lakes!).
I've been hoarding this lovely cotton voile from Emmaonesock for YEARS. I still remember, I saw it on her website and I HAD TO HAVE IT. I didn't even really know what voile was at the time. I thought I'd make a nice floaty skirt... but the fact is, I have lots of lovely floaty skirts that I don't wear very often. Floaty tops, however, get worn all the time in my wardrobe, since I think showing a lot of leg and not much midriff is a good look for my post-baby body.
The pattern is the
Ruby Top by Tessuti Fabrics. I'm drawn to tops with cut in shoulders. I think it comes from the days when I was a climber and had muscular arms to show off. I still love how free this sporty style feels since it gives a wide range of shoulder motion.
The cut of this top is fantastic... just so easy to wear, and it hangs beautifully with a nice drapey fabric. This is the second time I've made this pattern... the first one was pretty good, but I noticed the armholes hung very low. I didn't heed the warnings from other bloggers because I NEVER have this problem, if anything I tend to lower armholes a bit. But lo and behold, the armholes on that first top (which I will get to blogging sometime!) are VERY low, to the point that I have to wear it with-- um-- "decorative" bras.
 |
| Armhole detail. |
This time, I raised the armholes 1.5 inches. Yikes! I literally added 1.5 inches to the bottom of the armhole, and graded to nothing midway to the shoulder. It looked crazy, but it totally worked-- the armholes on this version are perfect. Not binding, and no peeking at my bra.
 |
| White cotton batiste lining. |
The other major change is that I fully lined the top with a white cotton
batiste voile. It was super easy to do... I suspect it was faster than all those bindings and facings anyway. I just cut two of the front and the back, trimmed 1/16 of an inch off the armholes and the neckline of the lining, then sewed the two together with
one of the "bagged lining" methods. Follow
this link for a great tutorial, but basically, I sewed the top together at the shoulders, and did the same for the lining. Then I sewed the neckline and armholes of the top and lining, right sides together. Then I pulled it right side out and sewed the side seams. It worked like a charm!
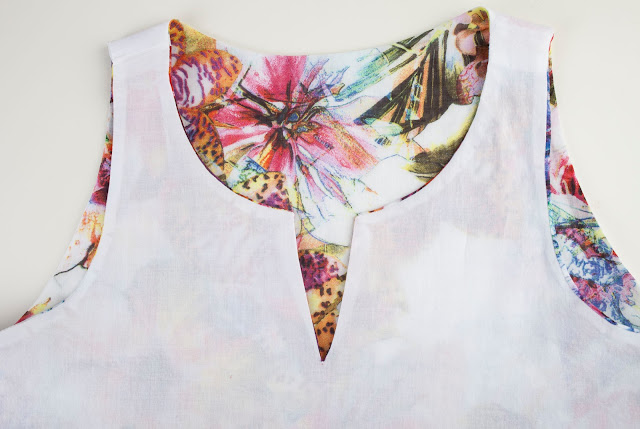
 |
| V notch front detail. Nice design detail, don't you think? |
The other change I made to the pattern was totally a mistake, but let's just call it a design detail. The "v" notch front was not part of the original pattern! The V was supposed to be the back closure... but in my muddled early morning gotta-get-this-done state of mind, I accidentally made the V in the front and didn't even notice until it was hemmed! Fortunately, I love it.
 |
| Tucked! |
Speaking of late night sessions, this is a quick make. I took my time, did lots of ironing, took breaks to soothe restless babies, refill my wine glass, etc, and I had it done, fully lined, in less than 3 hours.
 |
| Back view. Top looks great. Jeans... not so rockin...! |
Looking at this back view, it is a good thing that I have my Ginger Jeans pattern out and my Cone Mills Denim rumbling through the wash-dry cycles. These are, eh-hem, my best jeans! $100 RTW. Well, okay, they are about 3 years old, so I guess they probably have seen better days. We'll see if those long awaited new jeans finally materialize...


