

It's been awhile since I've made a coat. Last year I was crushing on all of the amazing versions of the Papercut Sapporo coat on instagram, and I bought a piece of wool to make it. Online purchase, and it was a lovely gray coating, but it was drapy-er than I thought would be ideal for the Sapporo coat. I was also having second thoughts on the Sapporo because it really isn't such a practical coat for truly cold climates since it has no front closure and cropped sleeves, so what I would be making would be a late fall-early spring coat, and the wardrobe gap I was filling was for a truly warm coat. I was also noticing how many of the Sapporo coats that I admired required quite a bit of finagling of the pattern, and then this review came out.
I still think I'll still sew the Sapporo coat sometime in the near future since it is such a unique pattern and I'm but for my winter coat needs, I went looking for another pattern. I was looking for something classic and a bit boxy, and decided on the Oslo coat by Tessuti. There are some incredible versions of this one out in the blogosphere by some of my favorite bloggers, including amazing versions by Diary of a Chainstitcher, Fifty two Fancies, Jasika Nicole, and of course the amazing Heather of Closet Case files.
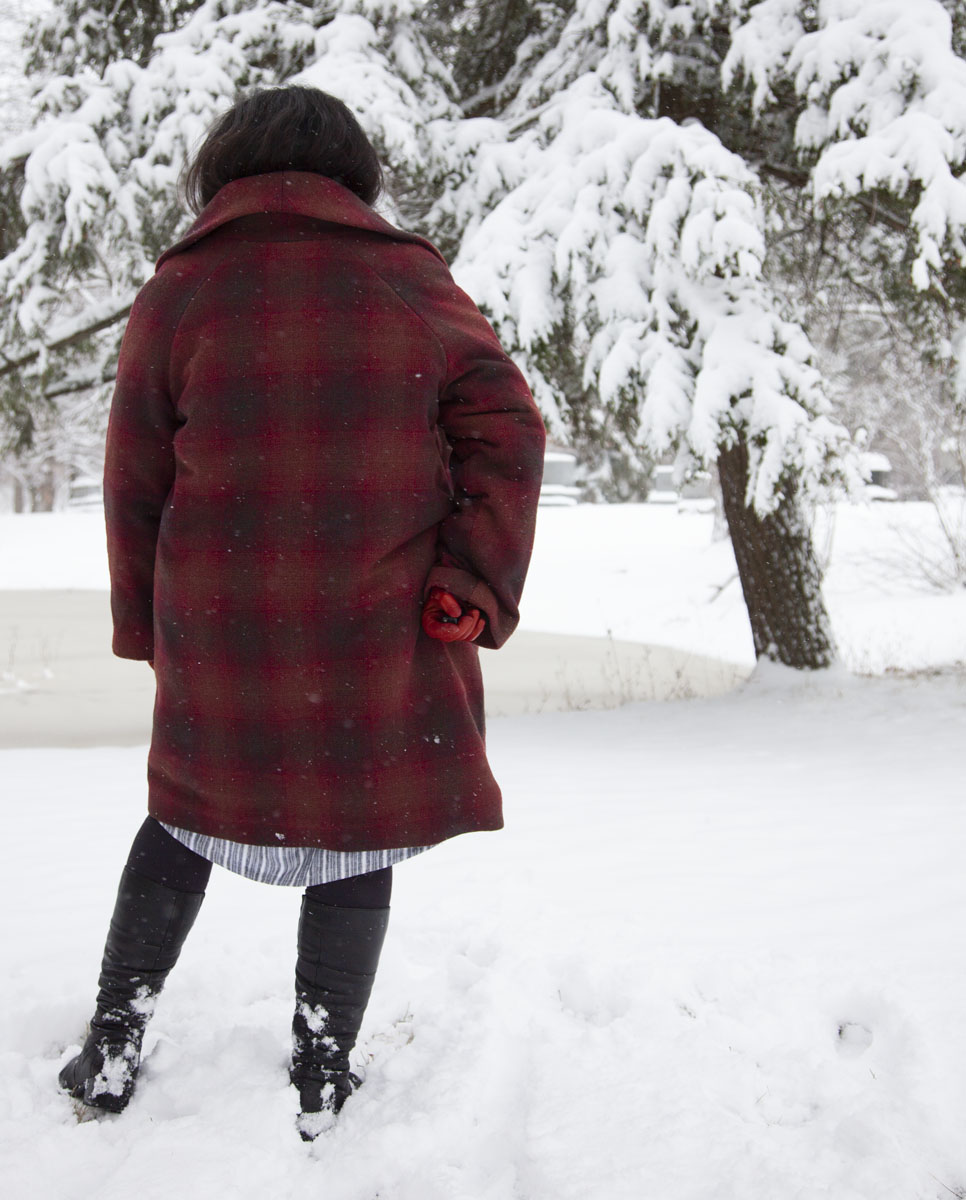
The plan was coming together for some cozy holiday sewing over the Thanksgiving break. However, when I pulled out my stashed gray coating, it didn't seem right for this project either. So I make a trip to my favorite local fabric shop, Homespun, and this ombre plaid coating was love at first sight. It was a pretty heavy wool, so I thought it would work well to make a structured, super-warm coat. I also picked up a lining that was an interesting fabric, smooth rayon sort of like a bemberg on one side and cotton on the other.
I took a cue from Heather and went up a size because I was planning on some serious underlining and interlining and I wanted room to be able to wear a thick sweater or down liner, and I increased the seam allowances to 1-inch on the side seams and sleeves to allow on-the-fly fitting. I ended up using some of that extra seam allowance to add some width to the upper sleeve because I felt that my very significant biceps needed a bit more ease for layering.
I bought about 1/2 a yard extra for plaid matching, but perhaps I should have bought more, especially after adding extra to the seam allowances. I just barely managed to cut it all out, and I ended up having to piece together one of the facings. However, in the end I am very happy with my plaid matching, it is so satisfying!
The one major change that I made was to raise the pockets a whole 6 inches. Every review I've read of this coat talks about how low the pockets are. I determined the pocket height by draping the pinned together coat pieces around me and imagining a good pocket location. The pockets are truly humongous, and this is a feature I love in the finished coat after raising them to a point where I can easily touch the bottom of the pocket when wearing the coat. There has been many a coat and dress where I've placed the pocket too low and not being able to touch the bottom of your pockets is seriously annoying!

One of the goals for this coat was to make a TRULY WARM winter coat. I happened to be reading this post by Fehr trade while making the coat, which really nailed home the wind-blocking properties of flannel interlining, so I fully interlined the sleeves and upper body with flannel that I had in my stash. I really loved Jasika Nicole's idea of a quilted lining, so I borrowed her idea. I used Dream Wool and the crib size was just enough for my coat.


I was almost too lazy, but at the last minute I found the energy to add an interior zipper pocket. I made it HUGE, it can easily swallow my big credit card wallet.

Generally the directions were quite good. However I had a small beef with the understitching instructions for the collar. Shouldn't one switch the side of the understitching at the break, the point at which the collar turns? Otherwise the seam would show on either the collar or the bottom of the coat. I followed the directions blindly at first, but it bothered me so much that I unpicked my understitching and redid it, clipping the seam at the break and switching the understitching.

This wool required serious use of steam and a clapper. The clapper wasn't on hand for the final press for these photos, and I ended up using a handy block of wood which worked just about as well as my fancy clapper.
I didn't add the buttonhole until just before I sewed in the lining, so that I could customize the location. It was a bit of a pain making a bound buttonhole with the coat already sewn, but not impossible, and it beats having the buttonhole in the wrong location. The button is an interesting dark green button from my friend Susie's grandmother's collection.
I was lazy and did not add the interior button. In some photos the coat does not lay as well as it could... not sure if I'm motivated to go back and add it though.

Towards the end of the project I was just going on autopilot, so I finished that tricky area where the bottom of the front facing meets the lining with a bit of hand sewing like I usually do. However in retrospect it looks like they had an interesting method for getting a nice finish, so I wish I had paid more attention to the directions.

I love the notch where there collar meets the shoulder, it adds a subtle detail to an otherwise simple design.
So, after finishing it up, I have to say... this coat is heavy! And sort of huge. However, it is toasty warm. It isn't the coat I reach for every day, but on cold days it is the coat I reach for when I know I'll be standing around it in. It is the perfect coat for keeping my daughter company on dark cold mornings as she waits for her school bus. It's definitely the coat I reach for on below-freezing snowy mornings when I know I have to be at work despite the conditions. However I wore it on a day I was out Christmas shopping and I was sweating in the stores!
A few more photos...



So the one thing I've thought about is adding an inner cuff to the sleeve. I probably should have tapered the sleeve a bit more, because as it is it lets in a bit of a draft.
I would love to make this pattern again in the future, perhaps with a lighter, drapier wool, not sizing up, which I think would make a very classy, versatile coat.
Have you made a warm coat? How did you add warmth to your coat?


