Showing posts with label Easter. Show all posts

Saturday, March 31, 2018

Flower Print Eggs: A Natural Egg Dyeing Tutorial

Flower Print Eggs with Easy Natural Dye
using ingredients you'll find in the kitchen and pantry


---------------------
Dyeing Eggs in Rome, Italy, Spring 2018

When I was growing up, we always used those supermarket kits with little tablets that dissolve in water and give brilliant colors. But after having kids, trying to do things in a way more inspired by natural materials and processes became really important to me, and dying eggs with chemical dyes just wasn't appealing. 

So, I first made nature print eggs using natural dyes two years ago, when my daughter Lily was 4. She's now 6, and I have a son who is 3... and we're still using natural dyes to do our annual egg coloring! 

This year we're in spending the spring in Rome, Italy... and we dyed eggs using our favorite methods here! It worked beautifully.


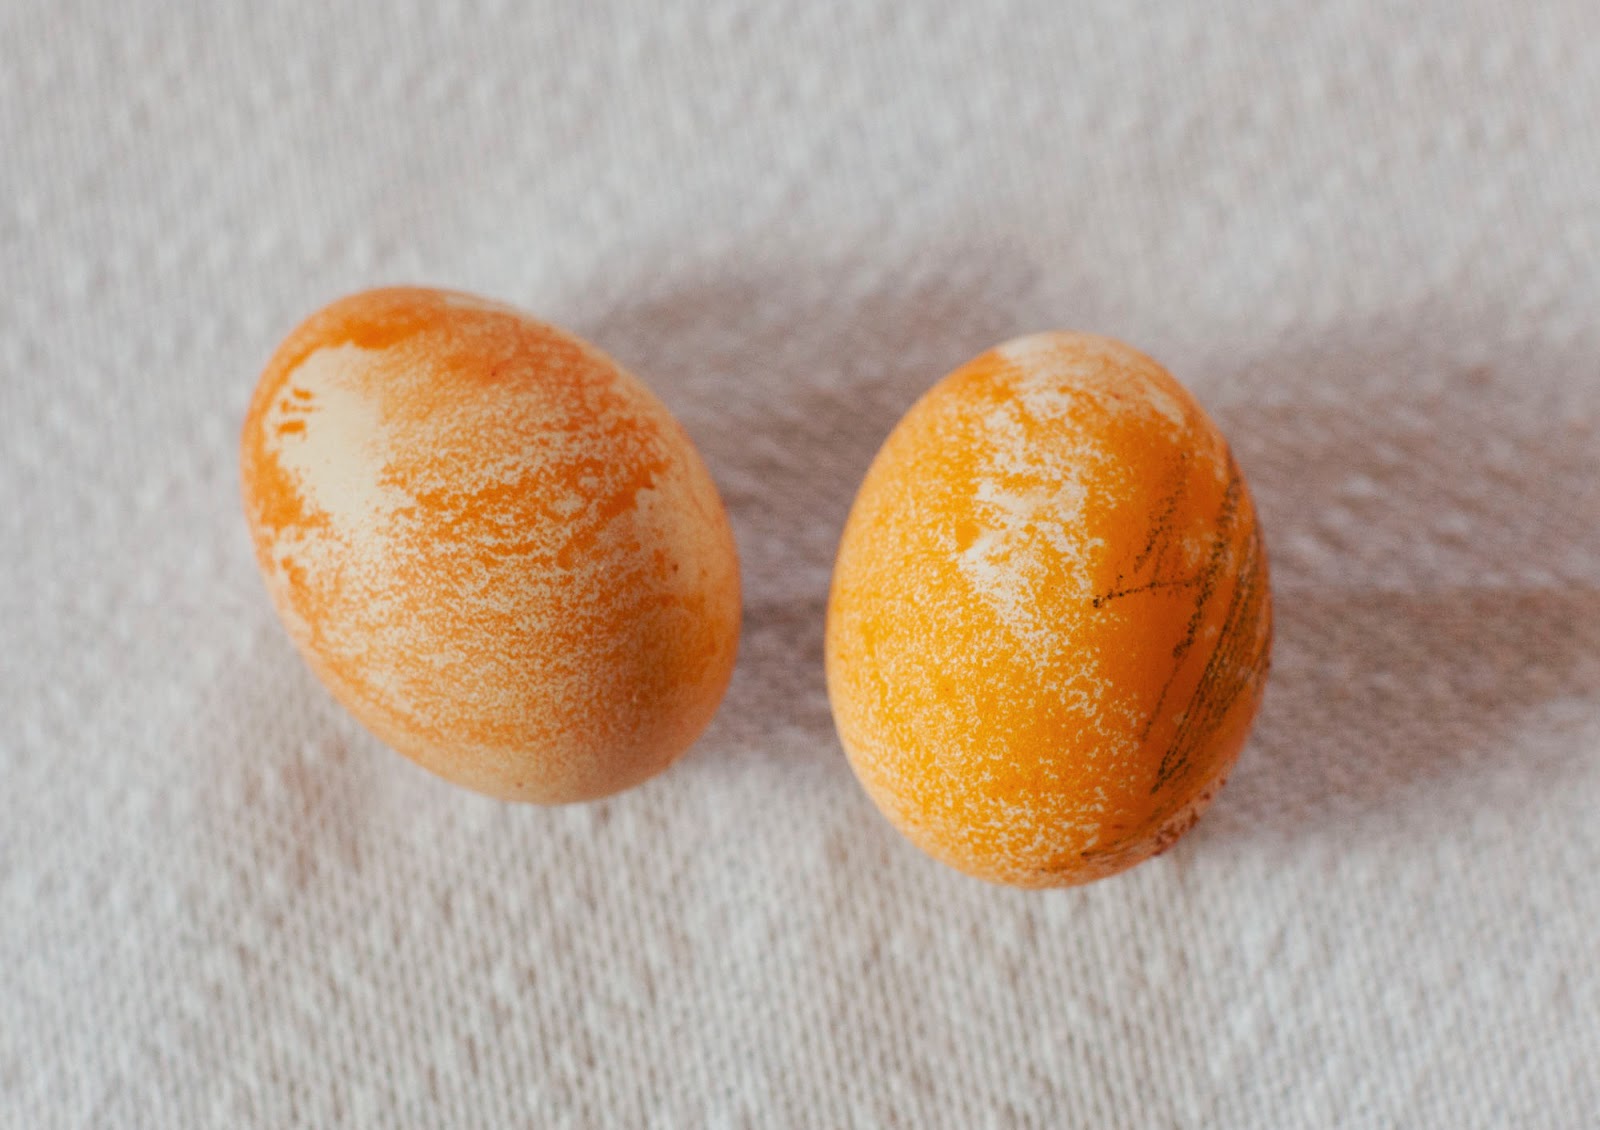
The cheapest pantyhose I could find was 2 euros a pair. I could only find brown eggs at the supermarket! After the fact I've seen white eggs in other stores, but the brown eggs came out quite lovely. 


Unwrapping is the best part.


The original post from 2016 follows... read on for the photo tutorial!

----------------------


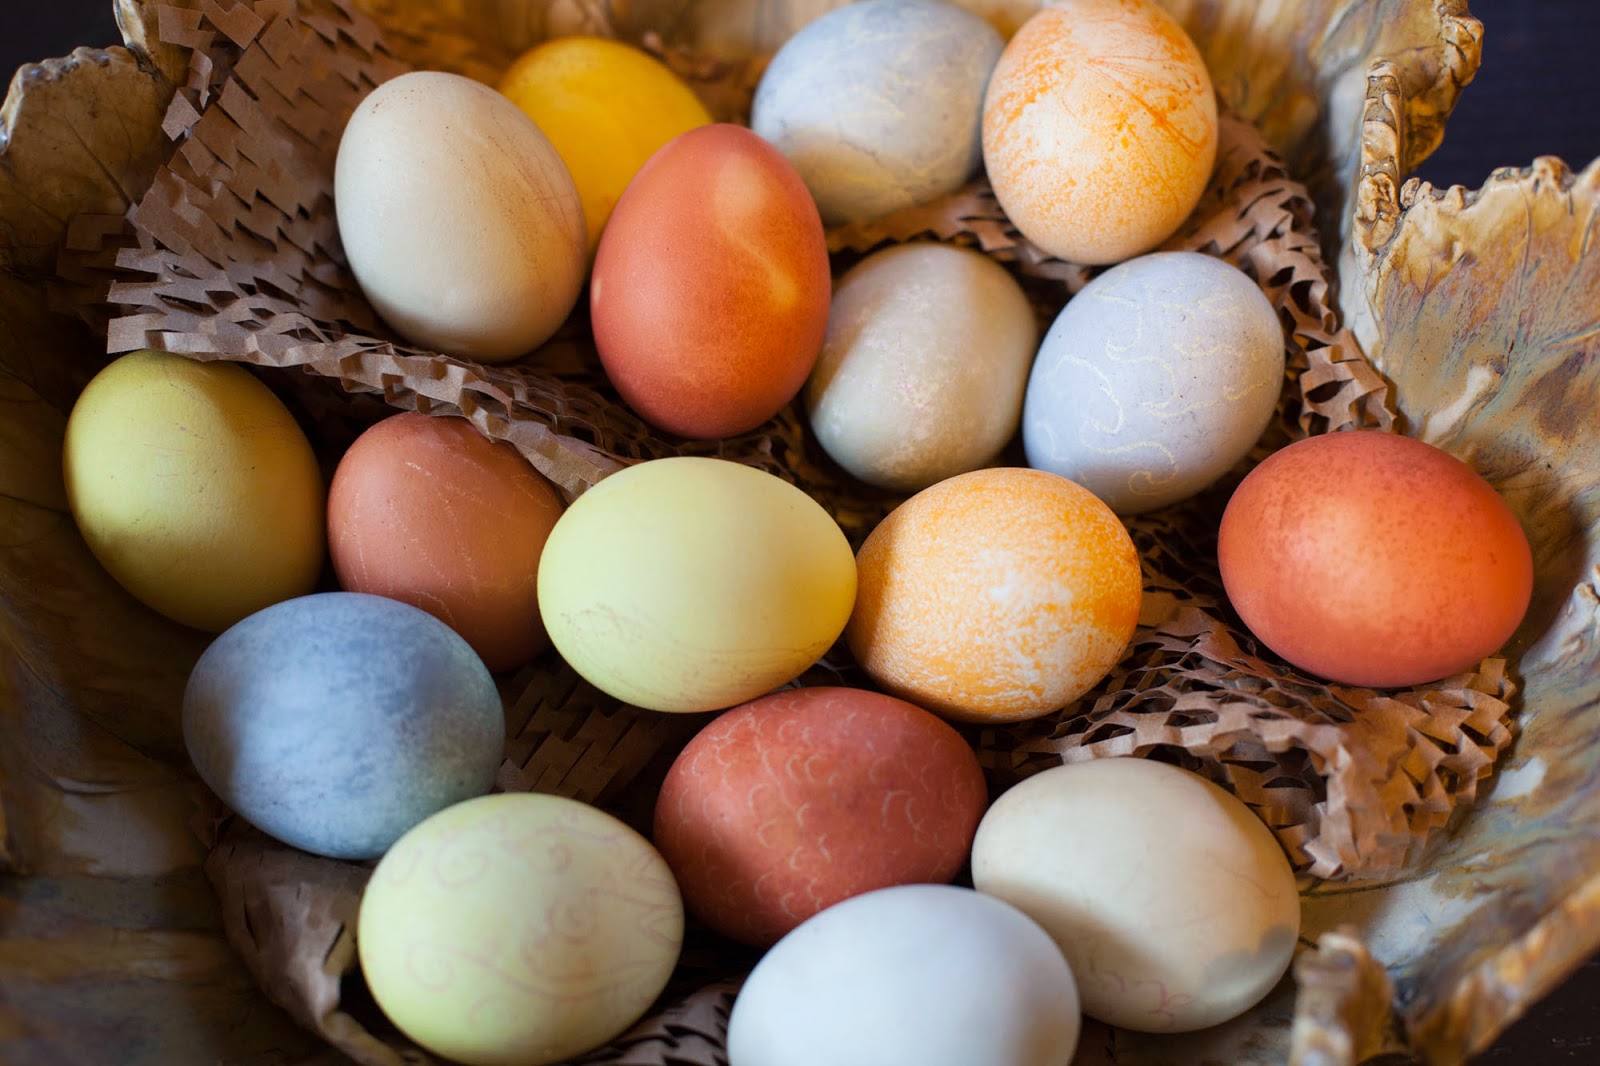
I've been a bit obsessed with decorating eggs with natural materials and dyes this year. It's great to do with my four year old daughter. I also love how they capture some of the ephemeral beauty of spring!


The most beautiful results have been with flowers. I had no idea they would turn out so beautifully!

Here's how you do it. It's very easy, a great project for kids or adults.


You need:
--Nylon pantyhose
--String
--Eggs (You can use blown eggs or raw eggs)
--Flowers
--Natural dye plants-- this year I used red cabbage (1/2 head), yellow onion skins (from 3 lbs of onions), and powdered tumeric (about 2 tablespoons).
--White vinegar

Where to get flowers in early spring? This year in the Finger Lakes we found hellebores, crocuses, and snowdrops in the garden and in the nearby woods. If you are gathering wild flowers, make sure to only pick a few so that there are lots left to make seeds. You can also use store bought flowers-- supermarket bouquets that are a bit past their prime (and on sale) would be perfect.


Position a flower on your egg. Use water to moisten the petals and help them to stay in place.


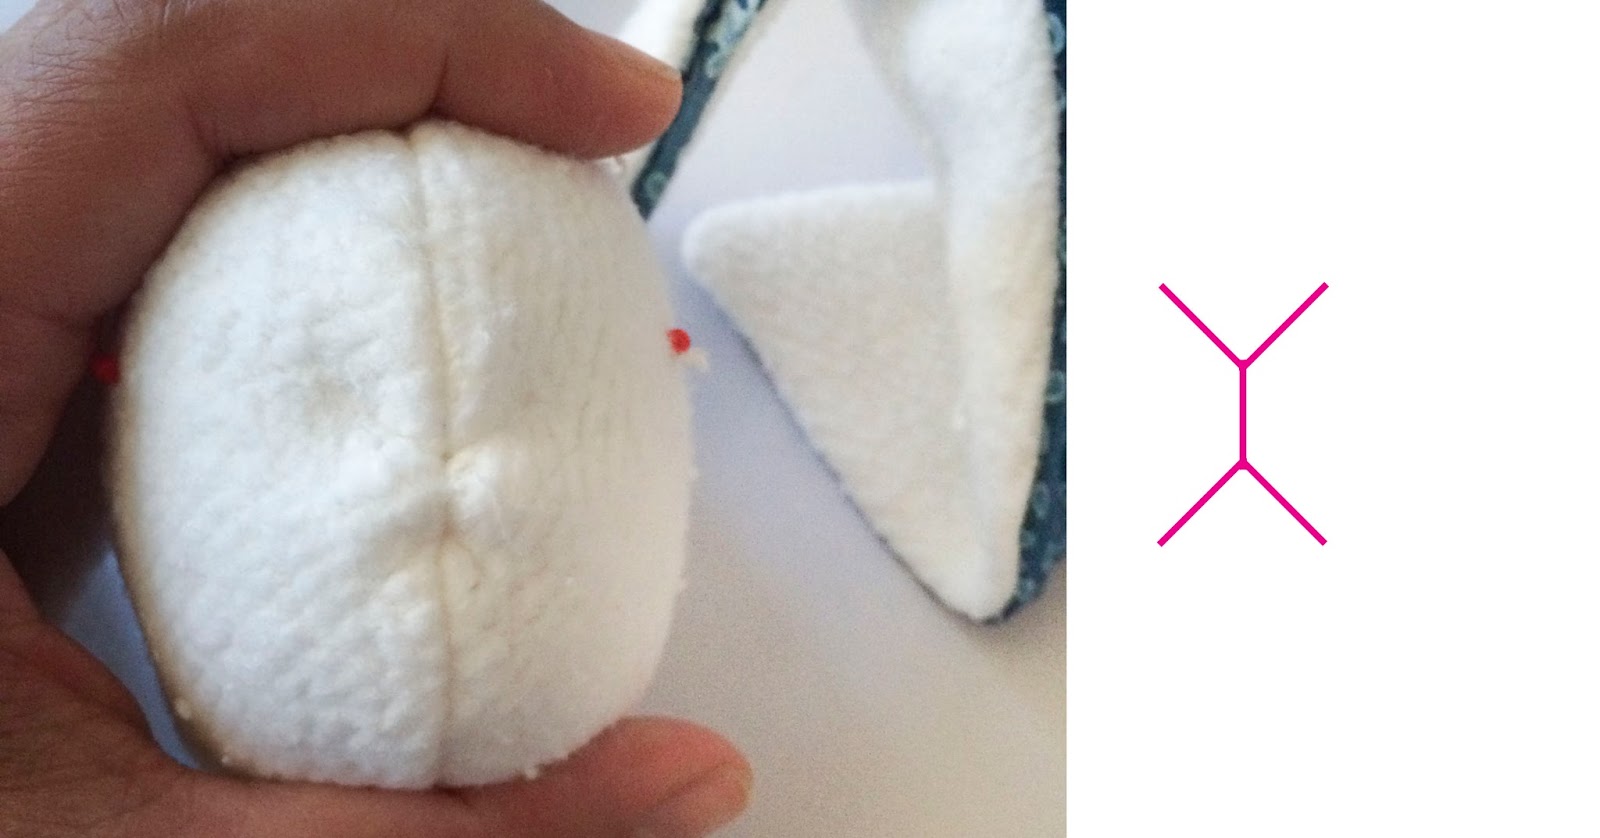
Wrap the egg with a piece of nylon pantyhose. Pull it tight around your egg, holding the flower flat against the surface. Tie with a piece of string.


Prepare your natural materials. For the onions, peel off the outer papery layer. For the cabbage, tear the leaves into chunks, or roughly chop.

Purple cabbage and the nylon wrapped eggs in the stock pot. Those blown eggs want to float!


Place the dye material in a large stock pot, and fill with cold water so that the eggs are covered. Bring to a boil. Allow to simmer for at least 1 hour. After one hour, turn off the heat, add 2 tbsp of vinegar per pot and allow the eggs to sit in the colored water until the desired color is reached. If you want a dark color, you might need to let it sit overnight.

The added benefit of this method is that your raw eggs will be hard boiled without an extra step. If you are dying blown eggs, you might need to put something on top to keep the eggs submerged-- a lid from a smaller pot might work.

Then, cut the nylon and peel off the flower to see your beautiful results!

Alternate method (or a method to keep the dying fun going): Boil the dye materials in the stockpot until reduced to about 1 quart of liquid. Strain and reserve the liquid. To dye your eggs, submerge for a couple hours or overnight, depending on how concentrated the liquid is and how dark you want your eggs.

Dying eggs in canning jars with the strained liquid. Left to right: onion peels, tumeric, purple cabbage.
Here are some results to give you an idea of how your eggs will turn out.


Above: Crocuses with purple cabbage, Crocus on an egg dipped in the onion skin dye then soaked in tumeric, snowdrows on an egg soaked in onion skin dye, hellebores on a egg simmered in onion skin dye. 


Above Left: grass in red cabbage dye, Above Center: leaves in tumeric dye, Above Right: Crocus in red cabbage dye.

Other natural materials work well too! The left egg is myrtle, the other two are weeds in our yard. All of these eggs were simmered in onion skin dye.

It is fun to experiement! This was a very unexpected result... we soaked some eggs in cranberry juice, and they came out not at all red, but etched, looking almost like fossils. Must be some kind of reaction at work, anyone know the chemistry of this? I can't really recommend it thought... the eggs in that batch are very fragile, three have broken already!


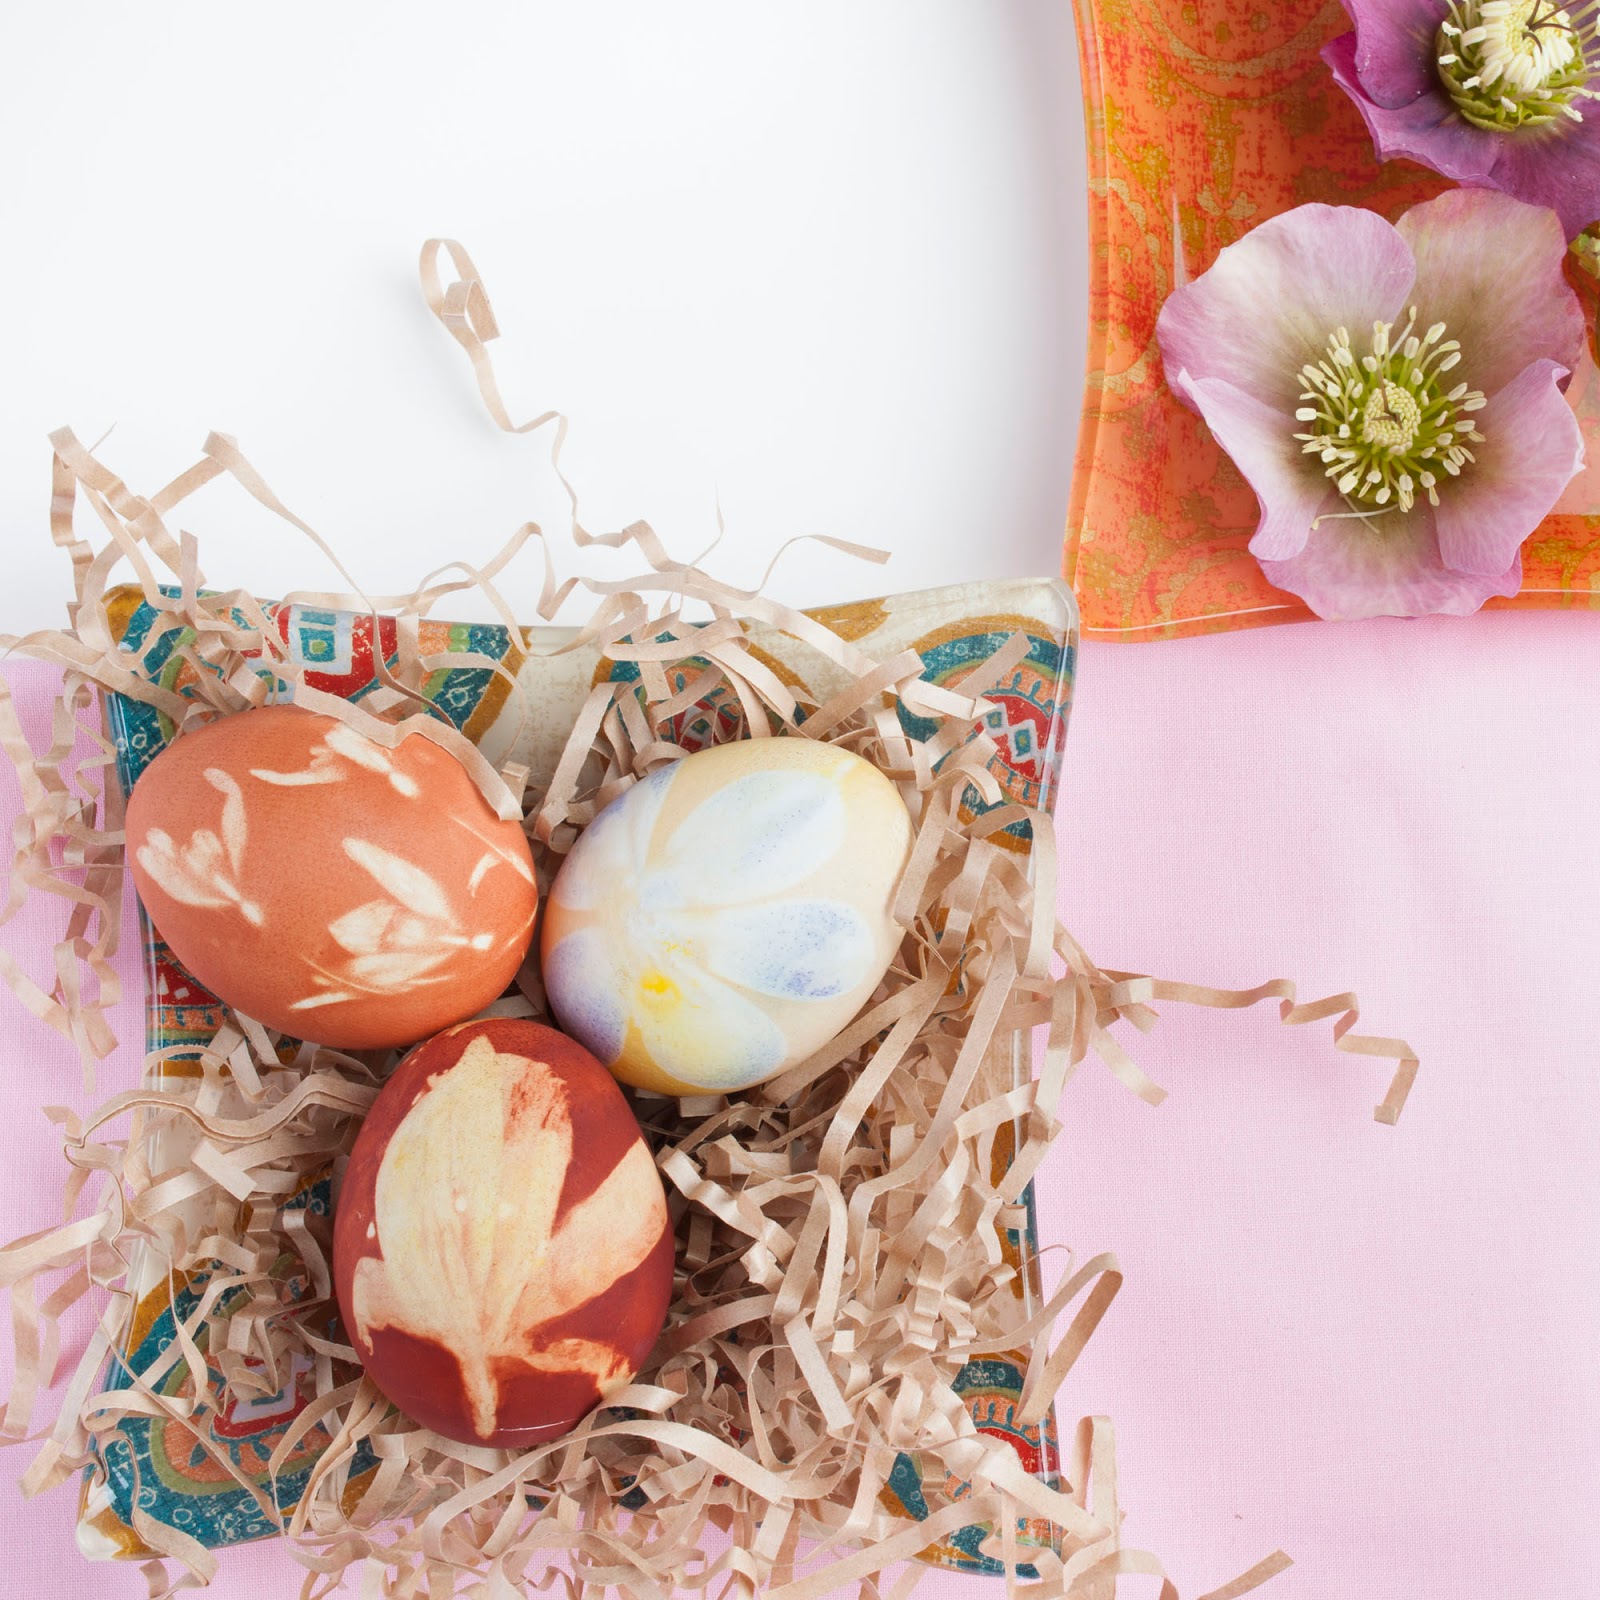
Another lovely flower egg: Hellebores in red cabbage dye.


Have fun! I would love to see your results, post them at instagram and tag @unlikelynest, #flowerprintegg.


Friday, March 30, 2018

Bunny Loveys made by you!

It's bunny season! My sewing machine is a thousand miles away, so I'm sewing vicariously with all of you who are making the Bunny Lovey pattern this spring. There are so many lovely variations, from classic to creative!

I'm just loving these Bunny Loveys made in Sherpa, they just look so snuggly soft! These are from Cedar Bee Made and Martin N. Mae.
A post shared by Cedar Bee (@cedarbeemade) on
A post shared by martin.n.mae (@martin.n.mae) on

Is there anything so sweet as a white white bunny? So classic and adorable. These are by Sunday Design Studio and Bethany Wells (Mama Sew Colorful).


What fun prints! Just loving these bunnies in fun prints by Lil Things by Aimee and Lori Sapp.

And, take a look at these designs that incorporate fun colors, fabrics, and textures by Charity Sue Design and Brandi Henderson (SixThirtyStitch).


Here are a few more designs by Melissa Barnett of martin.n.mae. She chooses such wonderful prints.

A post shared by martin.n.mae (@martin.n.mae) on
And here are a couple of designs by Sunday Design Studio. I love how they have such a distinctive modern style.

Aren't these sets by Rainbow Hill Designs just lovely? What an incredible present for a new tiny person.
Are you inspired yet? There's still time to make a Bunny Lovey, you can get the pattern here.

Friday, March 18, 2016

The Bunny Lovey: A Free Sewing Pattern with Illustrated Instructions


The Bunny Lovey is a sweet little blanket doll. It would be a lovely gift for a newborn! And it is quick to make if you have a sewing machine and some basic sewing skills. 

The pattern is FREE... just sign up for our mailing list on the sidebar. After you confirm your subscription, you will be sent a "Welcome" email that has a link to the pattern. 

With the free pattern, you can make as many bunnies as you like to give as gifts or for charity. If you would like to make bunnies to sell, please purchase the paid version of the pattern from my Etsy Store... it is just $5, and includes the right to sell your handmade creations. 

UPDATE August 2016... the PAID version on Etsy now includes downloadable, illustrated instructions. But once again, you can totally make this for free by subscribing to the newsletter and using the instructions here on the website.

If you sign up for the newsletter and you don't see the "Welcome" email, be sure to check your spam folder or the "Promotions" tab if you use Gmail.


Materials:

--1/4 yard or a fat quarter of your main fabric. I used an organic cotton fleece, but this could could be any fabric that is soft and snuggly. It would be lovely in a french terry or a velour!

--A very small amount of contrast fabric. I used colorful quilting cottons.

--The Bunny Lovey pattern. It is free-- just sign up for our newsletter on the sidebar. After you confirm your subscription to the email list, you will be sent another email with a link to the pattern. It is just two pages, and no taping necessary. 

--Embroidery floss for the eye.

 --Stuffing for the head and tail. I use wool batting or roving, but you could also use cotton batting or poly fill.


Instructions:

Sew all seams with a 1/4 inch seam allowance. 

Print out the PDF pattern on letter sized paper. Make sure the printer resize the page, I always set scaling to 100% on my printer. 

Cut out the paper pattern pieces,and lay them out on your fabric. Make sure the arrows on the pattern pieces align with the grain of your fabric. If you are using napped fabric like velour, the arrow should point in the direction that the fibers naturally lay down. Cut your pieces from your fabrics, as indicated by the directions on the pattern pieces. Transfer markings for the placement of the ears, eye, and tail. 


Sew together the two tail pieces, right sides together. Leave an opening at the base of the tail for turning and stuffing. Sew together the ears with each ear having one piece of main fabric and one piece of contrast fabric, right sides together. 


Clip the point of the ear straight across, close to but not touching the stitching.


Turn the ears and the tail right sides out. If you have hemostats, use them to grab the tip from the inside and pull it through. Otherwise, use your fingers and a stick (like a chopstick). Press them flat. 


Put the head pieces right sides together. Sew around the head leaving the neck open. Clip the curves, being careful not to cut your stitching.


Cut a slit in the head for the ears, where indicated by the pattern. Cut through both layers of the head.


Fold the ears in half, with the contrast fabric on the inside.


Stick the ears up through the neck into the head and through the holes you made. The fold should be to the back of the head.


Arrange the head so that the seam allowance is in the center, and the ears sit flat. The folds of the ears should point towards each other. Sew across the top of the head from ear to ear, catching the raw edges of the slits you made. 


Pull the ears to turn the head right side out. Smooth the seams flat with your fingers. Stuff softly with wool (or your choice of stuffing).


Sew the bunny nose and mouth. I used a double strand of white sewing thread to give just the shape of bunny cheeks and nose. You could also use pink embroidery thread to give a stronger impression of the face. Hide your knots inside the head.

Decide where you want the eyes. Use the markings on the pattern as a guide, but make sure it looks right for your bunny, with the personality you want to give it. I use a pin with a colored head to make sure I like the placement.


Sew the eyes with embroidery thread. I used blue on this bunny, but I also use brown or pink (albino bunny!). You could also just leave the eyes off to make a super minimal bunny. 

Hide the knots inside the head. Here I have knotted my strands, then threaded both ends through the needle and pulled them back through the head. I'll clip the strands close to the head and the ends will disappear into the stuffing. 


Attach the tail to the body. Cut a slit where indicated on the pattern, about two inches from the bottom of the bunny. Stuff the tail.


Slip the tail through the slit, with the tail of the tail on the inside. Sew across the base of the tail from the inside, catching the raw edges of the slit. Taper to nothing on either side of the tail. 


Sew the body together. Leave about two inches open at the center of the neck for turning and inserting the head. Clip curves.


Insert the head into the body. Push the stuffing up into the head so that the neck is as flat as possible. Make sure that the raw edges of the body pieces are turned to the inside. 

Starting about 1/2 inches before the opening in the neck, sew cross the base of the neck, catching the turned under edges of the body and the neck. Sew past the opening by 1/2 inch. I use a zipper foot on my machine to get as close to the head as possible. 

And you are done! You now have a beautiful toy that you can feel totally good about giving to some little person you love. 

Oh, and please send me pics if you make one, I would really enjoy seeing your creations! You can send me an image, or post on Instagram #bunnylovey


Sunday, April 5, 2015

Natural Dye Easter Eggs

The Saturday before Easter I brought out the egg dye kit that I had bought at the supermarket weeks ago. But this year I just couldn't bring myself to break open the brilliant, jelly-bean colored dyes. Those little tablets are tradition, what I did every year with my family as a child, but when I spend so much effort trying to fill my household with natural materials, they just don't make sense.


Instead, I searched my kitchen for color-rich food items. Normally I would have run out to the store for just the right items, but I'm still in my 2 weeks postpartum where I refuse to leave the house. 

So, after a quick consult to the web, what I decided to try was the following:

Orange: Yellow onion skins 
Yellow: Tumeric
Red: Pomegranate juice and paprika (separately)
Blue: Blueberry juice
Green: Parsley and green tea (separately)

Everything except the juices I put in a saucepan and boiled for 10-15 minutes (This took a couple rounds since I only have 4 burners!)


 I then arranged them all in glass bowls, adding 1 tsp of vinegar for each cup of liquid (roughly!).


Add hard boiled eggs and crayons, and we were dying eggs before naptime. 

Note: I washed the hard boiled eggs in a little soap and water-- this was suggested by one website.

Little Bug (3 yrs old) LOVED it. It took her 10 seconds to scribble a design on an egg with crayons, and then she carefully lowered it into the colorful liquid of her choice. Then she was onto the next egg!

We left them in the dyes for anywhere from a couple minutes (blueberry juice was very fast, and tumeric was pretty quick to give a pale yellow) to over an hour (those were the ones we just left in the dyes and went off and did other things). 


The biggest FAILS were:

--The parsley. Didn't really impart nearly enough color. Might try spinach next year, or liquid chlorophyll if I can find it.
--Pomegranate juice. This was a web suggestion... did they try this before they typed it into their blog post? Even after 10 minutes, it didn't even get to a pale pink.

The successful dyes were:


Tumeric! Of course this worked, tumeric will even dye your pots yellow (temporarily!). A couple minutes left a pale yellow, and longer gives a beautiful golden yellow.


Yellow onion skins. This is just such a satisfying orangey-brown color! The palest one is probably 5 minutes or so, and the darker ones were over an hour.


Green tea. Not exactly what I was going for, but it is a nice rustic greeney-olivey color.


Hungarian paprika. Another surprise. It acted almost like there was oil in the spice... maybe there was? Sort of a marble effect, rather lovely.


Blueberry juice. Not what I expected either, but sort of nice and rustic. They are a bit more blue than they appear in this picture.


All together, the look lovely! I'm totally sold on natural dyes... so beautiful.

Not to mention the fact that I'll feel a lot better about eating the hard boiled eggs (or letting Bug eat them).


Things to try next year:

Dyes:

Blue: Red or Purple Cabbage. A little after-the-fact web searching turned up this some truly lovely blue eggs that were done with cabbage.

Red: Beets. Obviously. But we didn't have any beets in the house!

Green: Spinach or liquid chlorophyll. No visual evidence that this works, but worth a try. Red cabbage on brown eggs might give a green too.

Purple: Red zinger tea or red wine.

Techniques:

Wrapping leaves around eggs with 5 inch squares of nylon stockings. Lovely!

Rubber bands. Simple, kid friendly.