Menu

Thursday, December 29, 2016

A Tale of Two Coats: Part 2, Simplicity 2508 and Burda Larissa hybrid

When I'm working on a project, I can't help but dream up other variations and possibilities. Does this happen to you too?

I envisioned the gray herringbone coat in Part 1 as my real winter workhorse coat. With its length and warm interlining, it would be the coat I'd reach for on snowy day and it would be great over slacks or skirts. But more often than not, winters here are sort of mild and I'm headed out in jeans or joggers... so I was thinking that my next coat would be a bit more casual and would skip the extra warm lining. I was thinking about a peacoat with military details, maybe in navy. How classic is that? On the other hand, it isn't so creative, and I was already playing it safe with the gray herringbone coat, so perhaps I should be a bit more adventurous with this coat!

As chance has it, someone passed me by wearing an orange coat. The coat they were wearing was obviously RTW in a cheap, overly bright orange, but it sparked my imagination. The color I imagined has a visual impact similar to red, but more earthy. Not halloween orange, but something more towards amber, rust, or burnt orange. I scoured the online fabric stores for coatings in this color family. The pickings were slim... either this wasn't a fashionable color this season, or it was popular and they were all sold out. Finally I found a couple options at Fabric.com, but the one I was most interested in-- a cashmere blend-- had no swatches available. The phone rep was unable to supply a swatch but suggested that I buy yardage, which I would be allowed to return with free return shipping since they hadn't had swatches available. What an odd system. But it ended up working out... when the yardage showed up it was the perfect color and the hand was lovely.


I am also in love with the asymmetric moto jacket trend. I made one several years ago in a blazer, but I'm glad to see that motos are still out there, because I'm not done making them! In fact, Heather at Closet Case Files and Novita at Very Purple Person just recently posted gorgeous asymmetric zip jackets. The closest pattern to my vision is Burdastyle's Larissa jacket which has been on my short list for a long time. But I wanted more of a classic coat profile, so I decided to merge the collars and front zip of the Larissa with Simplicity 2508.

The hybridization of Simplicity 2508 and Burdastyle's Larissa proved to be quite simple. I traced the front panels of both coats and simply overlaid them, creating a hybrid pattern piece. I used Simplicity 2508 in a 16 bust/18 hip and the Larissa in a 42 (the largest size on the non-plus sized pattern), and they fit surprisingly well. I also had to add a tiny bit to the front of the raglan sleeve since the new front of the coat was higher than before. Using the muslin I had already made for 2508, I figured out how long the collar piece needed to be, and the exact placement of the zipper.


I block fused the body of the coat with Pro Weft Supreme Medium and used hair canvas for the collars and front panels of the coat. I decided to go fusible for this coat, and used the fusible tailoring methods described by Anna Zapp in her book Couture tailoring. While I don't mind pad stitching, I've wanted to try this method. I think it worked beautifully! I couldn't find a good online tutorial, so I'll post some pictures of fusible tailoring in a future post.


I'm not so sure that using hair canvas on the front of the coat was such a good idea though. Since I had Zapp out, I was strongly influenced by her interfacing choices, but perhaps this technique is more suited for a shorter coat, or perhaps it just doesn't work that well for this particular fabric. Or maybe the fusible was my downfall. I really don't like the way the hair canvas holds the creases from sitting, and I'm not in love with how it affected the drape of the fabric. If I were to choose again, I would stick with Pro Weft for the coat fronts.


I love the zipper I used... it is a bright brass metal M6 Riri zipper. I ordered it in specially for this coat from Pacific Trimming. When I ordered it, I ordered extra stops and an extra pull so that I could use the excess to make a matching zip pocket.

I went a little nuts with pockets on this coat. In addition to the brass zip breast pocket there are also welt pockets, perfectly placed to be comfortable places to store my hands on a cold day. Since I had the placement dialed in from my Part 1 coat, I used the exact same placement and technique.

Single welt pockets.


And there are two "secret" interior pockets. I usually put a pocket in the lining when I make a jacket or coat, but recently it occurred to me that I should put interior pockets in the inside facings. Since the facing is made out of a beefier fabric and fully interfaced, it provides excellent support for the pocket.

Interior breast pocket (on the opposite side from the exterior one). 

Interior facing pocket... deceptively deep!

For the lining, I decided I'd use a piece of silk charmeuse that I've had in my stash for ages. It is just a perfect match for this coat! It is what I'd call a medium weight charmeuse, light but opaque. 

After my past bad experiences with silk charmeuse linings in coats, I decided I needed to try a few things to help this lining last a bit longer. The biggest point of failure for past silk linings has been at the seams, so I decided I'd leave generous 1 inch seam allowances. However, this plan was a bit messed up-- somehow I ended up making the lining too small around the armholes and I had to used my extra seam allowances to compensate. So, in a lot of the places that matter the seam allowances are only 1/2 inch. 

My other clever plan to add durability to the silk was to underline it. I decided I'd use plain washed muslin for this since it is reasonable strong and light weight. I based each lining piece to its muslin counter part, then serged around the entire thing for good measure. Then I sewed the lining together as usual, treating the silk and muslin underlining as a single piece. 

I'm hoping it works out, because I really love this print, and I'll be sad if I'm replacing it in a year!

The sleeve lining is just black rayon bemberg... it hardly shows and is nice and slippery and durable.


I drafted a back facing since it seemed like this coat needed one. Somehow did it wrong twice before it worked out. I still don't know what went wrong the first two times. I was in a bit of a rush so I'm sure that didn't help.

I loved this little tutorial on making a chain hanging loop, and decided to make my own on this coat. The chain I used was described as "11mm x 8mm gold chain" on the Pacific Trimming website and it is perfect for this application. The hanging loops are rayon seam binding that I folded over once for extra durability. The links on the chain were large enough that I didn't bother adding any rings.


I haven't yet added a maker tag... I want to use a larger tag than my usual ribbon ones, and I haven't gotten around to making or buying the right size tag.


I went for the extra long cuffs from Simplicity 2508. I really was hoping I'd convince my machine to sew a nice key hole button hole, but even with a single layer of coating fabric, my Janome choked on the task. So I did some quick fake bound buttonholes. The buttons are more of the horn buttons I ordered from ebay.


I LOVE wearing this coat. It is definitely my favorite thing that I've made, maybe ever! On days that aren't bitter cold, it's the perfect coat to dress up a pair of jeans or to dress down a skirt. And I can't wait to take it traveling-- I'm going to love all of the pockets for stashing plane tickets and passports and the like.


Monday, December 26, 2016

Happy Holidays!

Happy Holidays!


We've had a busy, wonderful Christmas!

I hope that where ever and whatever you celebrate, you are doing things that bring back fond memories, and making new ones to enjoy for years to come. 

Thursday, December 15, 2016

A Tale of Two Coats: Part 1, Simplicity 2508 in herringbone wool/cashmere

It feels wonderful to finish a project that has been a looooong time in the planning. Over 2 years!


I had to search my own blog to remind myself just how long it has been. In June of 2014 I posted about the materials I had bought in preparation for coat making... but even as I was writing that post I was probably just finding out that I was pregnant with Leo. No surprise that it didn't get done that year, and then the following year I wasn't feeling like making anything that I expected to last long term since my body was still shaped differently from pregnancy and nursing. 

This fall I was nearly back to my usual size and the coat situation was rather desperate. My everyday wool coat was so threadbare and sad looking that I refused to even pull it out of storage. I do have my trusty down coat, but even this needs some TLC and I don't really want to wear a poofy coat every day. So I set aside other sewing tasks and concentrated on the coat. 


Thanks to shopping done two years ago, I had a lovely wool/cashmere coating from Mood. It is 53% cashmere, 35% wool and 10% nylon-- so incredible soft and cozy. I think it was really a good find, there was nothing like it out in the online shops when I did a quick search this fall. I prepped the fabric by throwing it in the dryer with a wet towel, and it came out just a bit fluffier and softer. 

After some consideration of the coat patterns available, I decided to go with Simplicity 2508. The 40+ reviews on Patternreview were rather convincing-- when so many people have been successful with a pattern, it is always a good sign. I also just happened to have it in my stash, so I didn't need to lay out more $$. Closet Case Files Clare coat was also calling my name... maybe next time!


Another thing that really spoke to me about this pattern is that the vast majority of people were able to make it with no major fit changes, and the biggest complaint was that the shoulders and arms were too roomy. Since I almost always have to adjust the arms to allow for more space, I'm all over a pattern that is ready made for thick arms! I made a muslin using cheap polarfleece, and the fit was spot on. I did tweak the fit just slightly by grading out a size at the hips and doing a small sway back adjustment by taking in the back seams 1/2 inch and tapering out to nothing. 


However, there are quite a few glaring mistakes in this pattern. There is something odd about the way the front bust seams go together-- the darts are useless, obviously misplaced, and the hems don't line up. I didn't spend the time to diagnose exactly what was wrong, I just ignored the dart and added length to the problematic front piece. From my muslin (and the reports of reviewers) it was apparent that the sleeves were too short-- or perhaps they were meant to be short? That wasn't at all clear to me in the pattern, but I just lengthened them by 1.5 inches (actually, I could have done another .25 inches, I think they are a tad short still!). Since I definitely don't have long arms, I can only guess this was some odd style choice in the pattern. And, as reviews note, the placement of the back tab/faux belt thing is inches off in the pattern-- I used my muslin to figure out proper placement. 


After reading lots about coats and looking at the coats people have made, it seemed clear to me that the best coats used substantial interfacing. So I block fused my coating to ProWeft Supreme Medium from Fashion Sewing Supply. Since I don't have a press and I don't live anywhere that I know anyone with a press, I did it with my iron. Ho hum. Thank goodness there were some episodes of Project Runway that I hadn't watched and I could use the time to catch up on. 


I had planned to do the in-seam pockets. Reviewers pointed to how small the pocket bags were and initially I tried just making the larger. This, however, created an awkward situation since the pockets are in the princess seam that is pretty far forward. You can only make the pocket bag so large since there isn't a lot of space (you'll run right into the front pockets) and I was also worried about creating bulk right over my belly, where I really don't need any extra padding. In addition, the position of the pockets wasn't very comfortable. 


So I bailed on the in-seam pockets and added slanted single welt pockets. I love that I could put them exactly where I want my hands to be, and had plenty of room to make big, deep pockets. I used the pattern piece for the welt pocket that was included in the pattern, slimmed down a little because it looked clunky to me. I decided on where to place it by demo-ing it on my muslin, then used online tutorials to make the welts. Of course, Heather's tutorial was among the best. The back of the pocket lining is my coating fabric, and the front is rayon bemberg lining. Slipping my hands into my pockets and feeling the cozy cashmere wool is wonderful!


Since there is no way that my machine will successfully make a buttonhole through multiple layers of this fabric, I did bound buttonholes. Thank goodness this is a very forgiving fabric, since they are perhaps not the most perfect buttonholes. The buttons are real horn, from an ebay seller in Hong Kong that I can only recommend if you have a lot of time and are determined to save $$, since I only received them after complaining that I hadn't received them. When they finally arrived, they were lovely buttons with beautiful natural variation and have a cool, smooth feel that is unlike typical plastic coat buttons. 


I also did a few things that I hope will help with the durability. I added a back stay made out of washed muslin, and used cotton twill tape to reinforce seams (and prevent stretching) on the collar and the raglan sleeve seams.


I hate a floppy collar, so I interfaced the collar with fusible horsehair canvas. When it got to putting the collar on, it turned out to be 5 inches too small! I went back and looked at the pattern pieces and I'm pretty sure I used the right one, cut in the right size. So I added a piece in the center back to make up the difference. In the picture above, you can also see my hanging loop, which I made out of a tube of coating fabric. 


I had been considering using a lovely silk charmeuse for lining, but worry about its durability. About 4 years ago I re-lined my old wool coat with what I thought was a fairly substantial silk charmeuse, and it was showing signs of wear before the end of the season. After another season it was pretty much shredded! I've thought about ways that I could help out a lovely silk lining... but for this coat, I went with a slightly heavier rayon lining in an aubergine color that I found at Gorgeous Fabrics. I also added an interior zip pocket in the lining. 


I interlined the coat with lambswool/rayon interlining. I basted it to the lining pieces, then trimmed excess out of the seam allowances. I considered various ways not to sew it into the seams at all, but the bulk turned out not to be a problem and this method saved me hours of hand stitching. The lambswool is so light and non-bulky that I even interlined the sleeves, and I can hardly feel the weight of it. 

As for sewing in the lining itself, I used the "bagging" technique and it worked like a charm. There are multiple tutorials on blogs on how to do this, including this one by Heather


I decided that the coat would benefit from a small shoulder pads. Using the shoulder of the pattern as a template, I cut out a two-piece shoulder pad (there is a seam down the top of the shoulder in the pattern). In the above picture, you can see my cut out pieces for two shoulder pads. I sewed the two halves together and pressed the seam flat, making a cup shape for the shoulder. I think I ended up going with only two layers of fleece (scrapping the smallest circle). 


While I appreciated how wide the sleeves were around the biceps, I didn't care for the fact that there was absolutely no tapering of the sleeve. So I added my own tapering, taking off over an inch (spread over two seam allowances) at the wrist. I mildly regret not adding buttonholes to the sleeve tabs... but not enough to undo them once they were done!


I've been able to test out my coat on some real winter weather lately, and I can say it is wonderful to wear. It is perfect for cold, blustery weather... I just love being able to button up the collar and feel armored against the wind. The wool is warm, but not so much that I'm sweating by the time I've loaded my grocery cart. The cashmere/wool blend feels wonderfully luxurious to wear and isn't at all scratchy. I have to say I'm pretty pleased with my first real winter coat, it was worth the wait!

Tuesday, December 13, 2016

Best Classic Wool Coat Patterns (a completely biased survey)

I've been so involved in my artist residencies and making soft toys and toy patterns that I haven't posted about my other sewing projects lately. I'm going to try to address that right now in a short series of posts about coat making!

This fall has been all about coats-- the classic wool winter coat. It is too much for one post, so I thought I'd start off by just talking about some of the patterns I considered on my journey.

Choosing a coat pattern is a big deal! In fact, I've posted about coat patterns before... but there are new choices to consider. Making a coat is a big project, and one doesn't want a pattern that you will regret once you are too far into it to back out. Also, with all the effort and cost put into making a handmade coat, the expectation is that you will get YEARS of wonderful warm wear out of it, so you want something that will look good now and won't look ridiculous in 3 or 5 or more years.

It is also a very personal style choice-- for those of us who live in cold climates, the coat you wear is more often then not the first impression people have of you.

I had a short list of requirements for a good coat pattern:
--A great draft with a fit that works for the majority of people who have sewed it, without the need for dramatic changes.
--A classic shape. Enough shaping to highlight the female form, but loose enough to be an easy fit over a wide variety of clothing. Princess seams are a plus. Shapeless blocky forms aren't really my style.
--Multiple views that achieve a different look with the same basic pattern is a big plus. If I'm going to commit to a pattern and go through the effort of prepping it and fitting it, I love the idea of being able to use it again to make another coat in the future. However, no one needs to coats that look exactly the same in their closet... so different collars, lengths, or styling.
--Timeless styling. Nothing too trendy.
--No voluminous skirts or gratuitous pleats. No shawl collars or giant floppy lapels. Nothing obviously retro, at least for this particular project. I reserve the right to incorporate all excluded gratuitousness in future sewing projects.

As you can see, I'm pretty open on many things. Collars, for one... I love a great lapel, but I also love a good funnel neck. Probably not double breasted, but I might consider it as an option for the future. A zippered option is also intriguing to me.

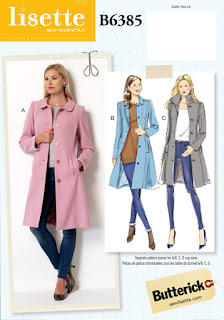
Let's start with the coat patterns that have come out since my last coat pattern post. I LOVE Butteric 6385 Lisette for Butterick-- I rushed out and bought it at the first Simplicity sale. Princess seams, back yoke, and two choices of collars-- what more could I ask for? I've never sewn a Lisette pattern, but I strongly suspect the drafting and directions are much better than Butterick's usual fare. At the time I was starting my coat there were no reviews yet, but now there are several people who have made great coats and give the pattern excellent reviews.


Also exciting and relatively recent is the Clare Coat by Closet Case files. I'm fairly certain that this pattern would be a joy to sew, with beautifully thought out details and instructions, and there are lots of inspiring examples that people have made. It has a lot of features that I admire... I love the zipper option and the oversized funnel neck, how amazingly cozy does that look! The biggest hesitation for me is the boxiness of the silhouette-- I think I'd like something more shaped for this particular coat project. I don't own this pattern yet... the printed version is on my wishlist.


My biggest contender from last time was Burda 8292. This might be out of print-- I couldn't find it in Burda's online catalog, but is is still available on Patternreview.com. If you can get past the ridiculous styling and pose of the model, it has classic lines and nice collar choices.


Also from my last coat post, there is Simplicity 2508. The raglan sleeves are growing on me. Once again, the pattern envelope styling makes me cringe, but you can see from the line drawings that it has great lines and many intriguing options to get a different look with the same pattern. This pattern has a big following on Patternreview.com, with lots of inspiring coats made using it.


In my next post, you'll find out which pattern won out, at least for this fall's coat making!

Monday, December 12, 2016

Givaway Day Winners!


Congratulations to our giveaway day winners: Tasha Larson, Je (jblanton), and Emma Andrews! Winners have already been sent an email asking for their choice of patterns, so if you are listed here and didn't get our email, then contact us. Thank you everyone for visiting, and I really enjoyed reading your blog comments!

Thursday, December 8, 2016

Bunny Ear Teether PDF Pattern

Please welcome our latest pattern!


This is a very easy pattern to make a teething toy using a 2.75-3 inch wooden ring.


This pattern makes a generously sized toy (it is about 10.25 inches long including the ring, and 3 inches wide). It is designed to be made with two different fabrics, a thicker fabric which could be fleece, minky, or french terry and a thinner layer like a quilting cotton. The two fabrics give it a variety of textures and allow you to play with different combinations.


The Bunny Ear Teether pairs very well with the Bunny Lovey!

Happy making!

Wednesday, December 7, 2016

Giveaway day- free patterns!

It's Giveaway Day at Sew Mama Sew, so if you're here for some free stuff, thanks for stopping by! 

If you haven't been here before, I'm an artist and a mom and I love to sew. I blog about my sewing projects, DIY projects, and lately, about my new patterns! I love making soft toy patterns, some of which you can see in my store here on the blog and at Etsy. I also have plans to release some women's clothing patterns, so stay tuned later this year. 

Bunny Lovey Pattern


Made patterns First Day Dress.

Marcy Tilton Jacket Pattern


Without further ado, here's how to get a FREE pattern. Three lucky people will get their choice of patterns, either the PAID version of the Bunny Lovey or the Dragon Lovey. To enter, use this Rafflecopter form: 

a Rafflecopter giveaway


Good luck, and thanks for stopping by!

Bunnylope Lovey Tutorial

Today I'll show you how easy it is to make your own Bunnylope Lovey!


Start by making a Bunny Lovey. You can get the pattern and tutorial here.

To make the Bunnylope antlers, you'll need a bit more fabric, a little bit of stuffing, and the pattern.

I'm using white cotton velour, but you could also use fleece, minky, or even quilting cotton.

Download the pattern and print it out without scaling on your printer so that the pattern is the right size. Then cut out the pattern on the solid line.

Cut two squares of fabric 6”x4”, then fold them right sides together into a 3”x4” rectangles. Trace the pattern onto your fabric rectangles.


Sew on the lines you traced. Leave an opening on the bottom of the antler, where indicated by the pattern.


Cut around your sewing, leaving a 1/8 inch seam allowance.


Clip corners. Turn right side out.


Stuff the antlers firmly enough that they hold their shape. Use dull stick (such as a chopstick or the eraser side of a pencil) to help push stuffing into the tips of the antler.


Hand sew the antlers to the top of the Bunny Lovey’s head using a ladder stitch. Sew all around the opening, so that the antler is firmly secured and the opening is completely closed.


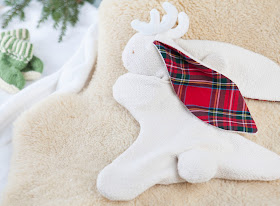
And now you have a Bunnylope!


Share your creations #unlikelybunnylope #unlikelybunnylovey
@unlikelynest